Build it! Creating your own application with Edge Impulse
- Using Keyword Spotting to Control Physical Systems
- Creating a Crowdsourced Keyword Dataset (Live Lab / Demo)
- Deploy a Custom Keyword Spotting Model (Live Lab / Demo)
- (Bonus for you to try at home) Deploy a Custom Image Classification Model
- (Bonus for you to try at home) Creating Your Own Crowdsourced Dataset
Yesterday we analyzed a pre-trained keyword spotting model using the keyword “hello world” with audio samples uploaded from a small set of participants. Today we will see how machine learning becomes even more powerful when we train a model with it’s potential biases in mind, such as the tone, pitch, accent, or even the language of the keyword itself. But before we dive into the hands on lab we’ll be given a demo by Professor Gage Hills on how we can use these kinds of models to control objects in the world around us!
Using Keyword Spotting to Control Physical Systems
Professor Gage Hills and Ezenia Diaz-Lambert designed a demo to show how you can use a Keyword Spotting system to control objects in the world around us. In this example they used Edge Impulse to train a Keyword Spotting model to control a pet feeder! To learn more about the project you can check out the video tutorial Ezenia made!
Creating a Crowdsourced Keyword Dataset (Live Lab / Demo)
- Grab your phone, open up the Camera app and scan the QR code below by pointing your camera at your computer screen, then click on the link that appears on your phone:
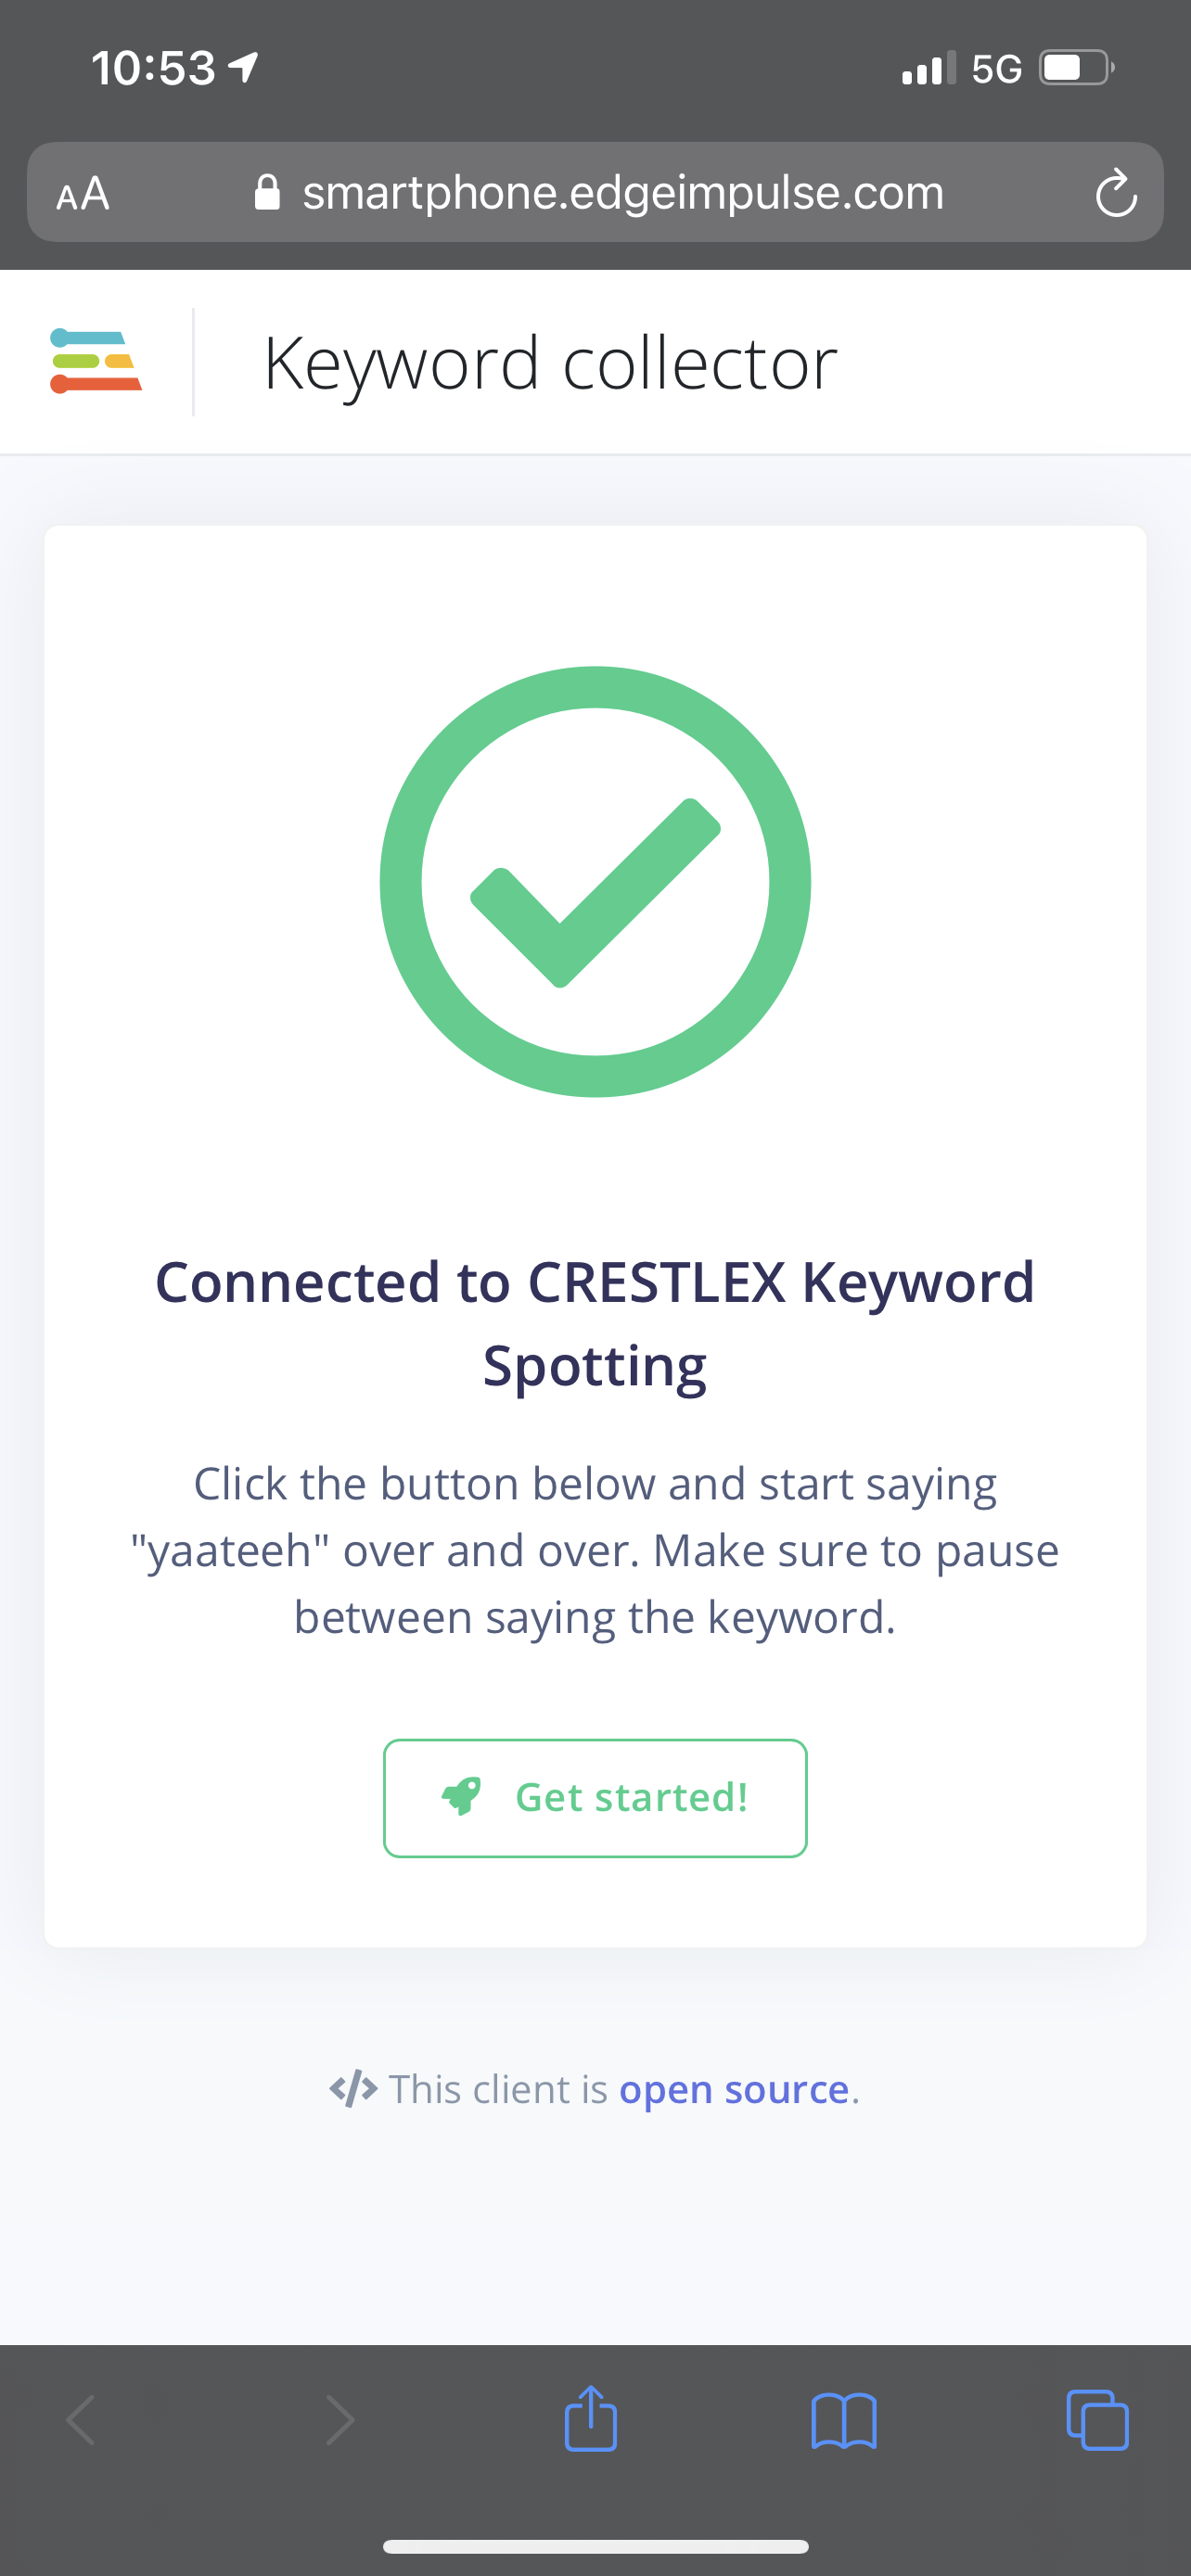
- Your phone’s web browser should open and connect successfully to the keyword collector application for our custom model:
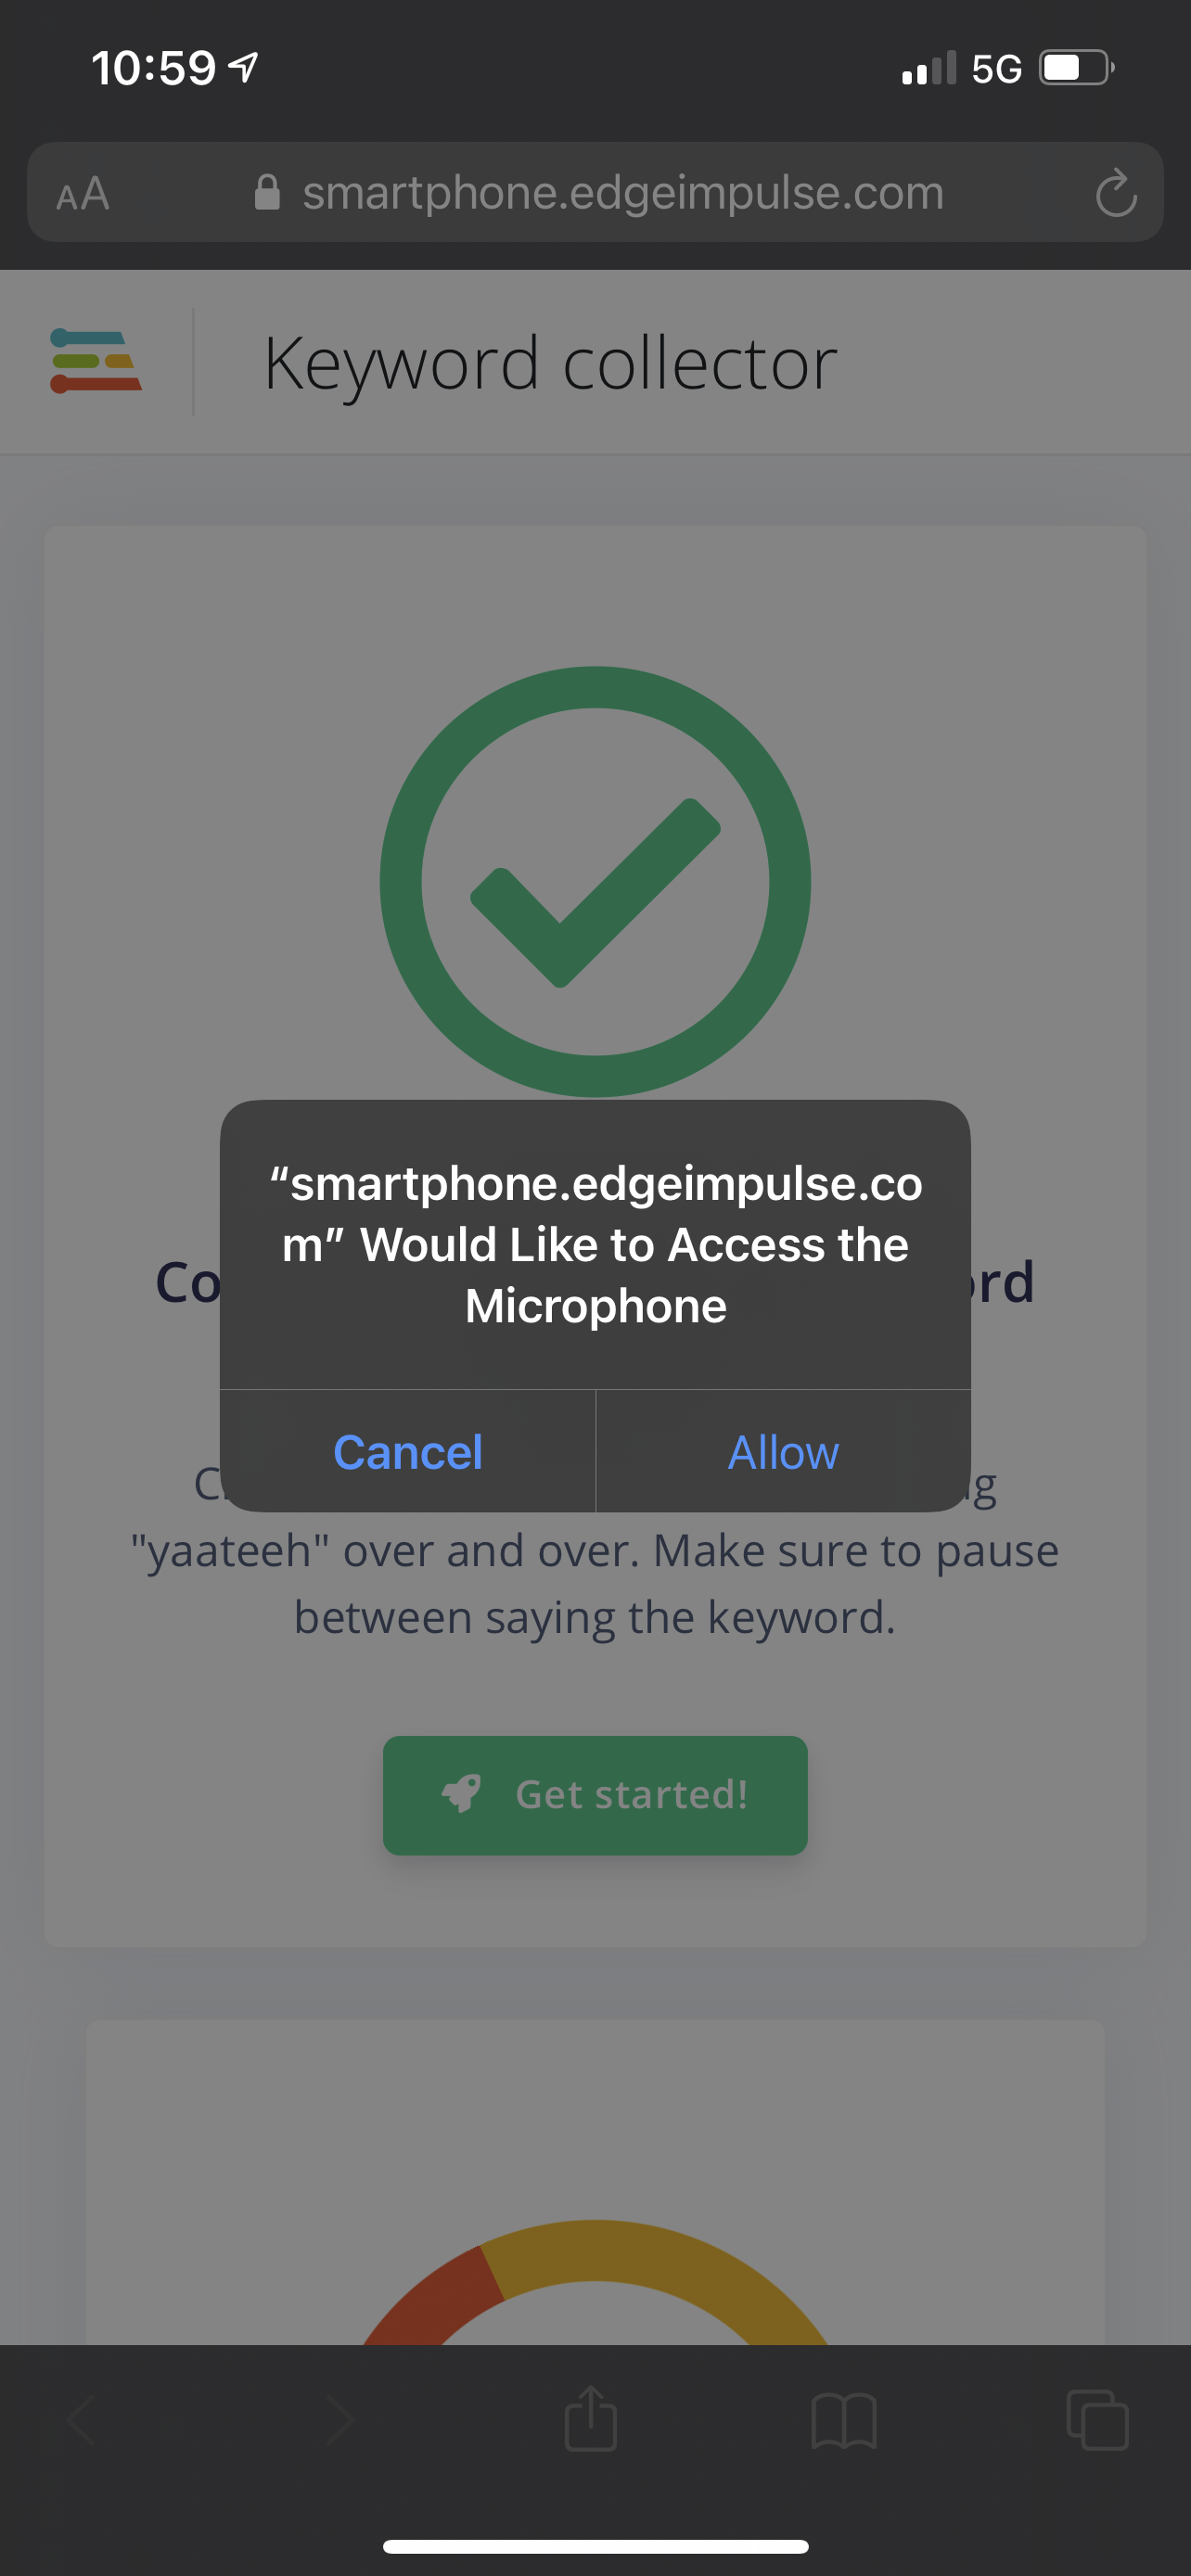
- Click Get started! and give your phone’s web browser access to your microphone by clicking Allow:
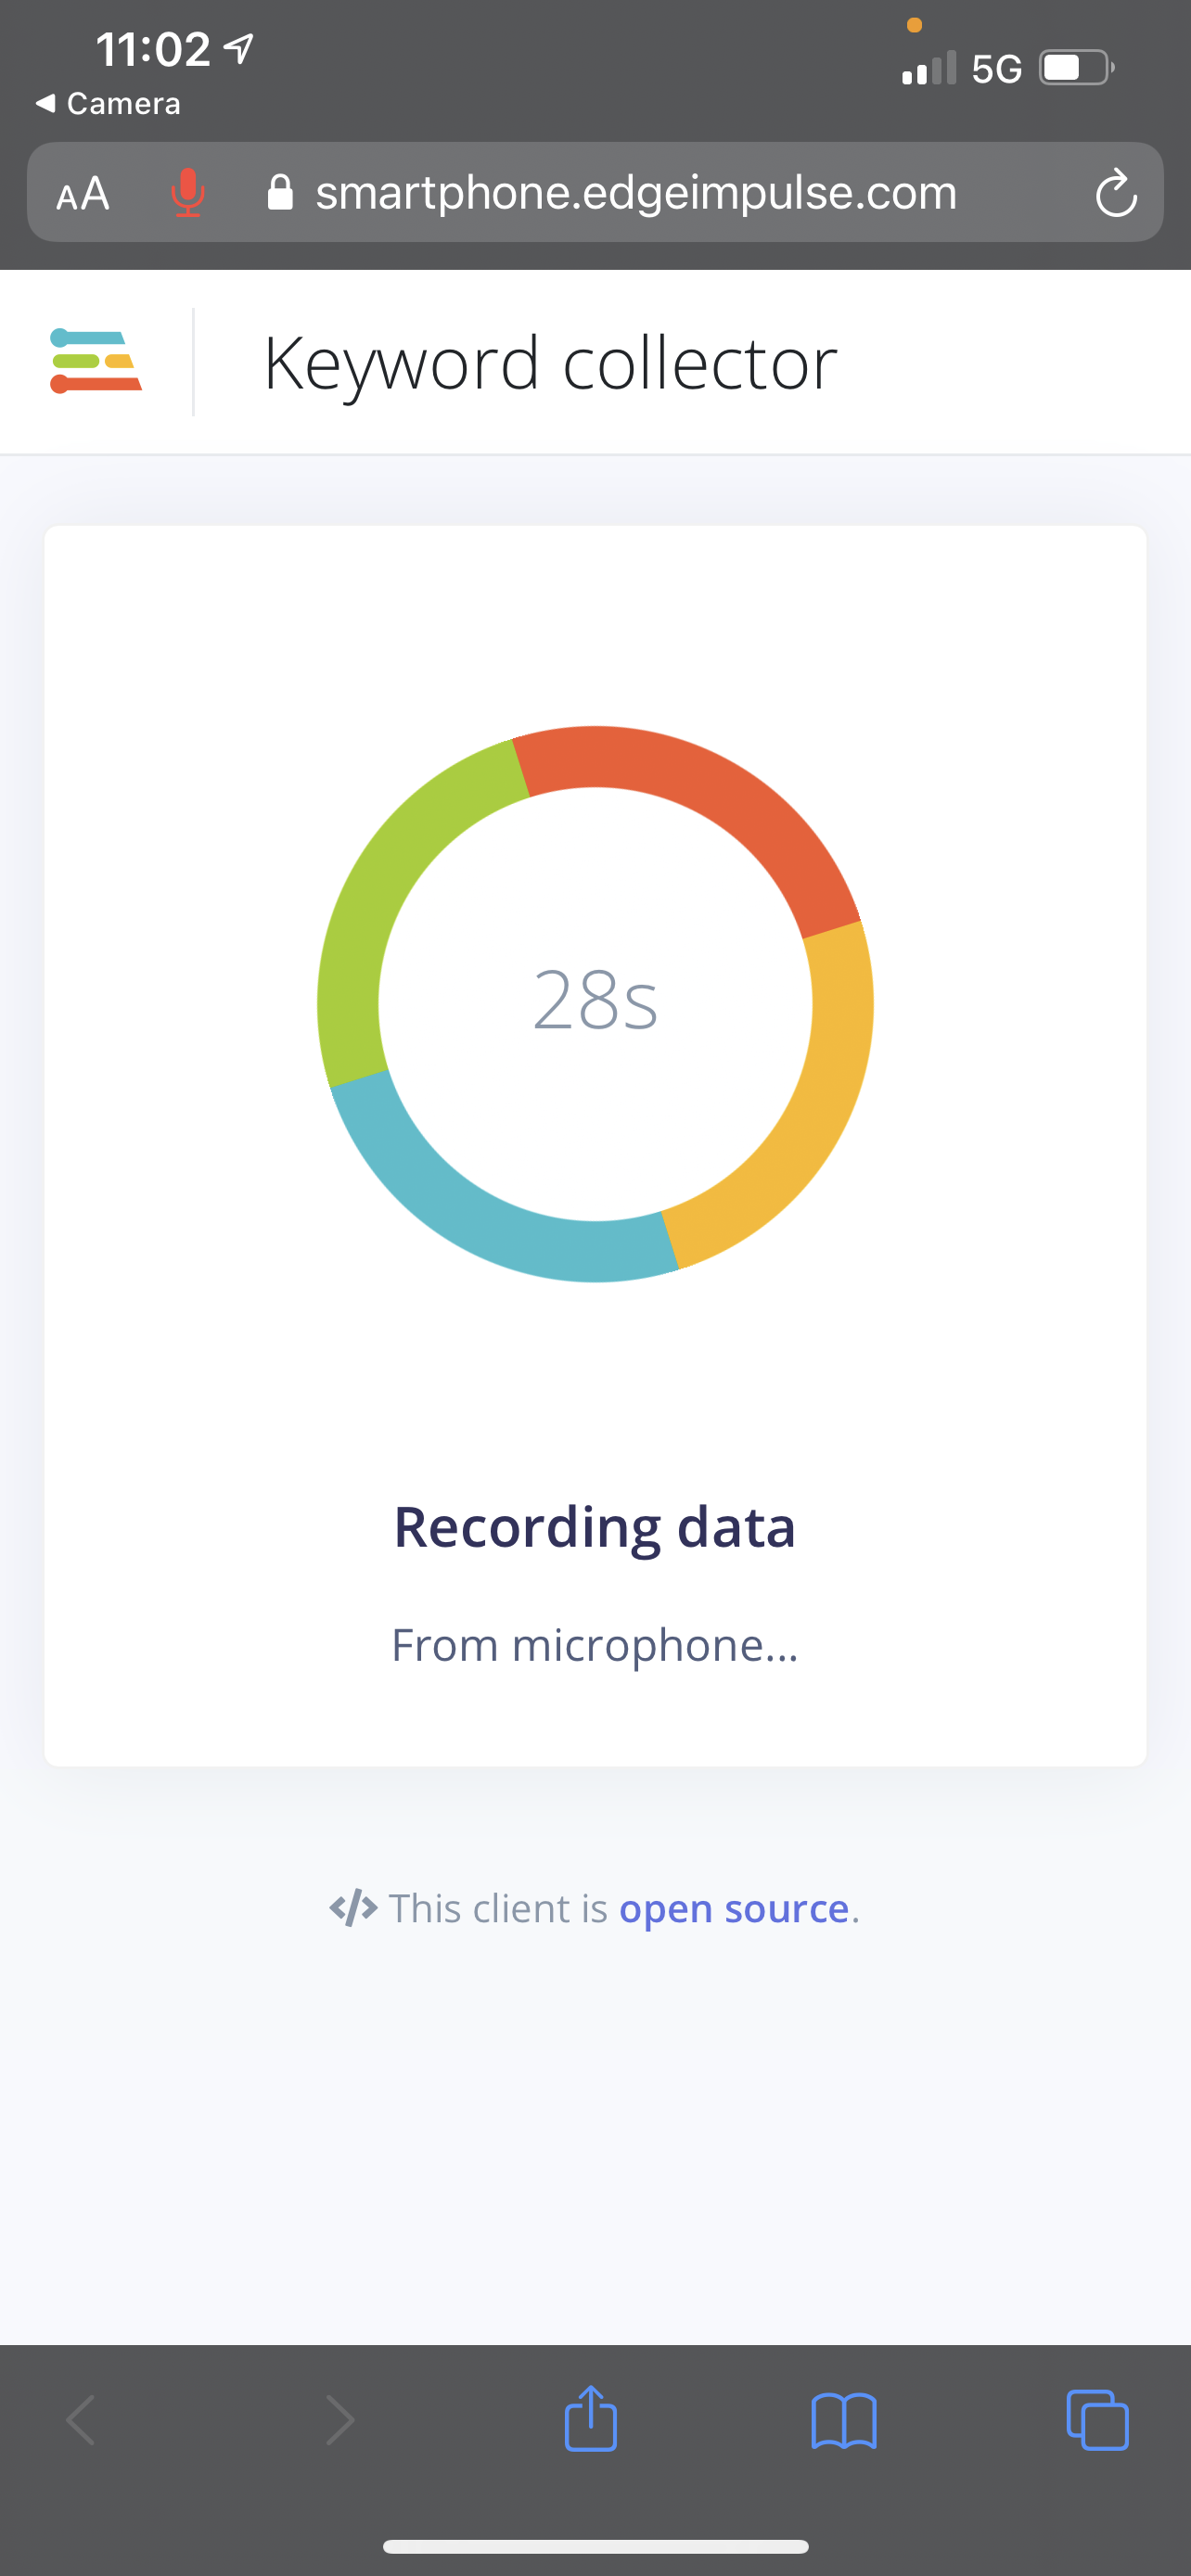
- Wait for audio recording to begin for a couple of seconds:
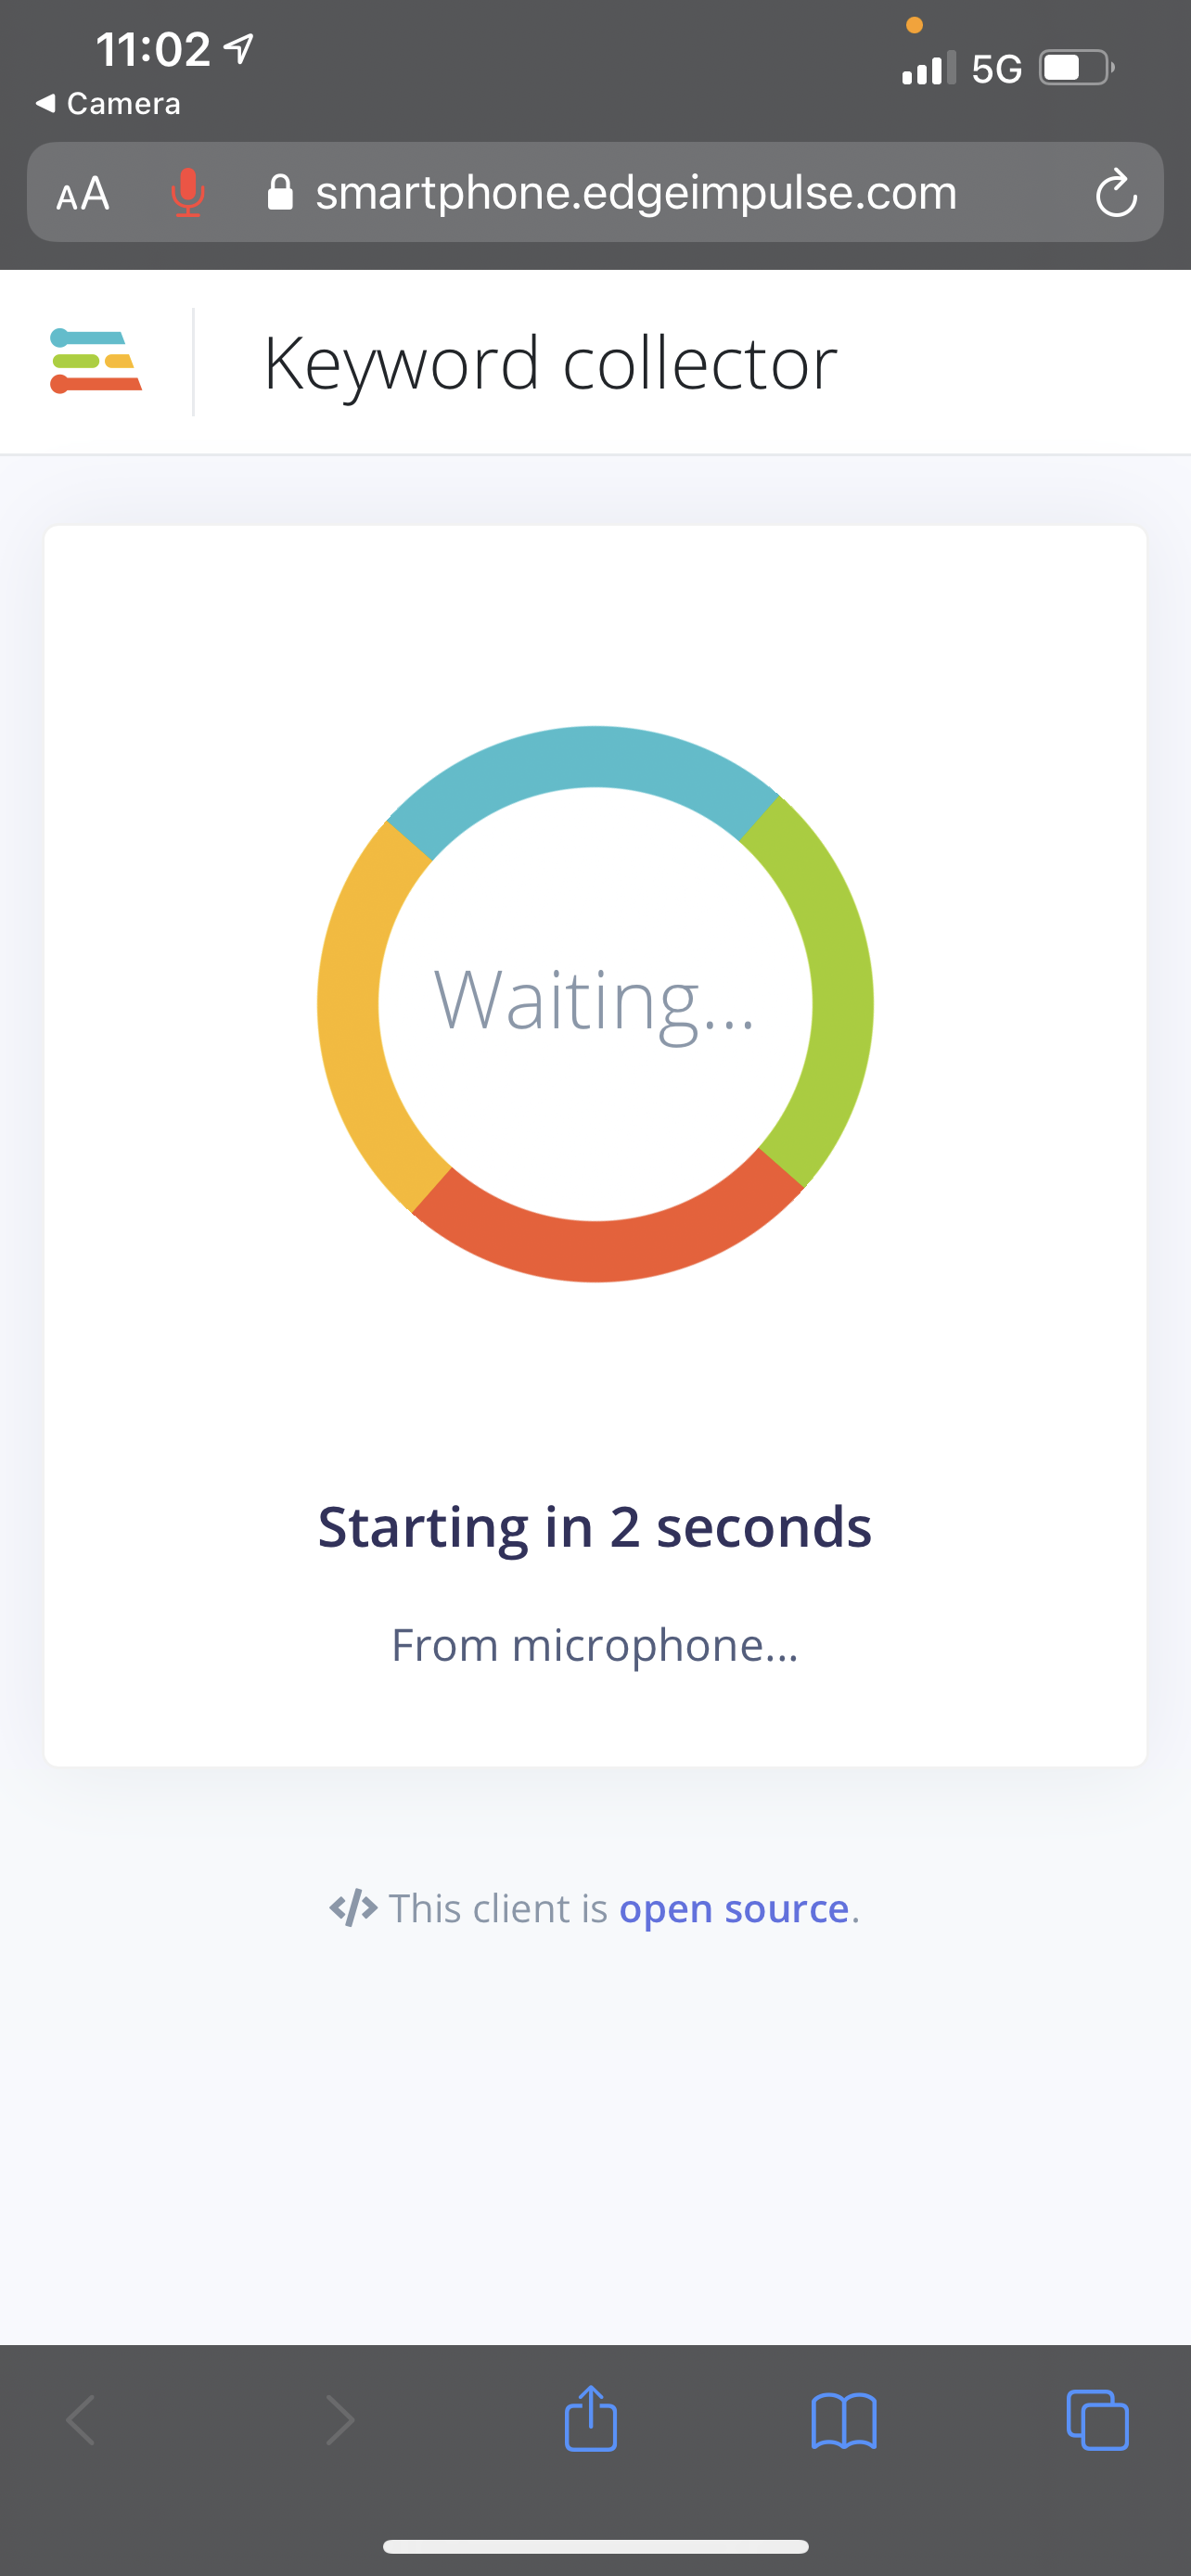
- Once audio recording begins, repeat the keyword “yáʼátʼééh” over and over into your phone’s microphone, leaving a pause of space between each iteration:
- Your keyword samples should now be successfully uploaded to the group’s shared Edge Impulse Custom Keyword Spotting project!
Troubleshooting (Keyword Collection)
Phone: TypeError
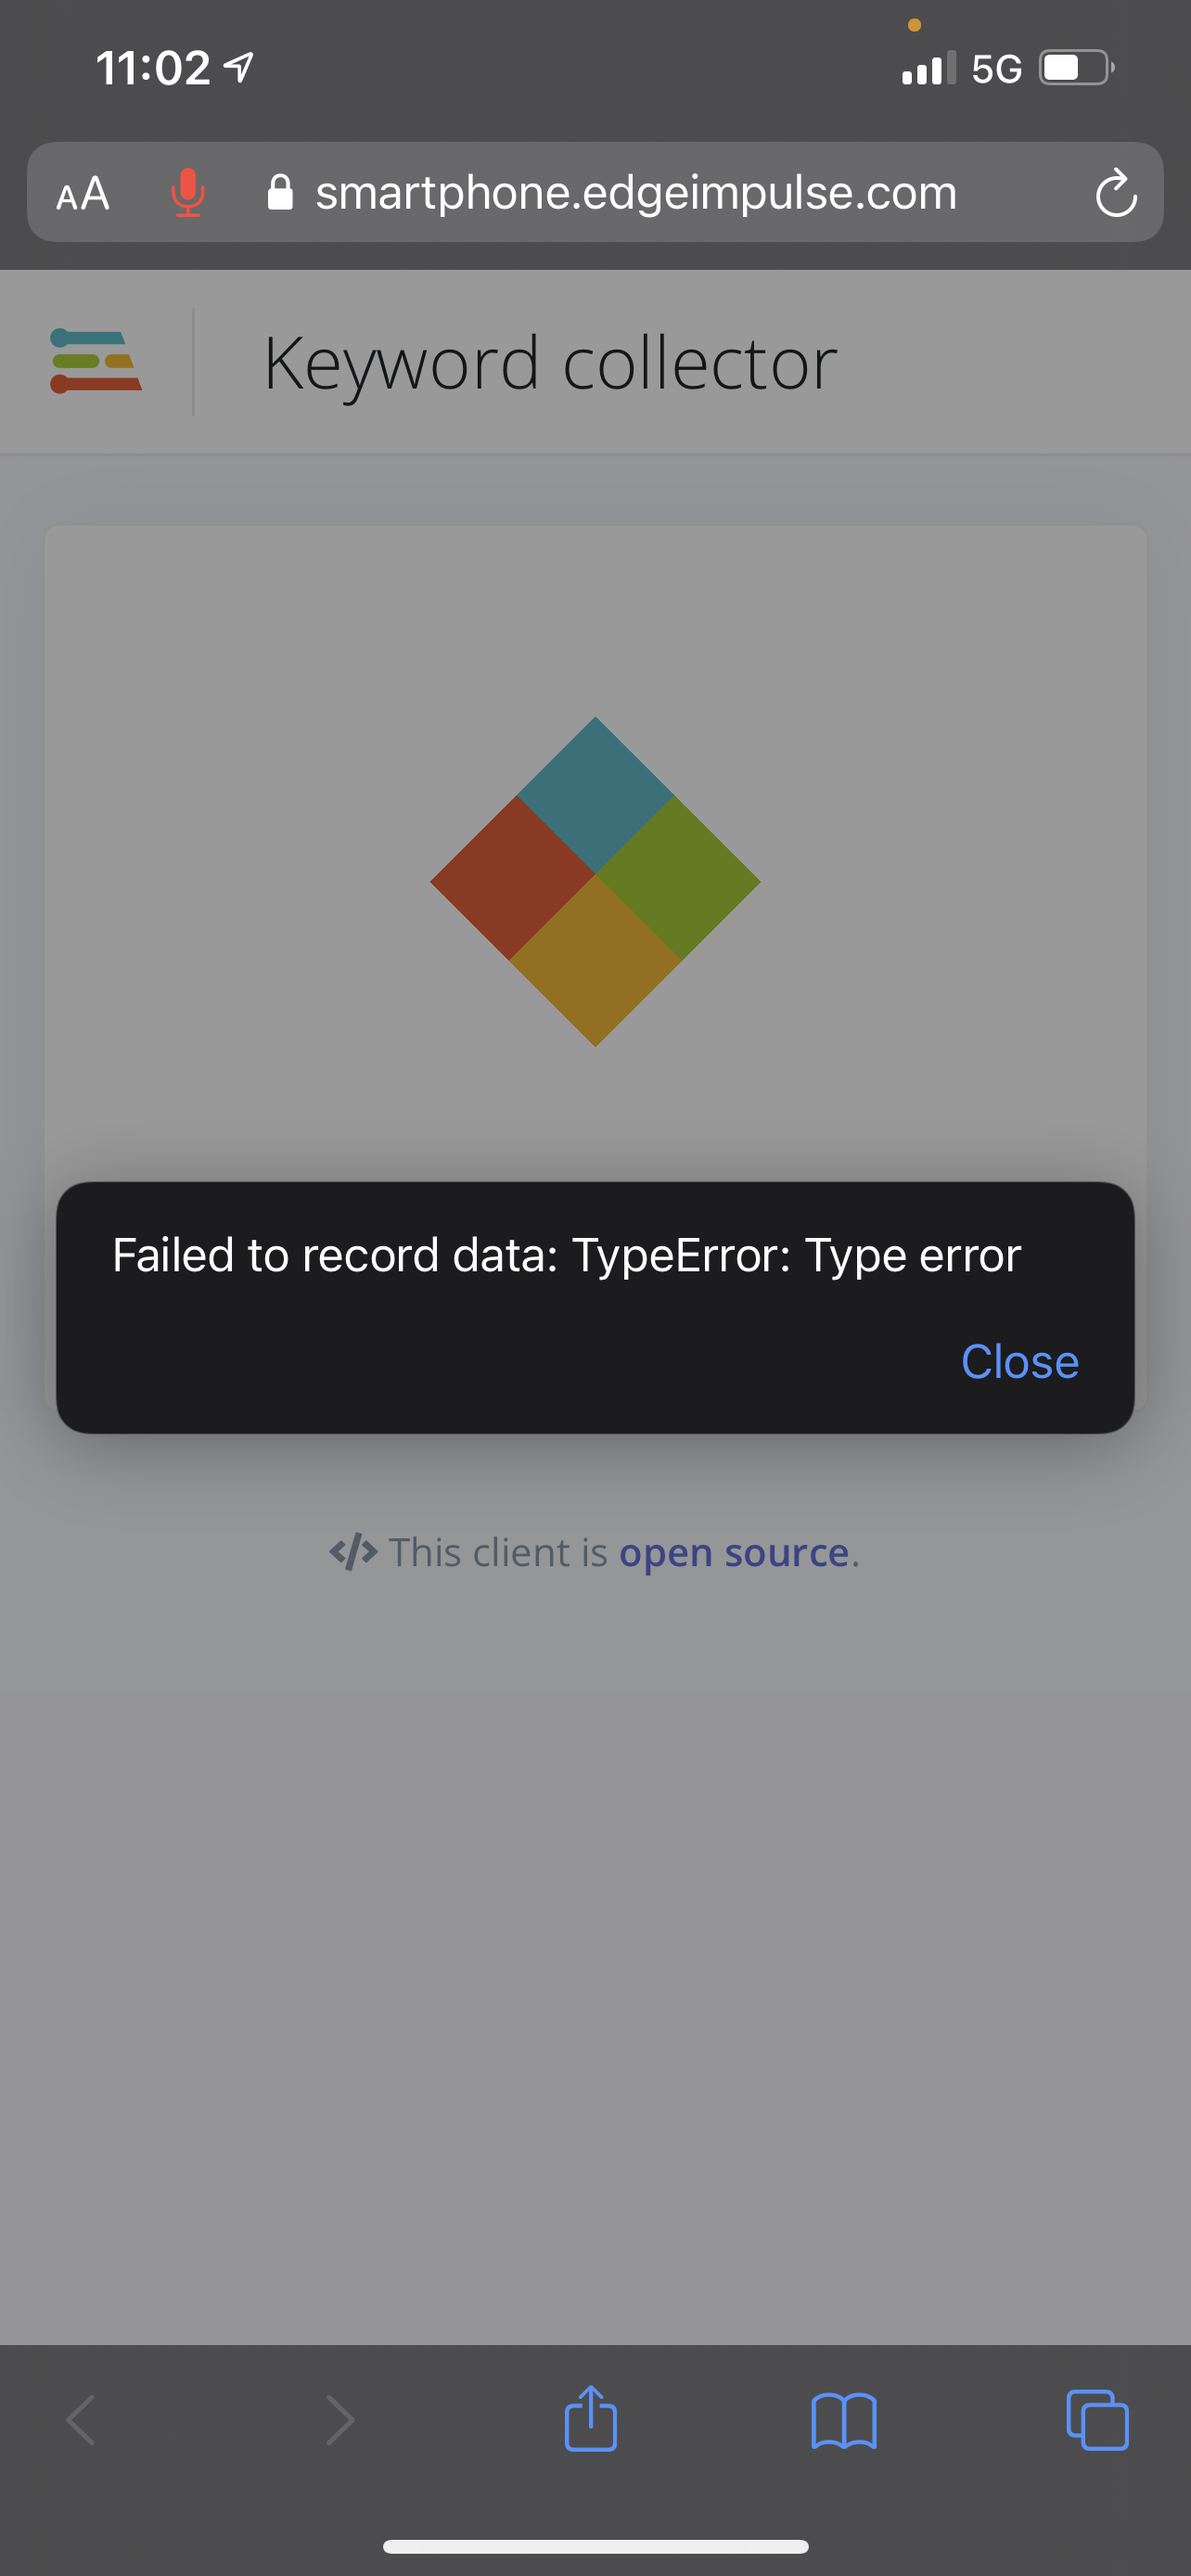
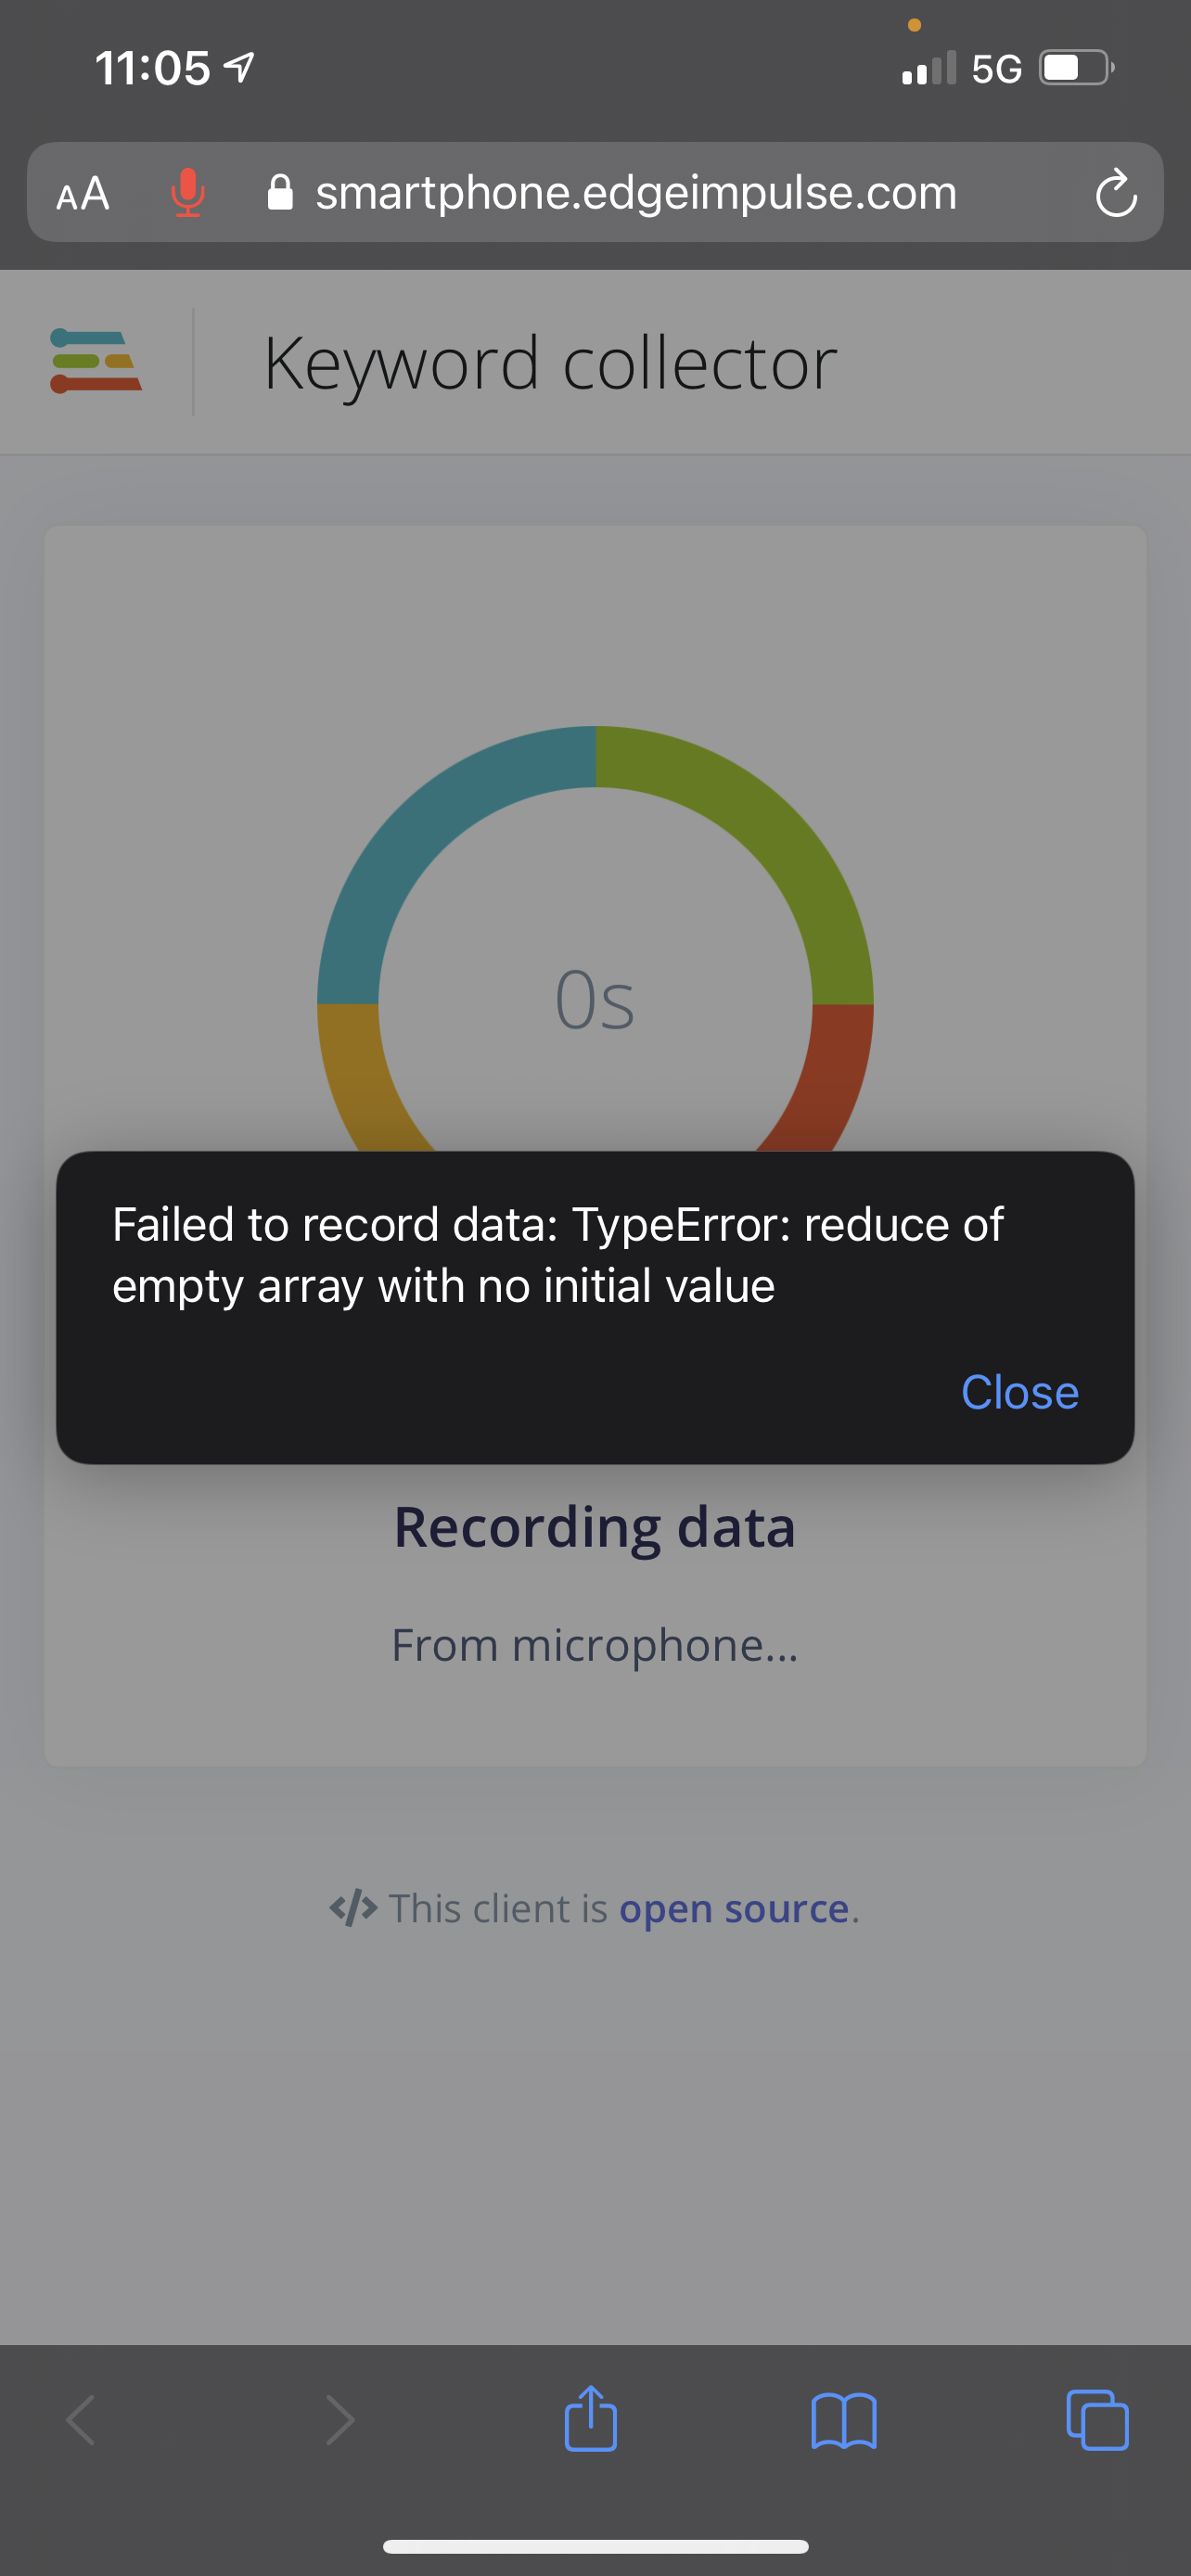
These errors usually occur when you have switched applications on your phone mid-recording (for example, by swiping up and leaving the web browser), or you have lost connection to the internet. Try re-scanning the QR code from step 1 from the Creating a Crowdsourced Keyword Dataset steps above and re-recording your keyword samples.
Deploy a Custom Keyword Spotting Model (Live Lab / Demo)
Now that we have collected our crowdsourced dataset and designed/trained our custom keyword spotting model, we can deploy this model to our phones for keyword spotting on the edge in real time.
Note: While Edge Impulse does allow you to deploy a trained model to any device via the QR code on the “Devices” tab (without needing to create an Edge Impulse account), today we are going to go through the steps required to create and build a project on your own Edge Impulse account for your future use!
- Login to your Edge Impulse account: https://studio.edgeimpulse.com/
- Clone the CRESTLEX custom keyword spotting project to your own Edge Impulse account. Click the following link and then click the Clone this project button on the top right corner of the page: https://studio.edgeimpulse.com/public/35699/latest
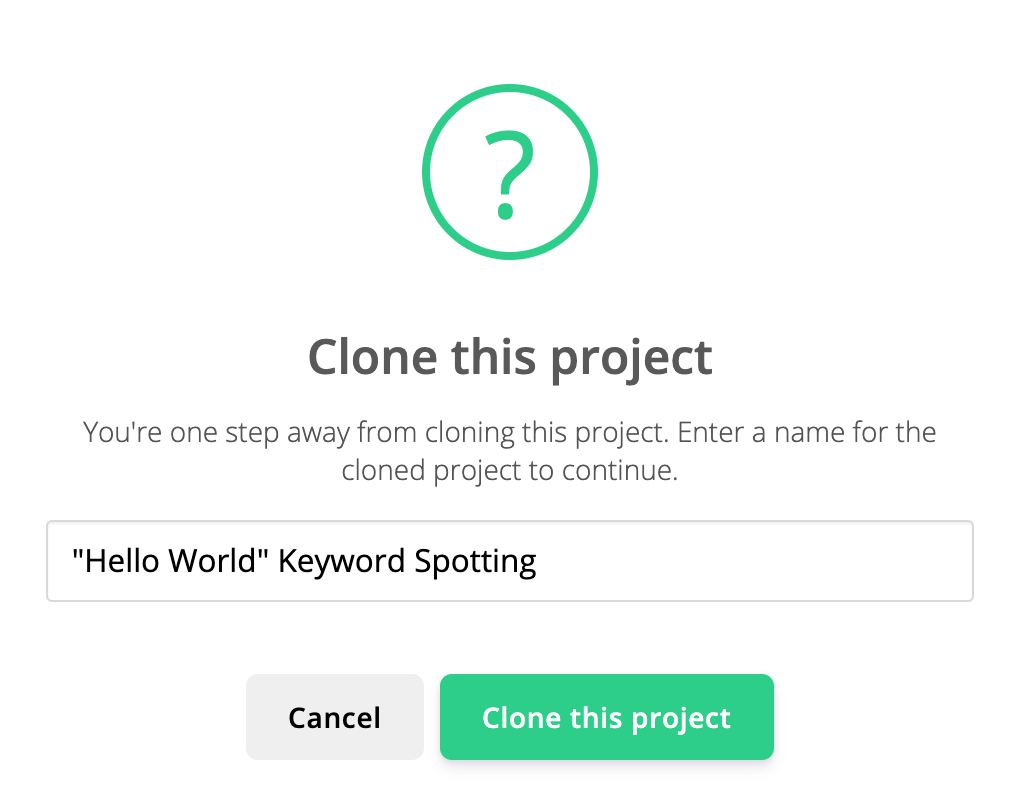
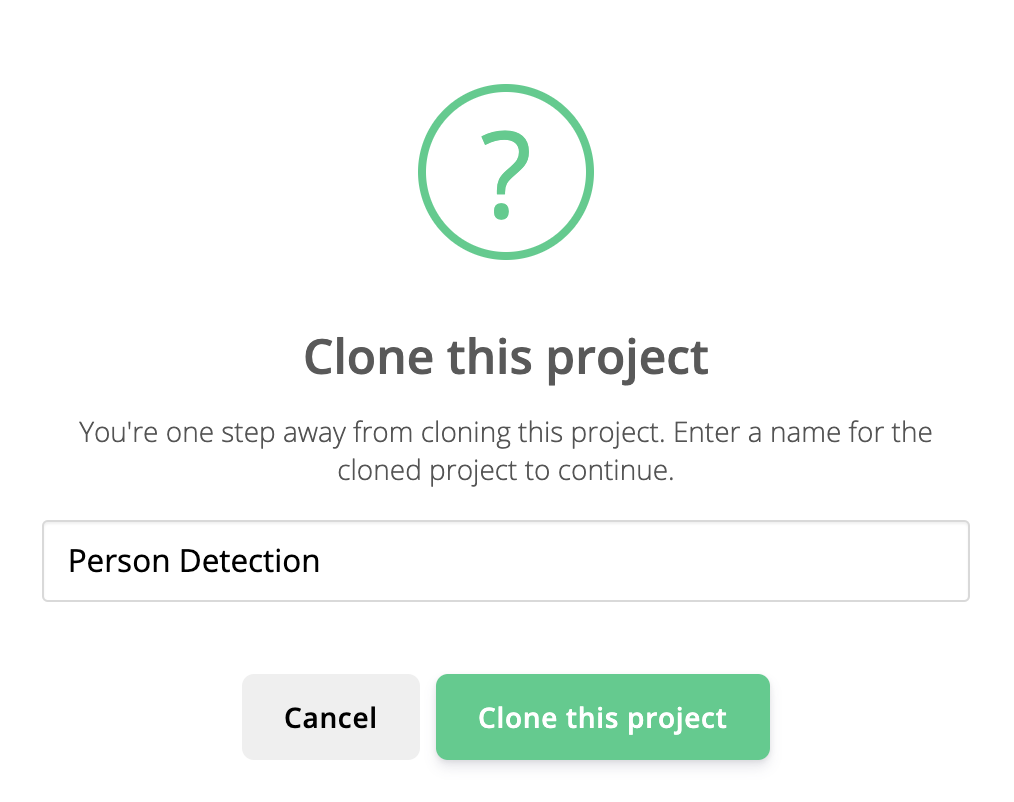
- Change the name of your cloned project if you would like, then click the green Clone this project button:
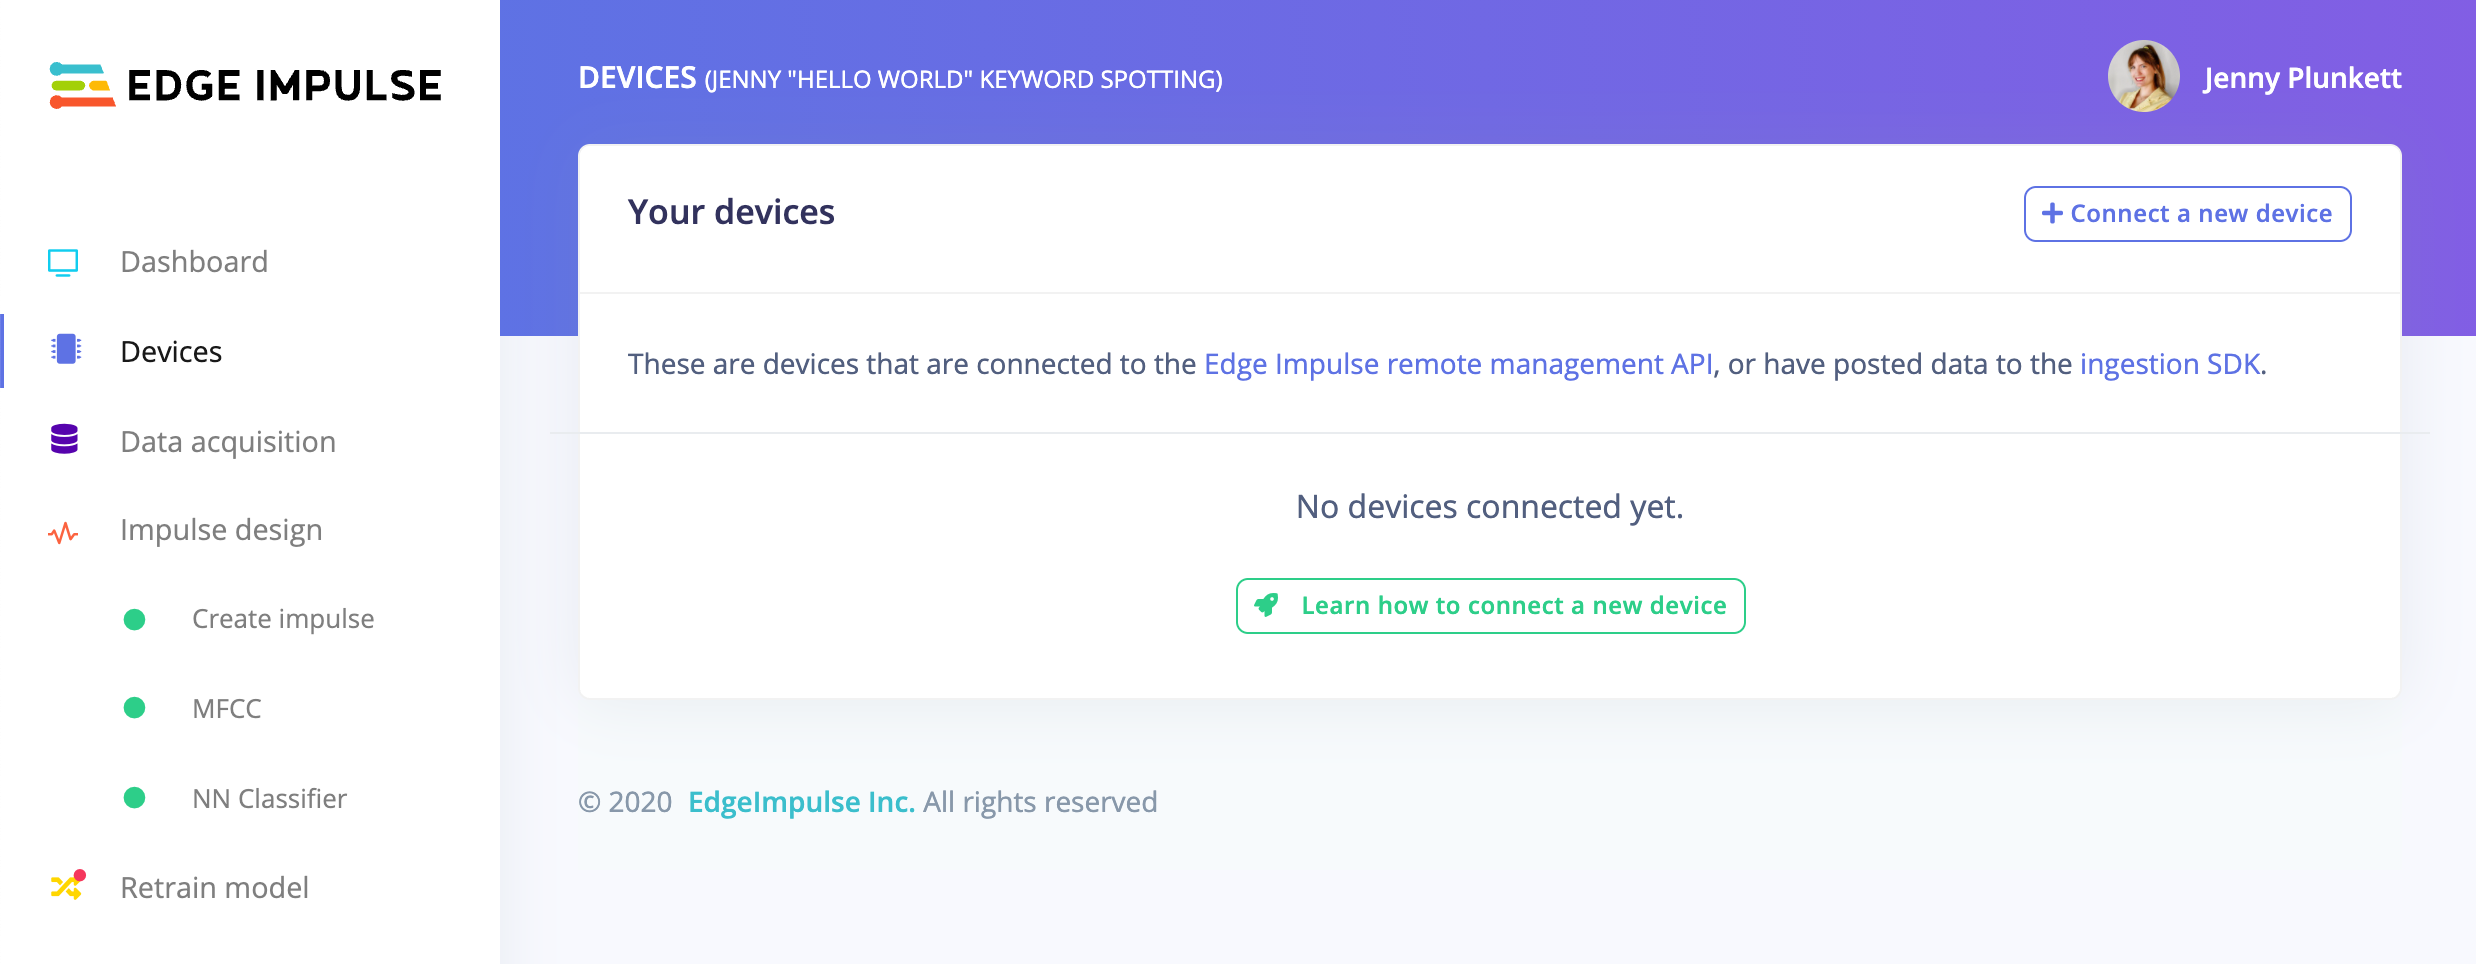
- When the studio has finished cloning the project, select the “Devices” tab and click the Connect a new device button:
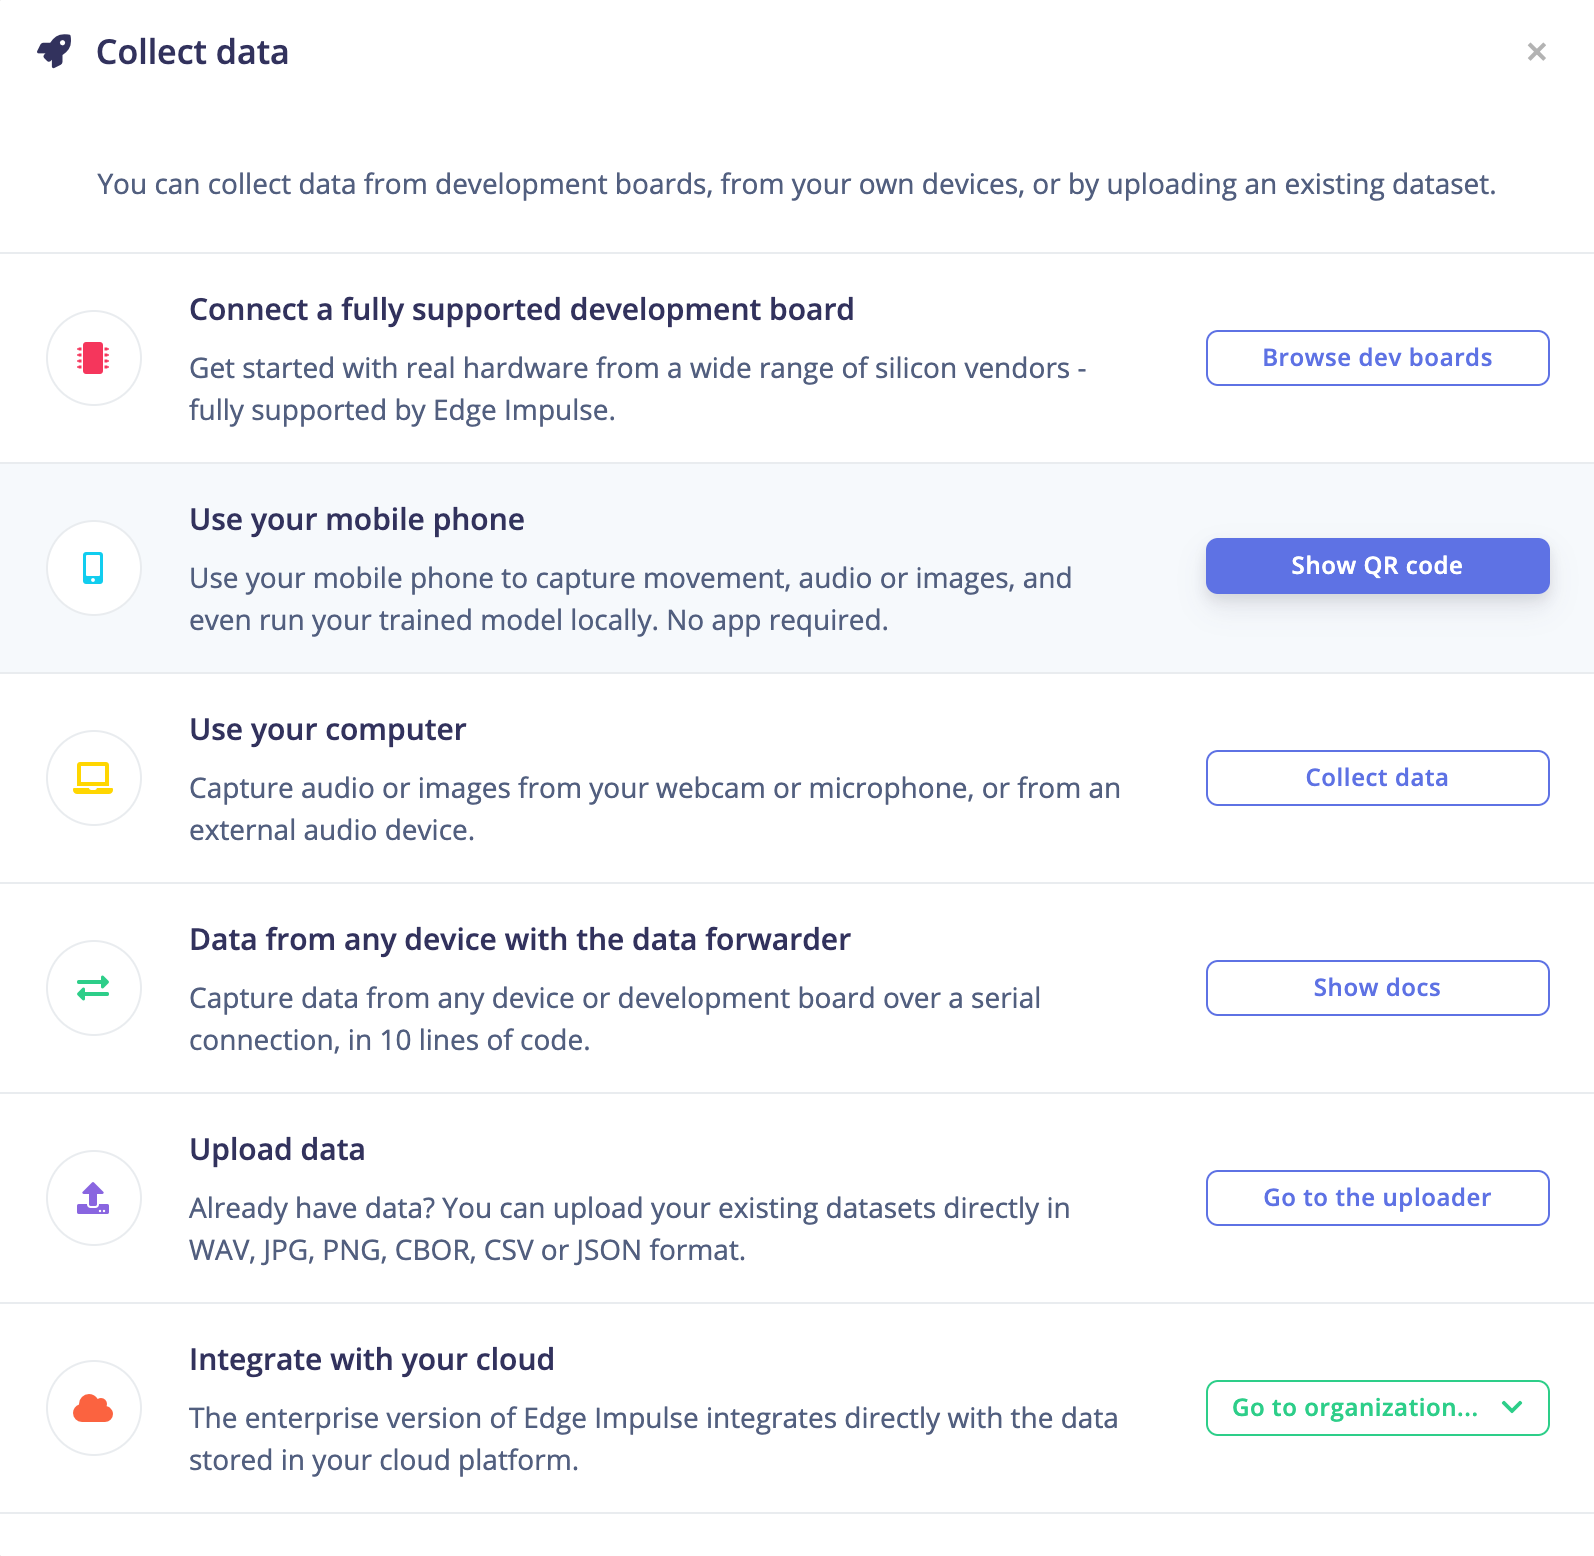
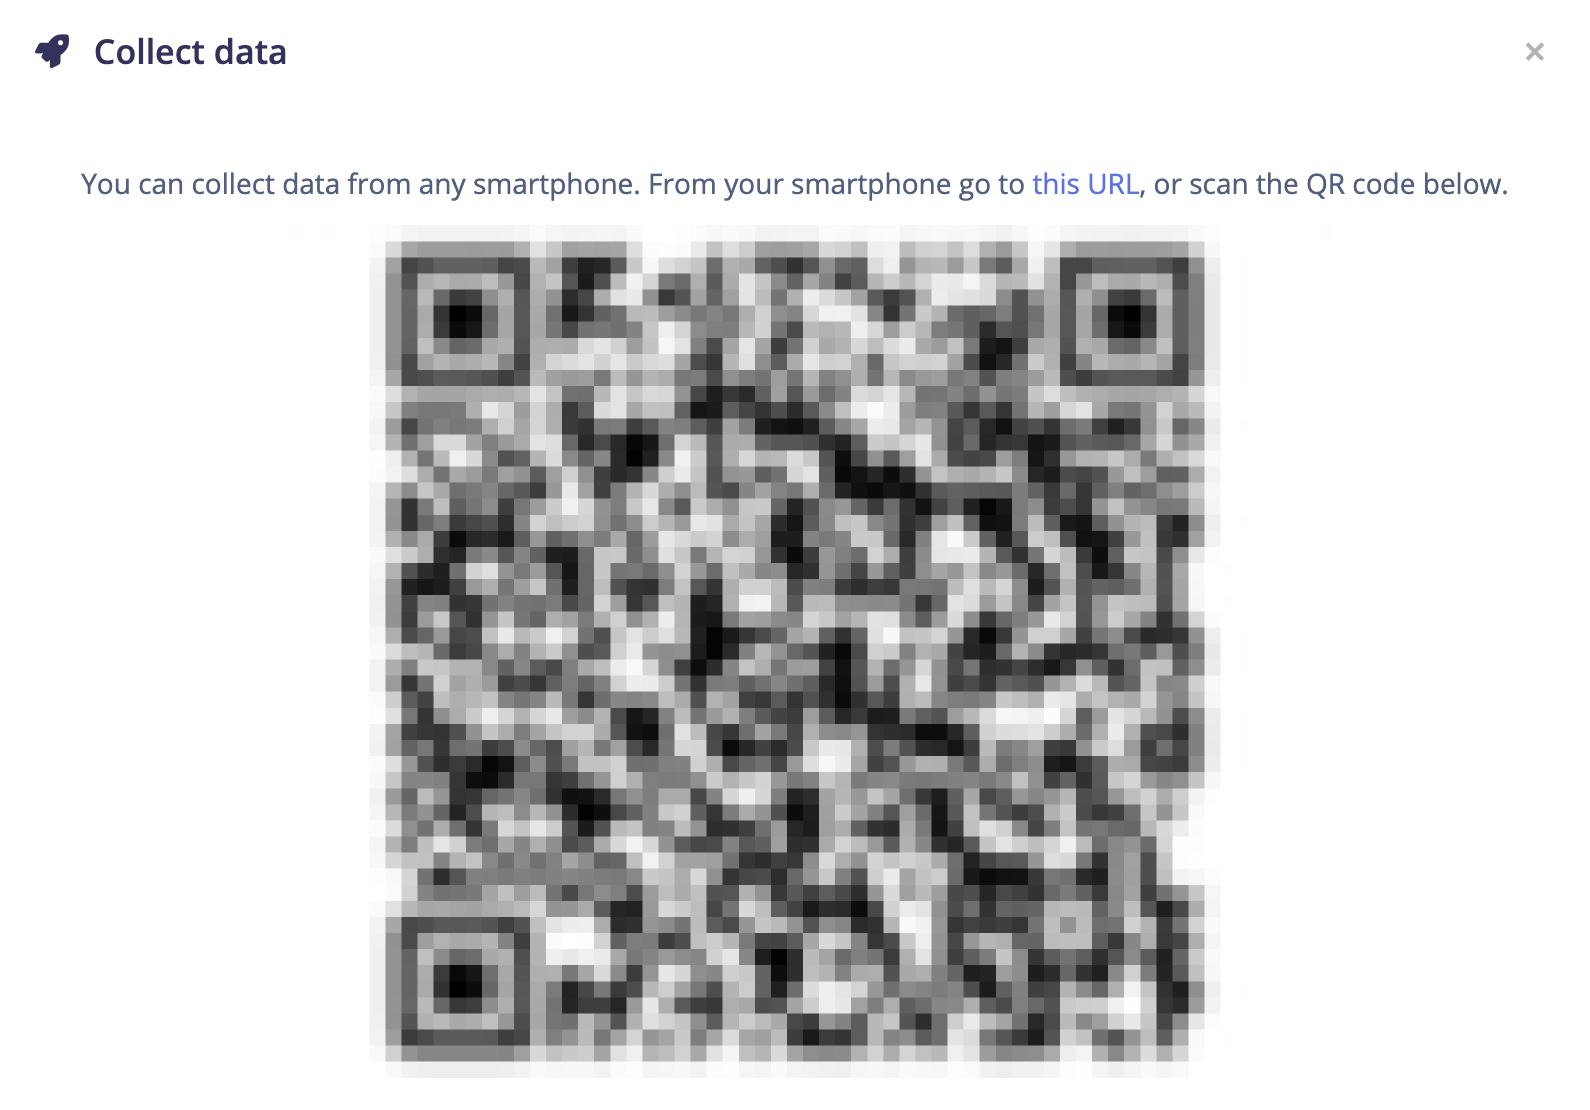
- From the “Collect data” pop-up box, click on the Show QR code button next to “Use your mobile phone”:
- Grab your phone, open up the Camera app and scan the QR code that was generated for you by pointing your camera at your computer screen. An example of the QR code is shown below (this QR code is blurred out and unusable):
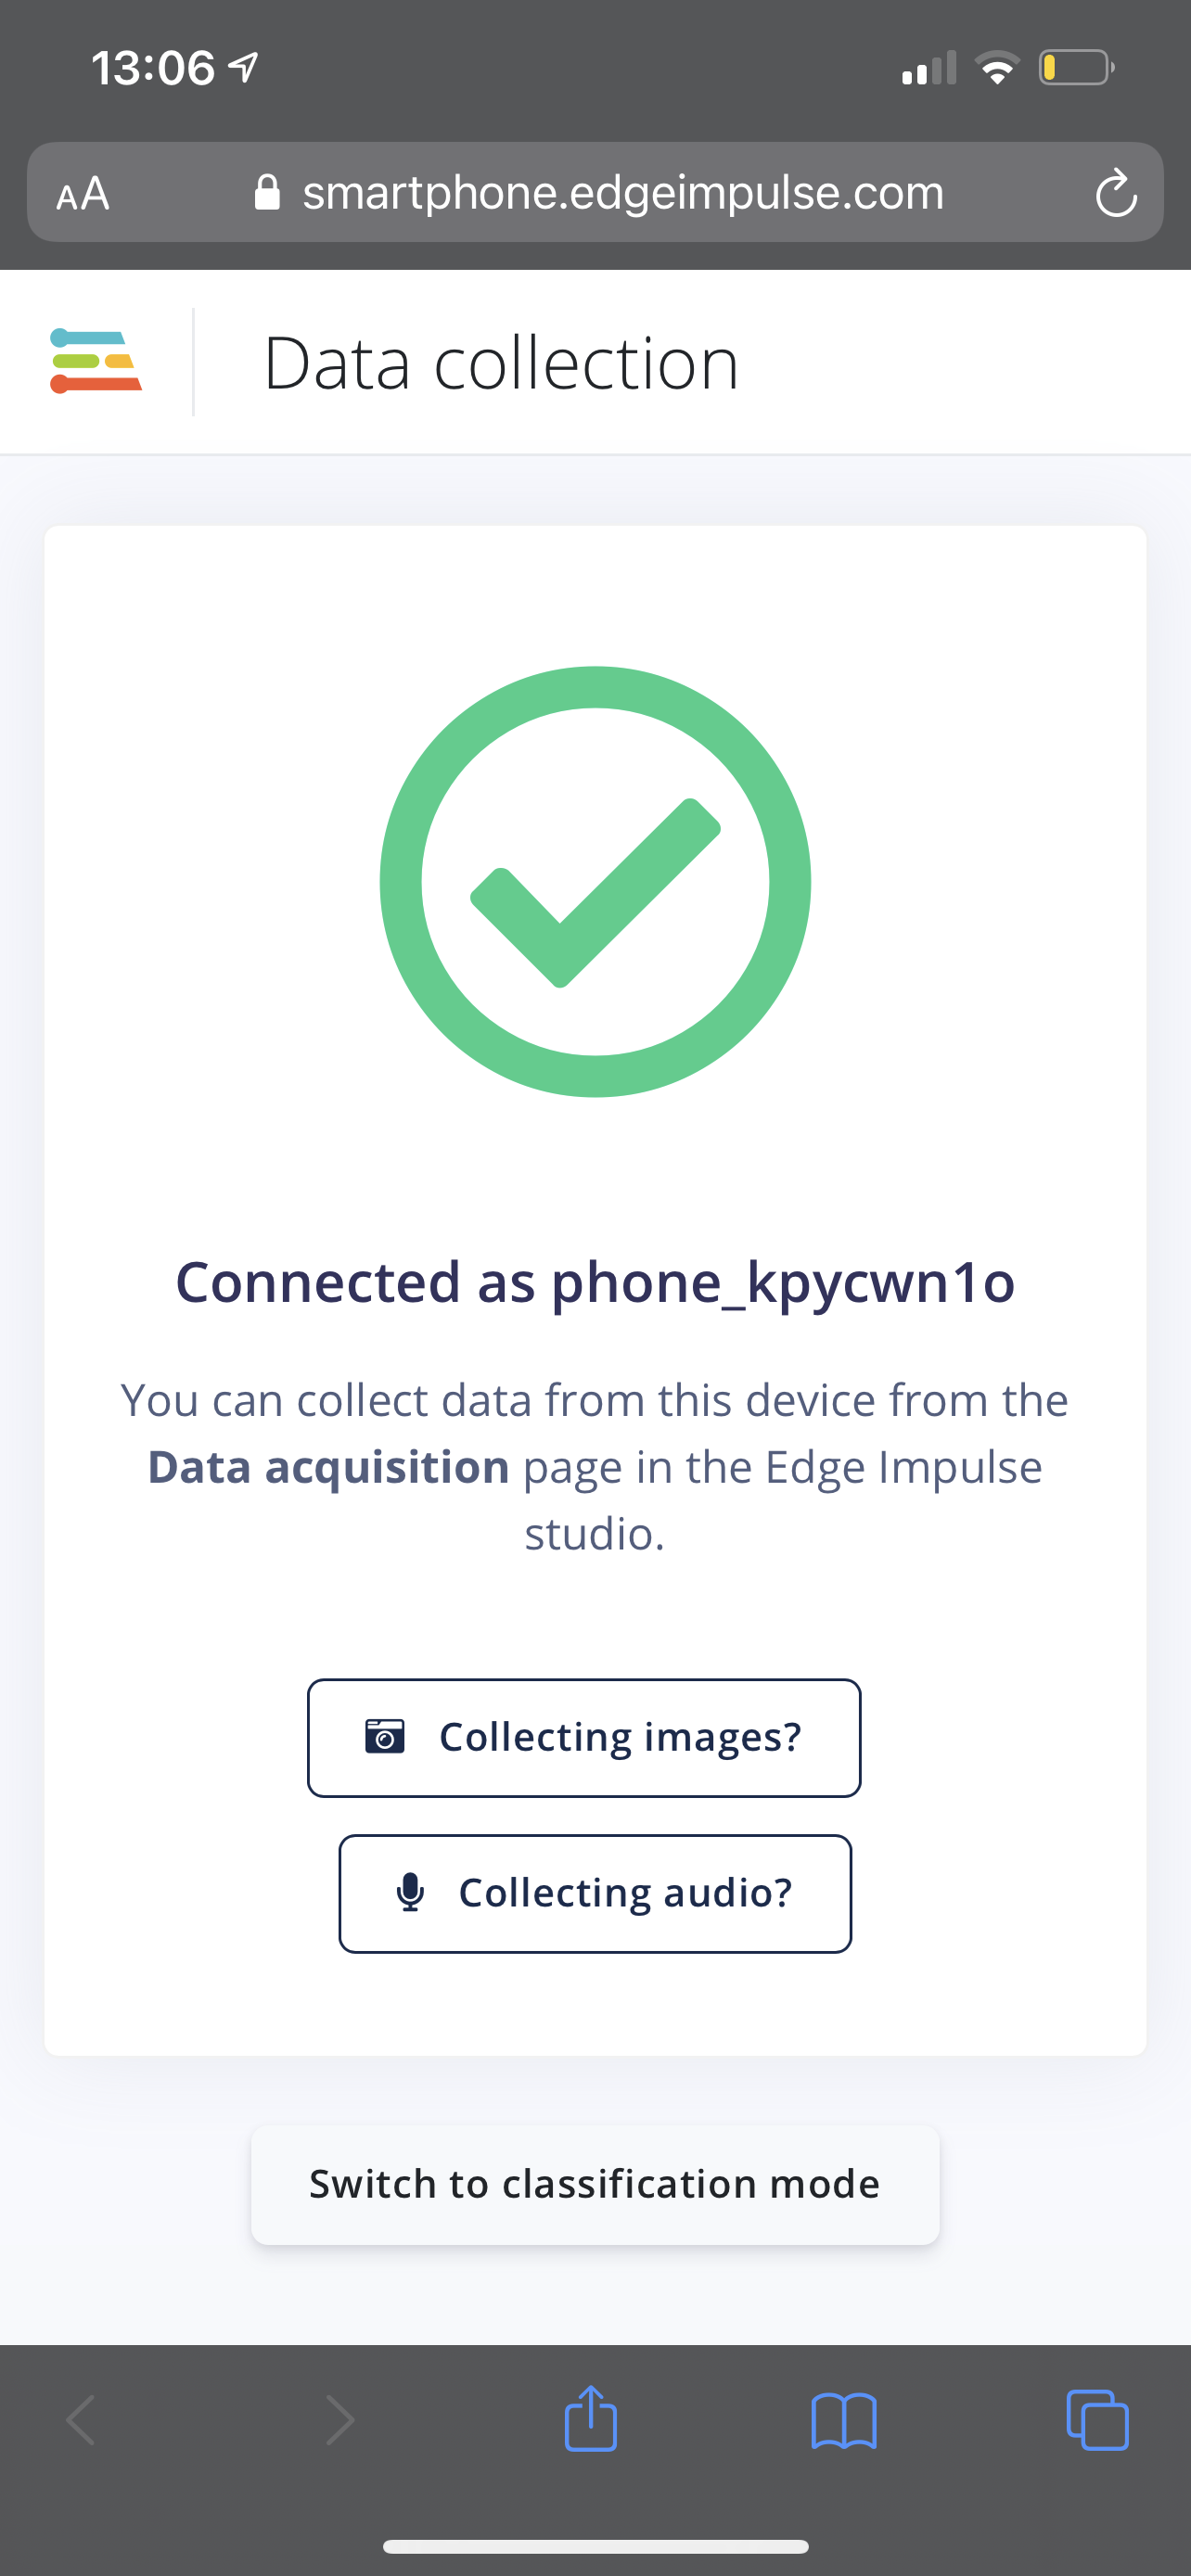
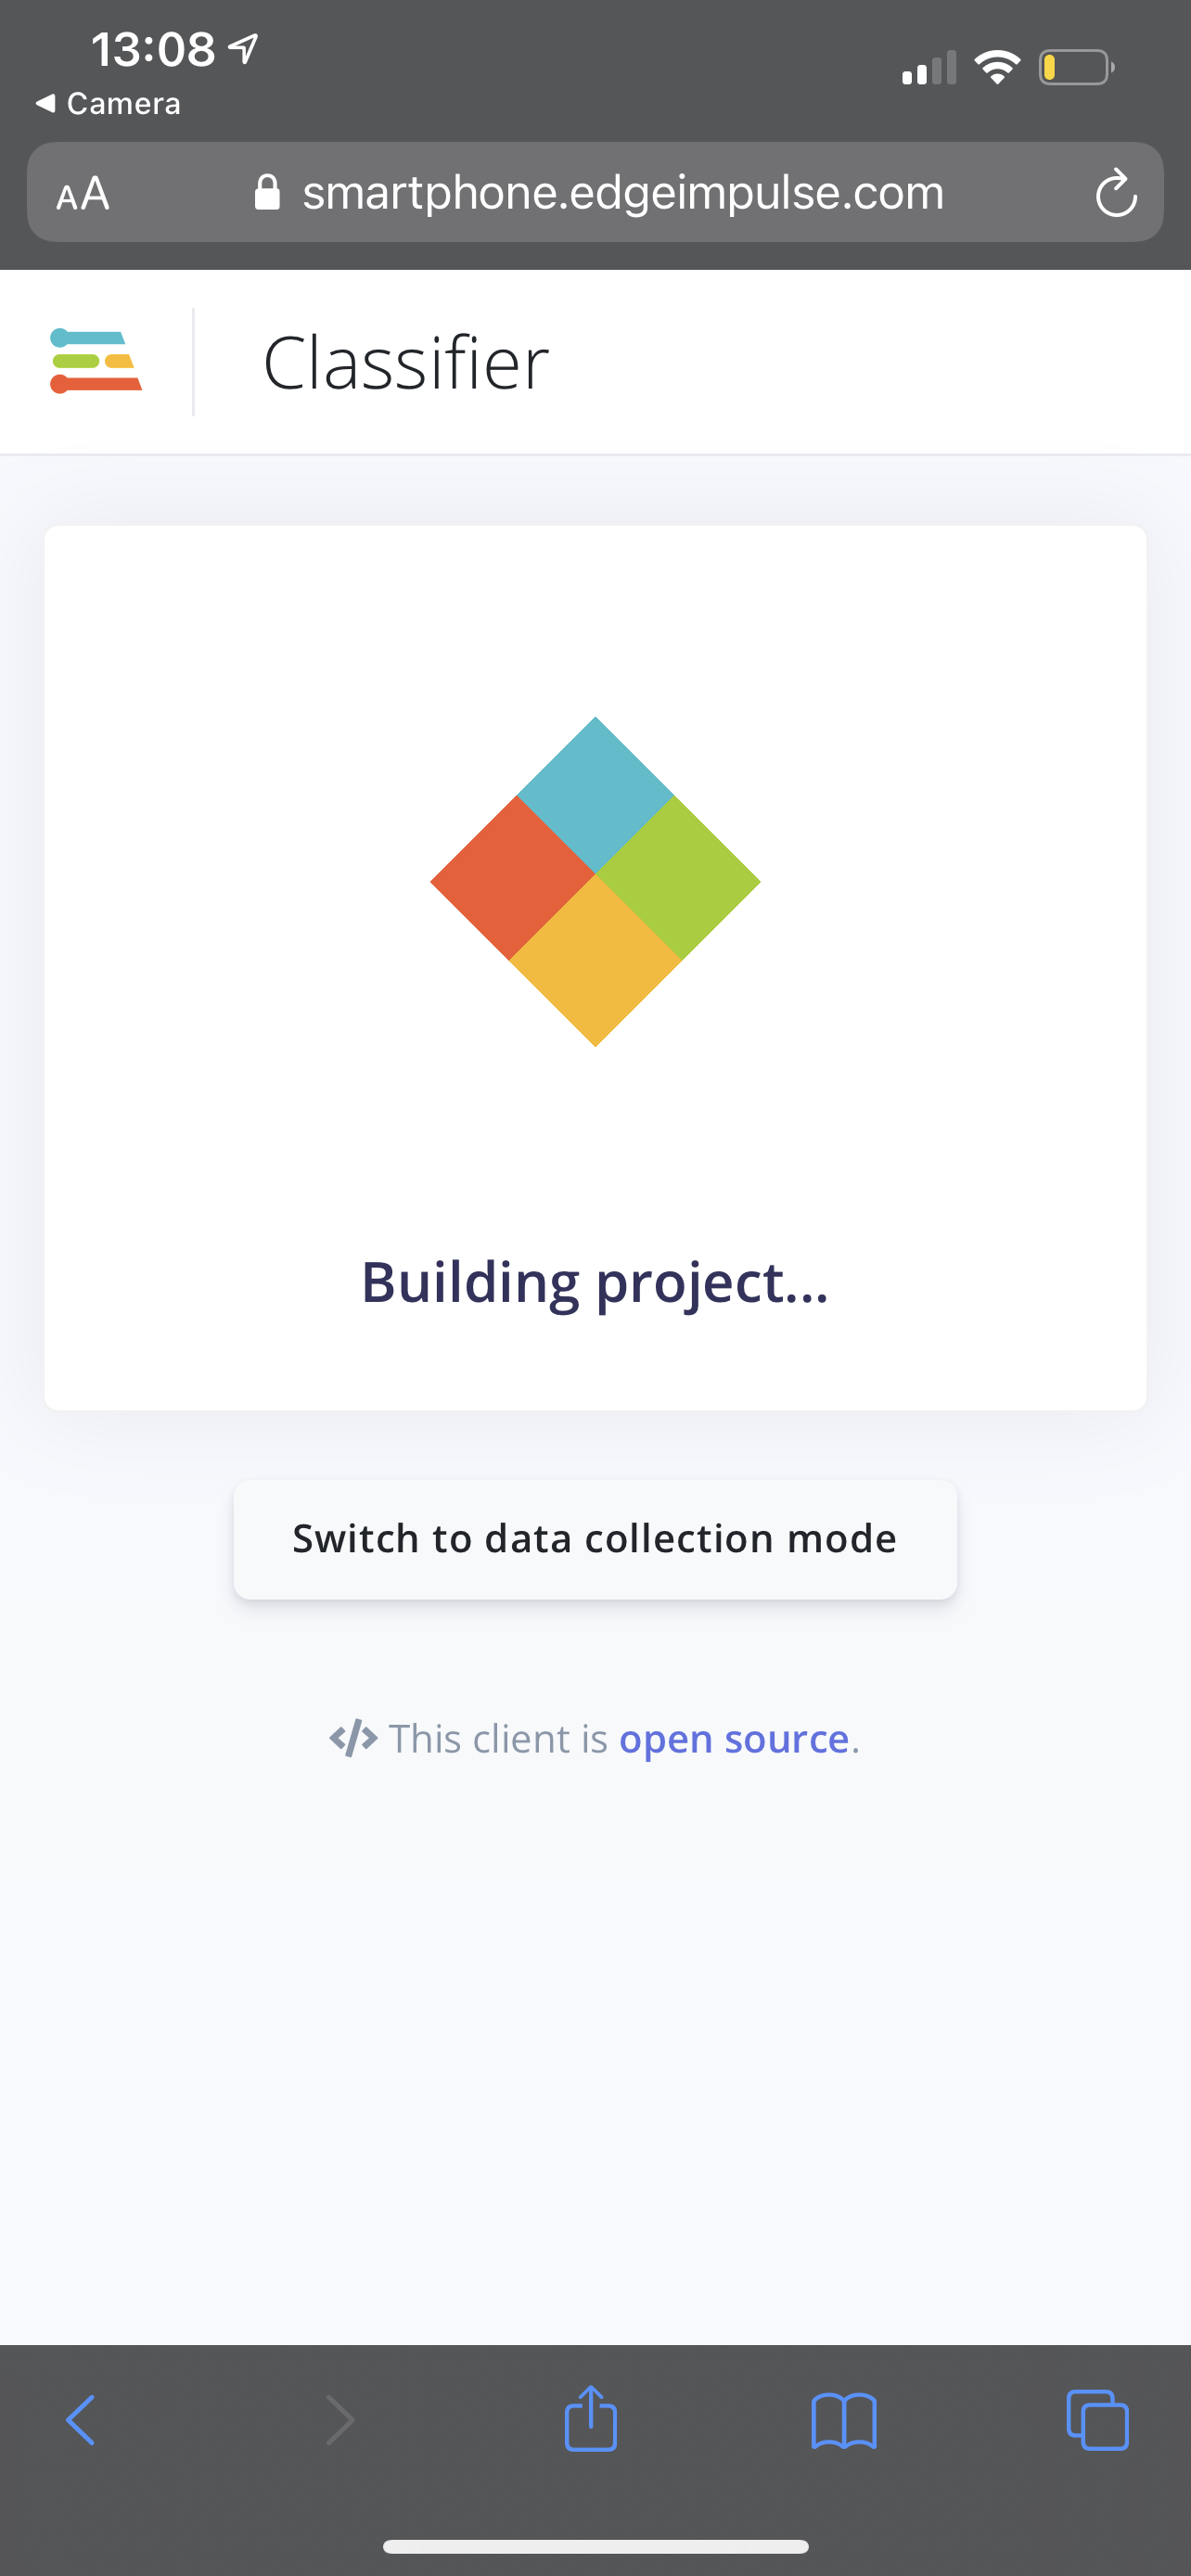
- Once you have scanned the QR code, your phone’s web browser will appear loading the the “Data collection” web application. At the bottom of the page, click on the Switch to classification mode button:
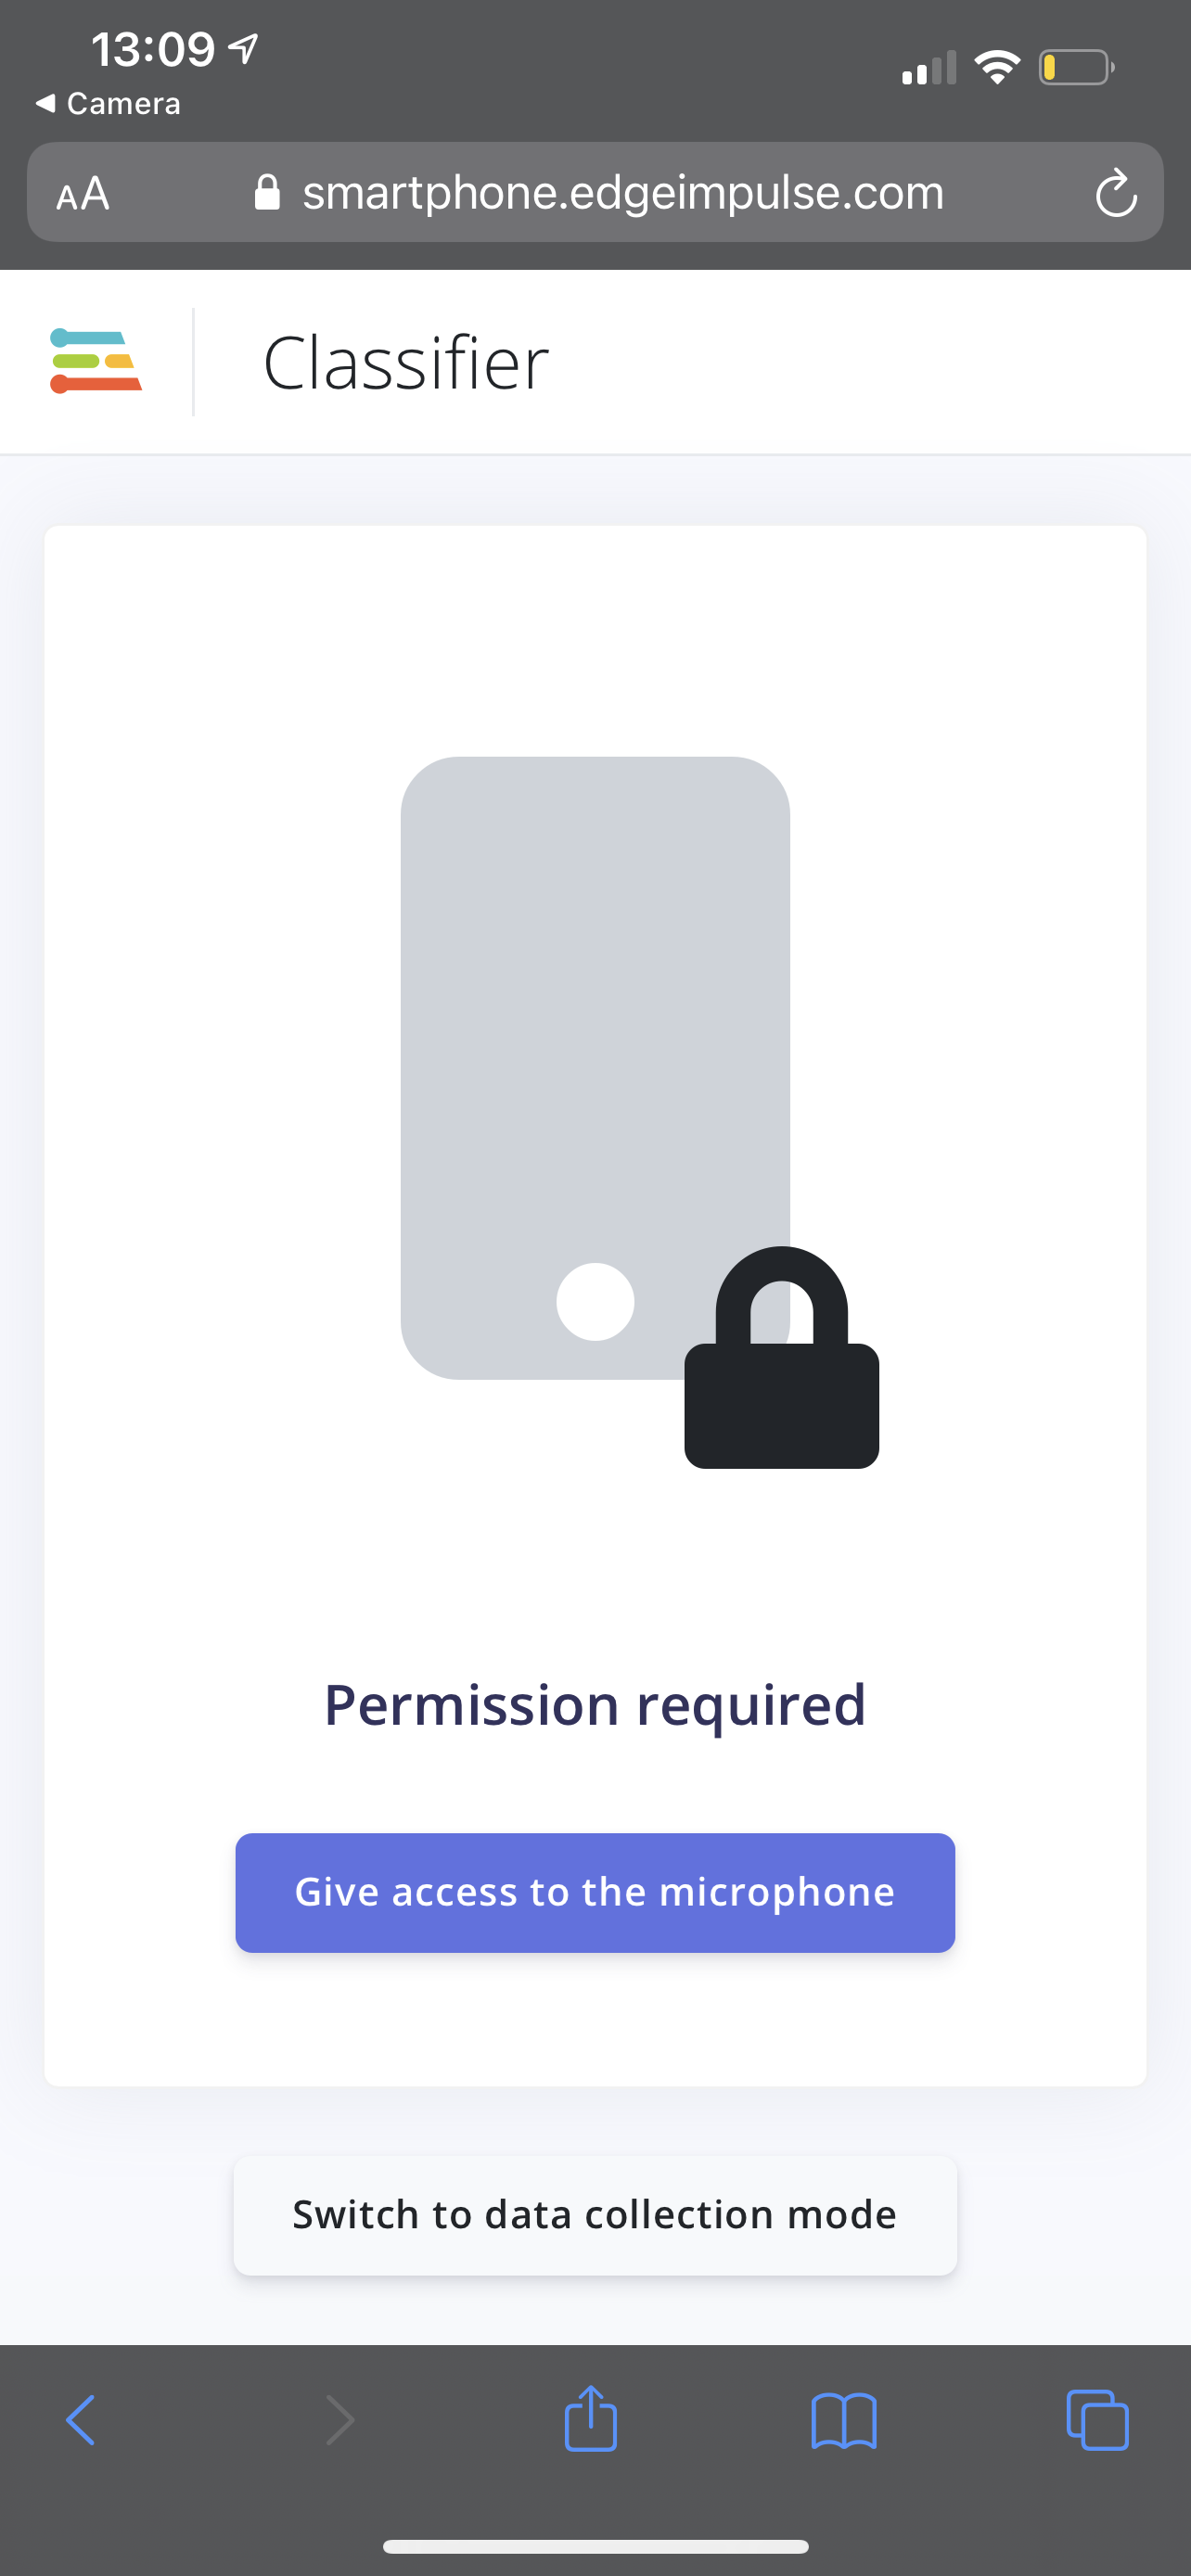
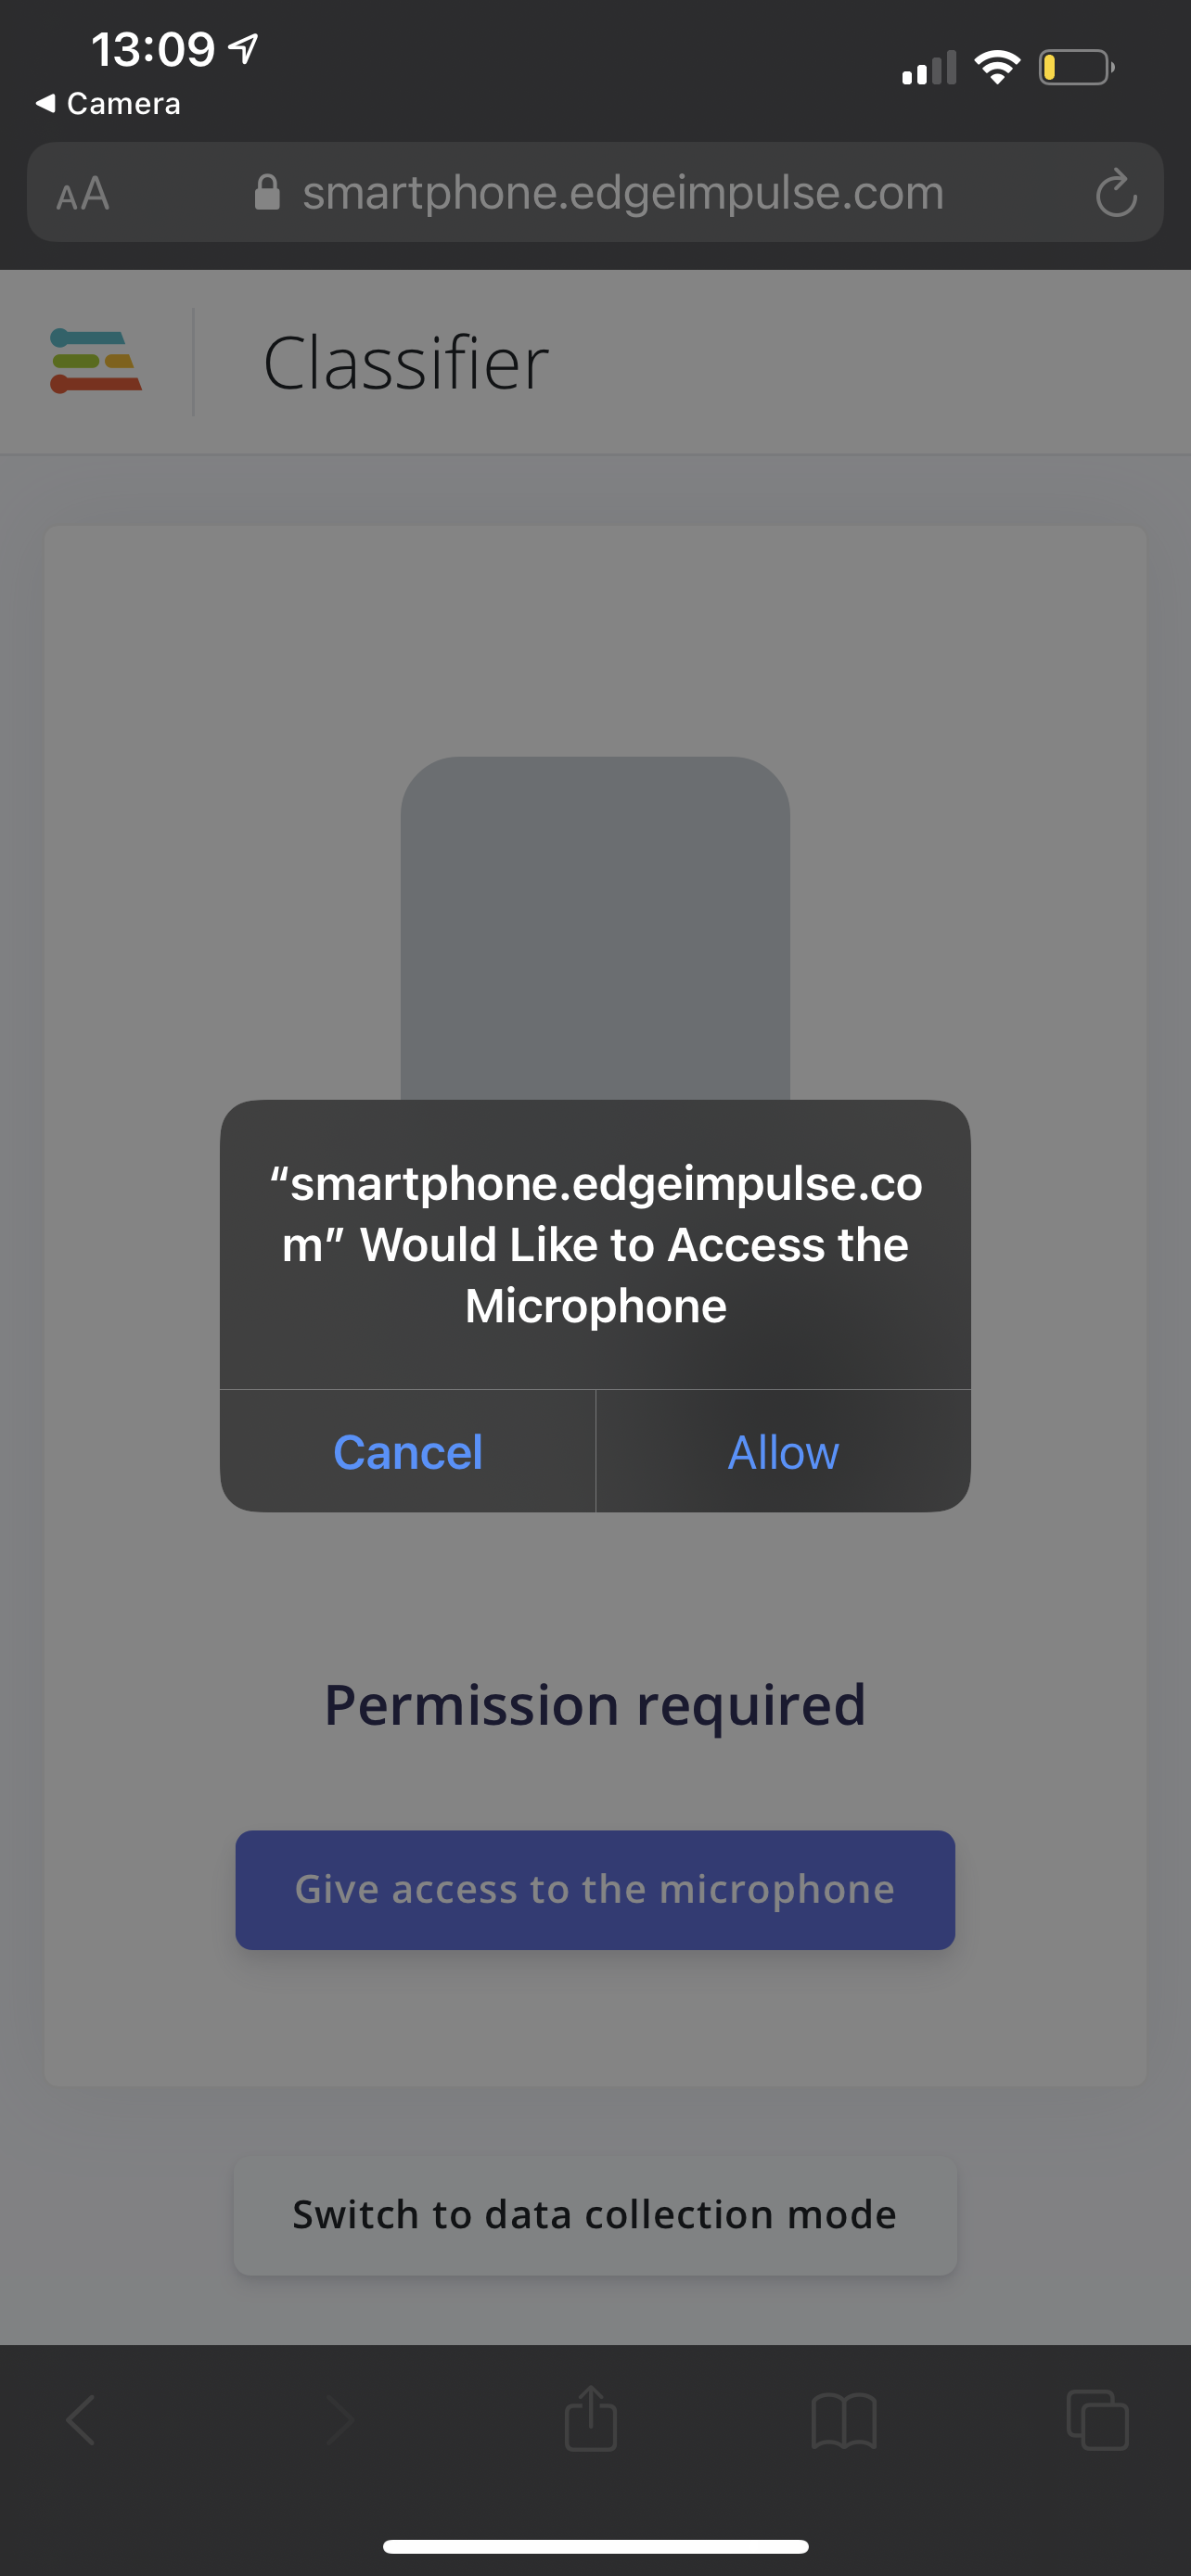
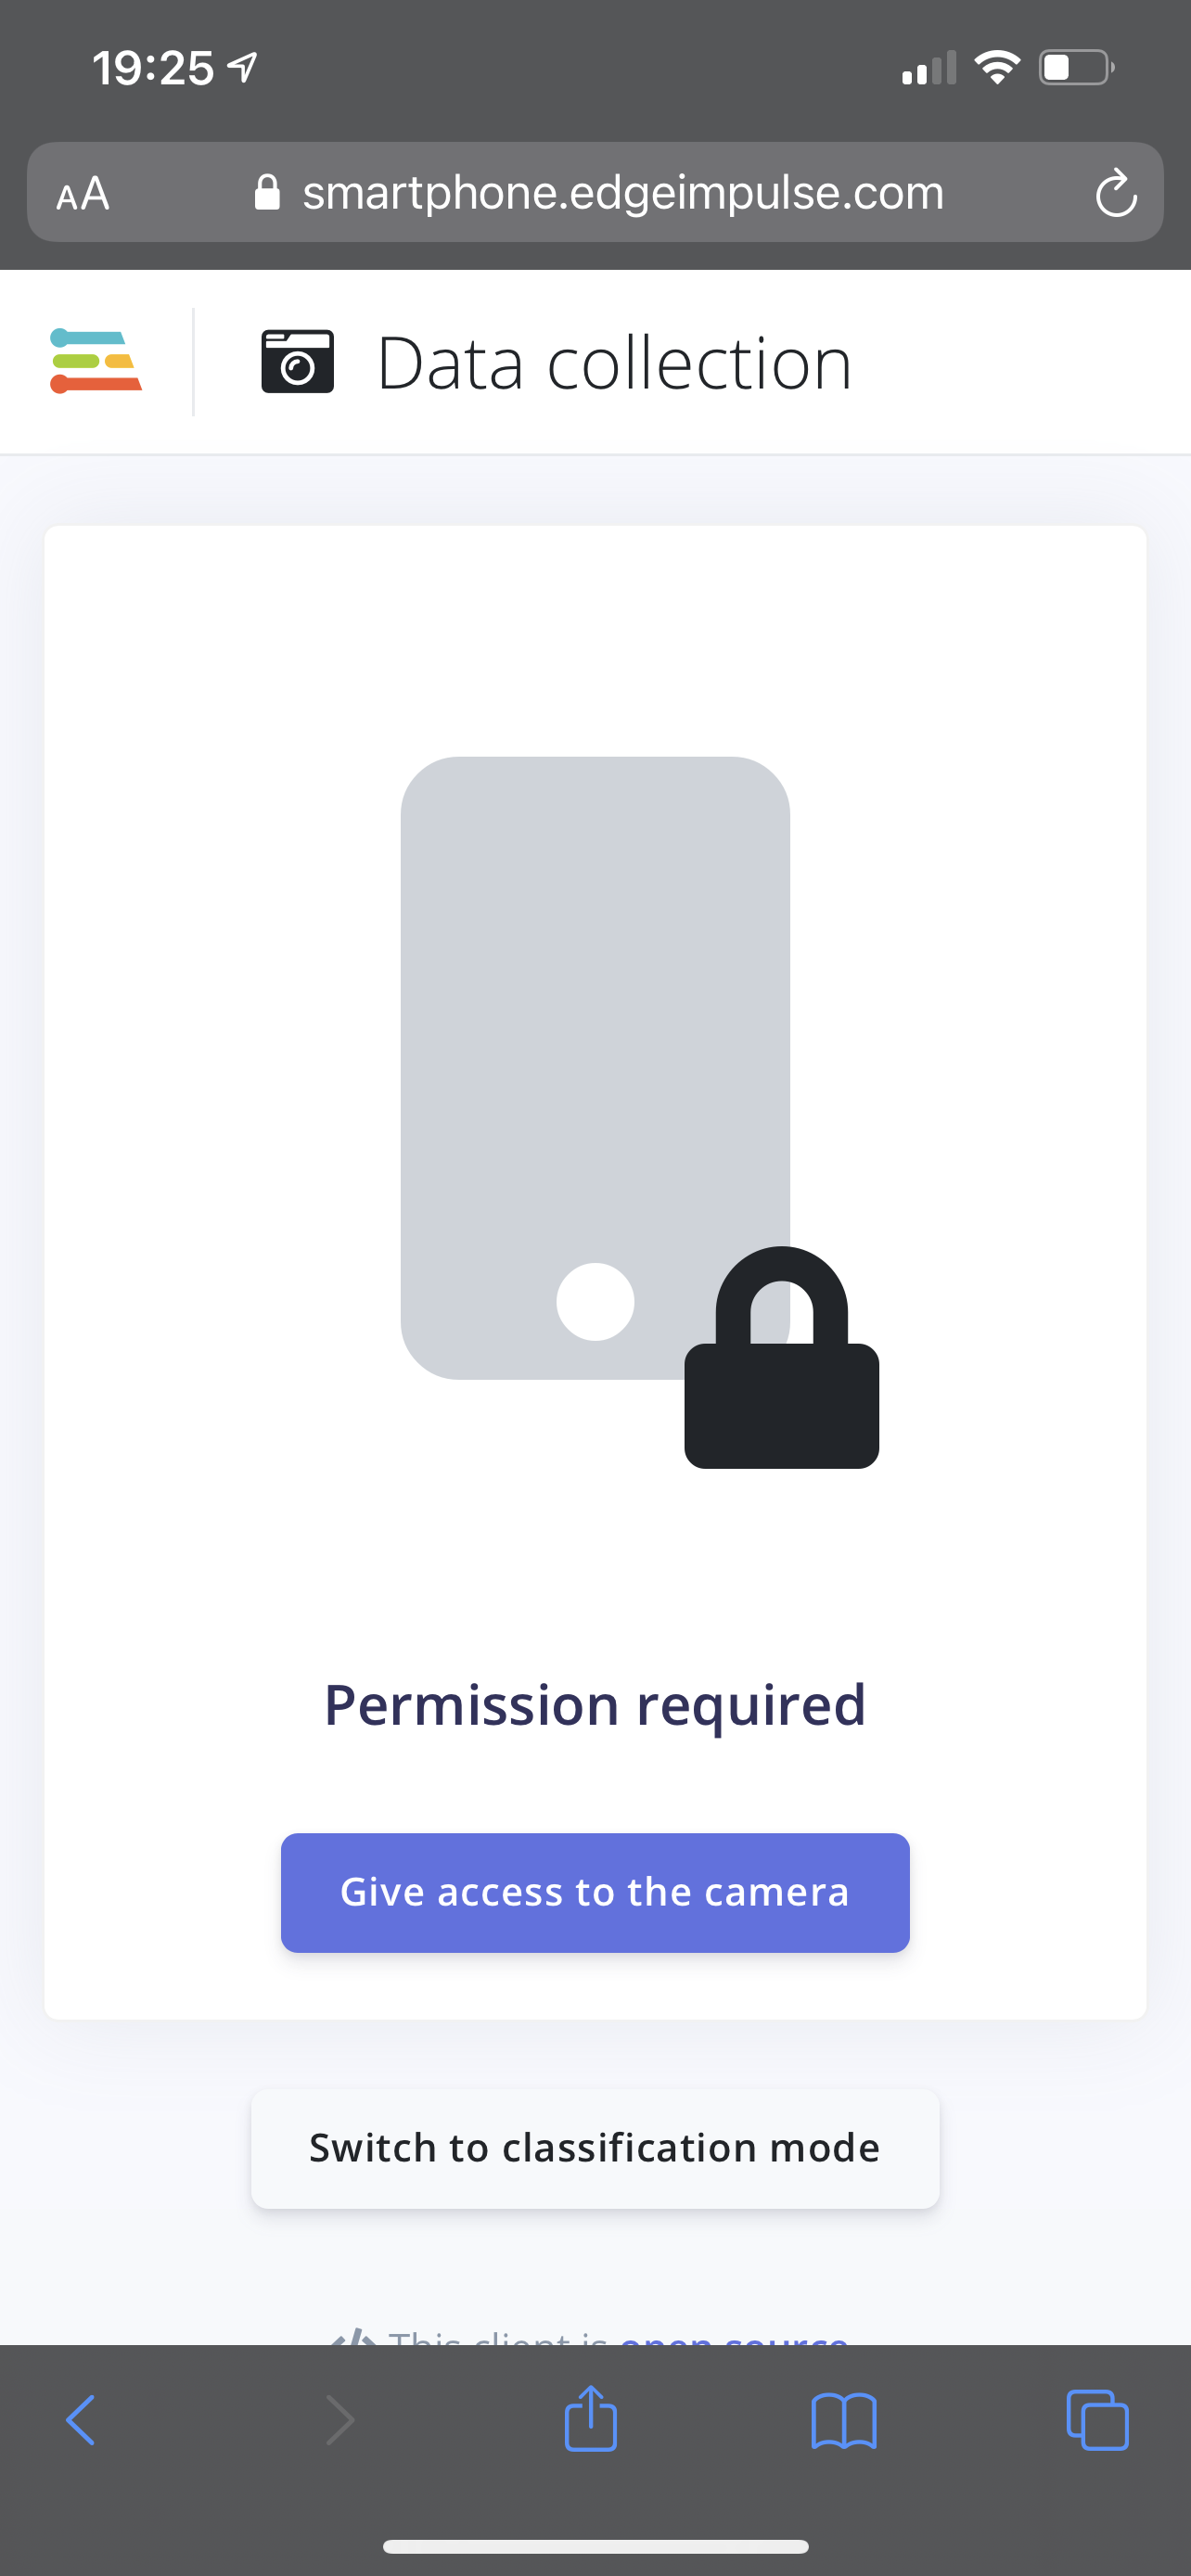
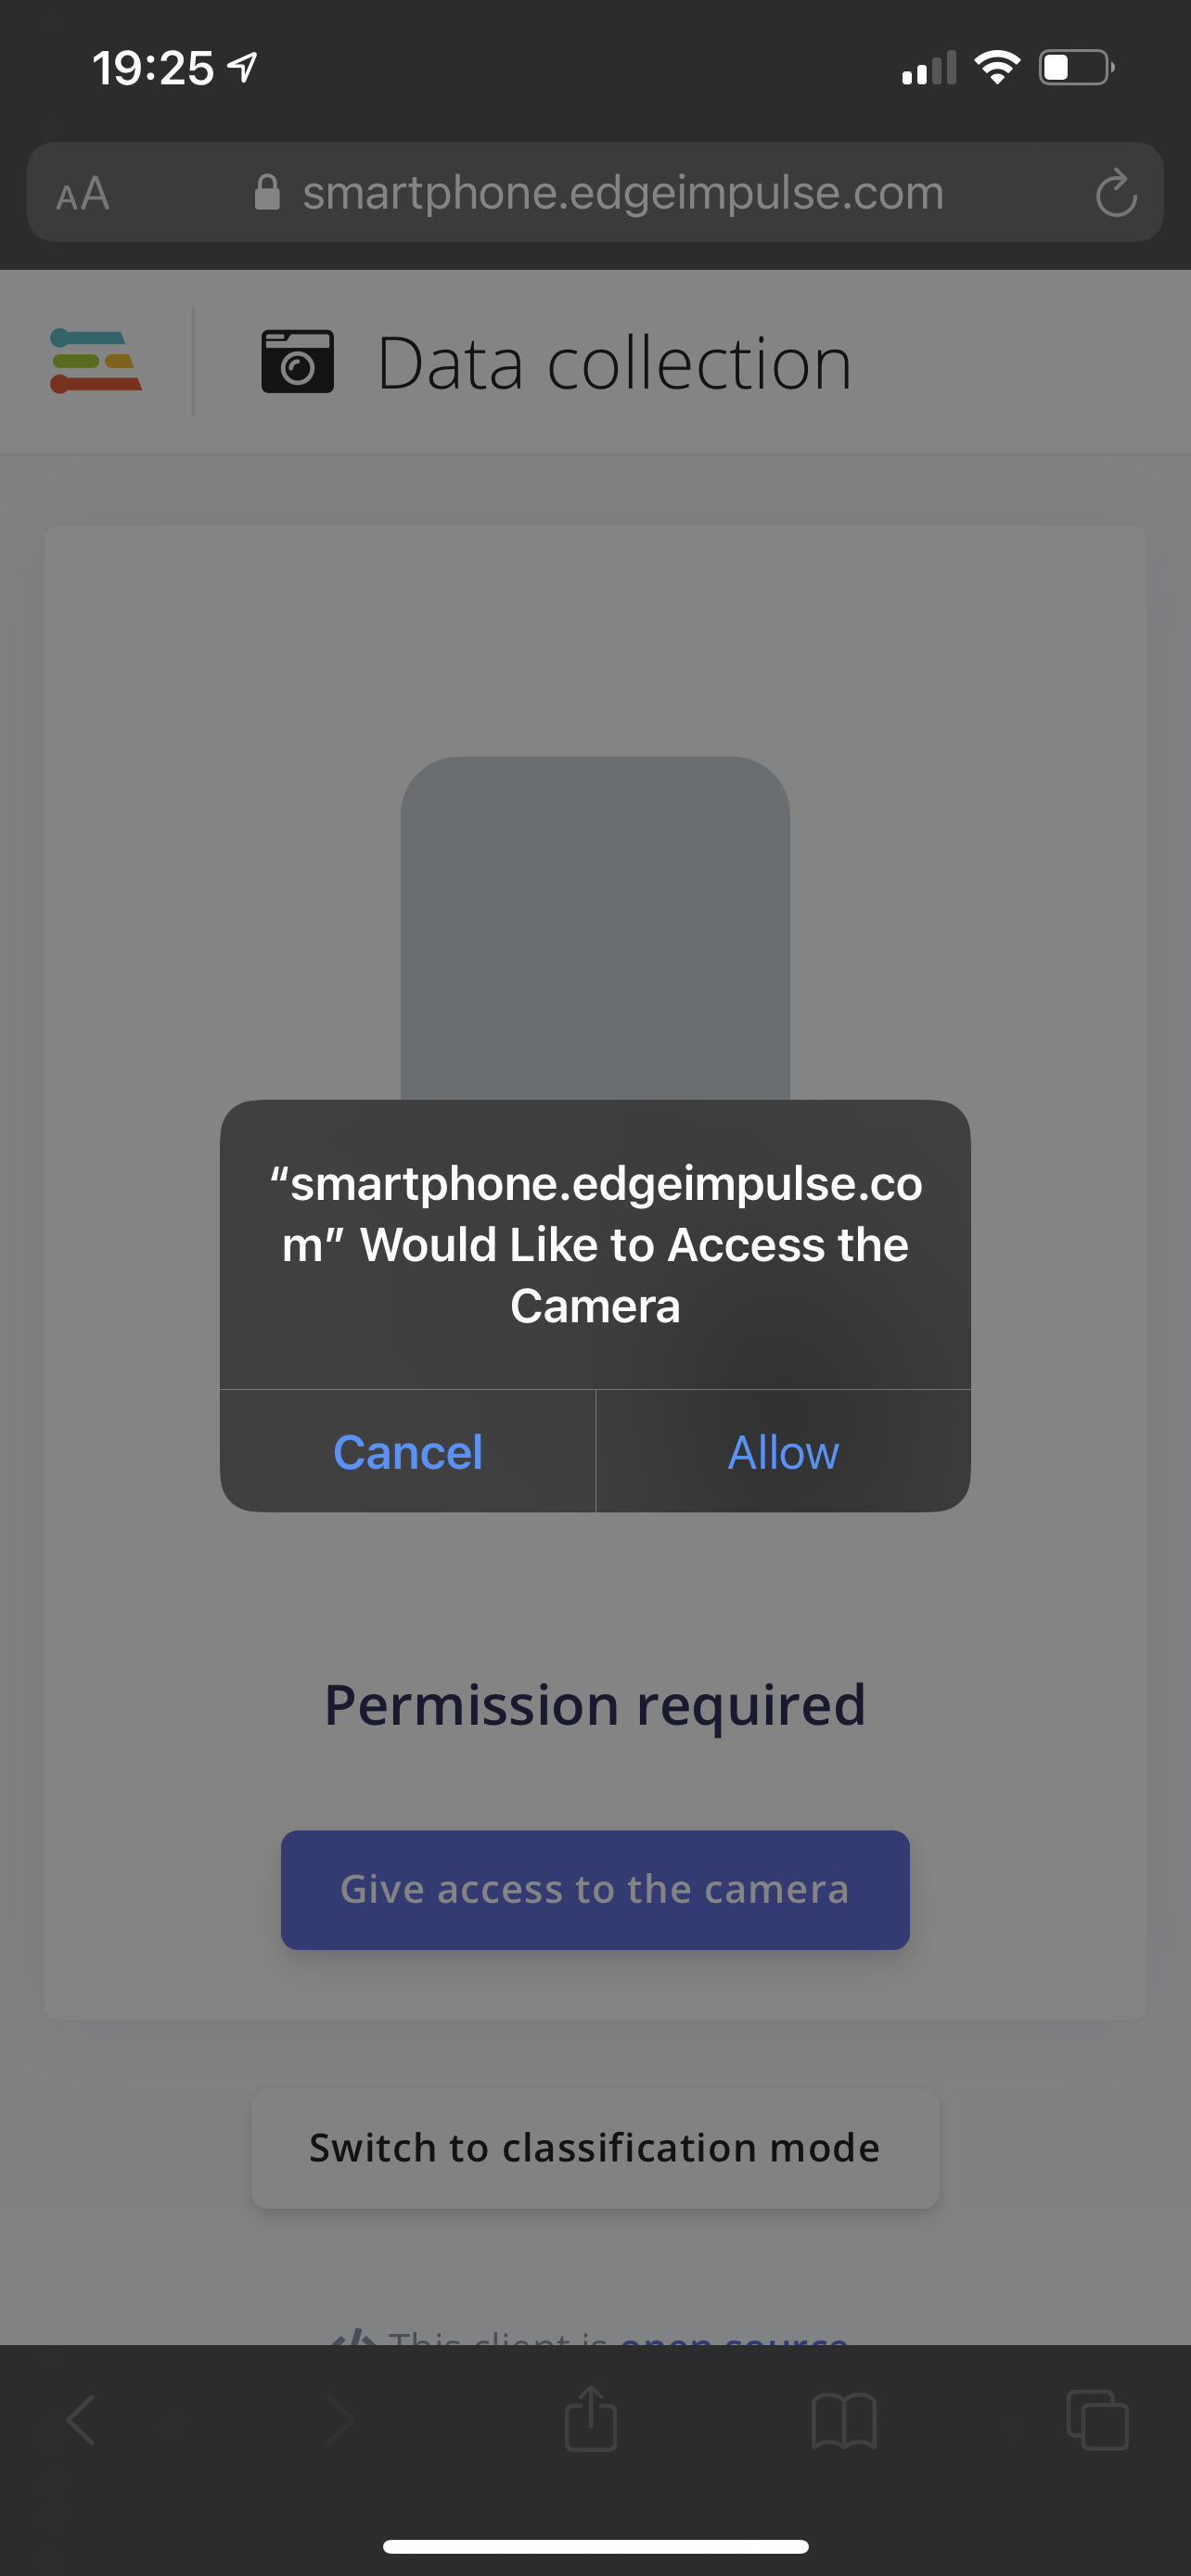
- Once the project has finished building, click the Give access to the microphone button, then click Allow:
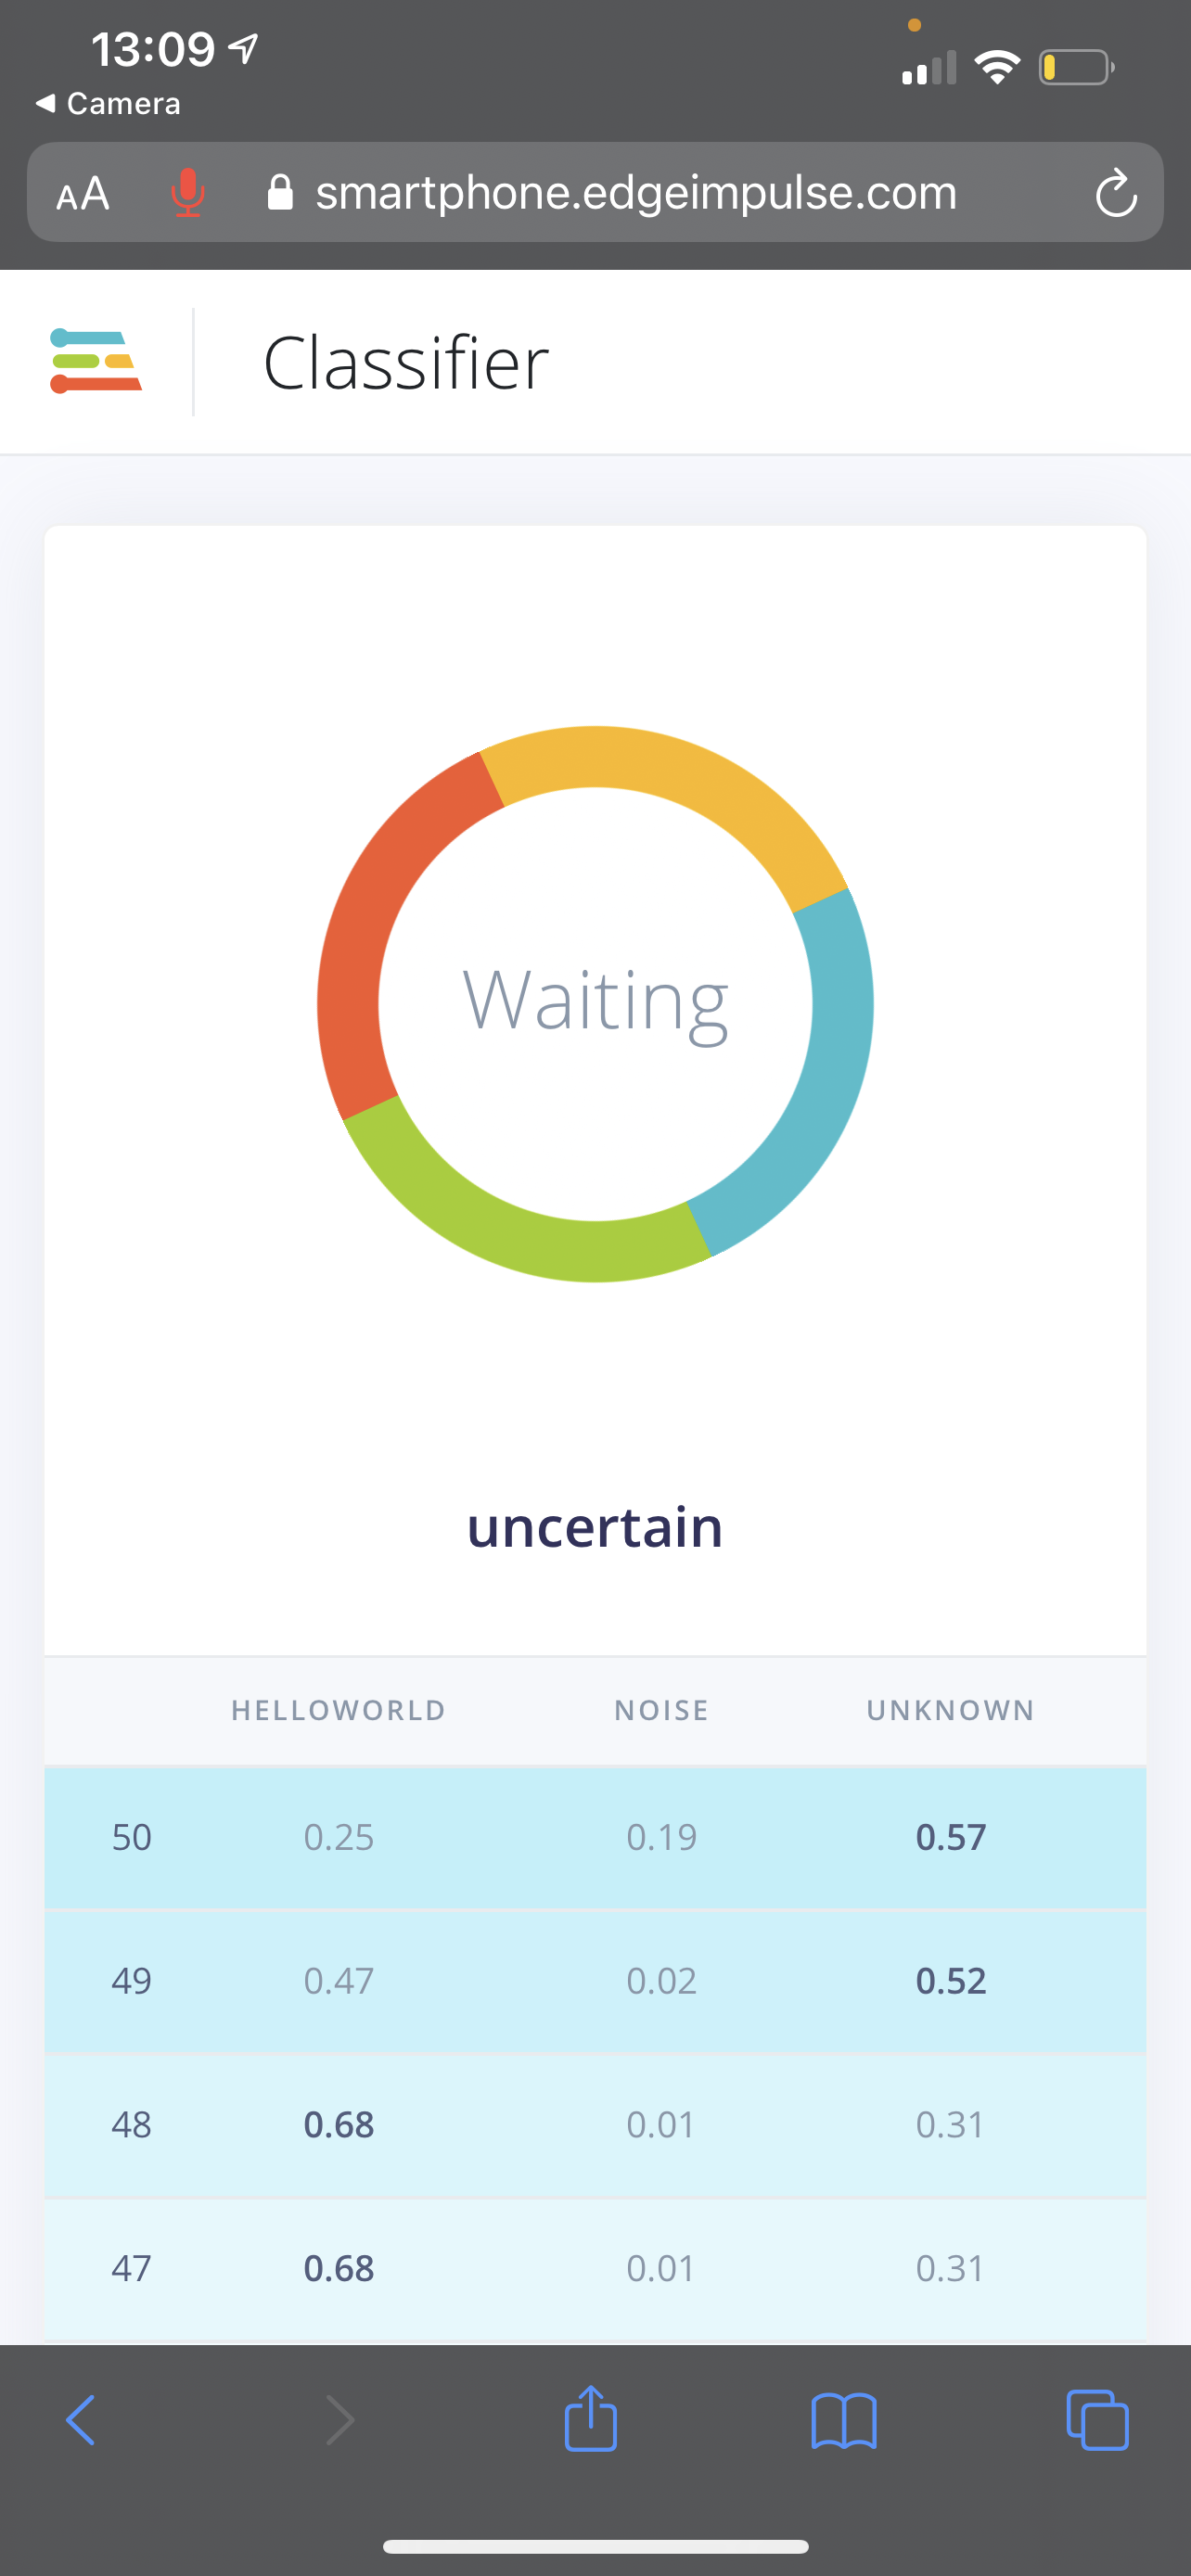
- Now see our custom keyword spotting classifier in action!
Troubleshooting (Keyword Spotting)
Phone: Not connected
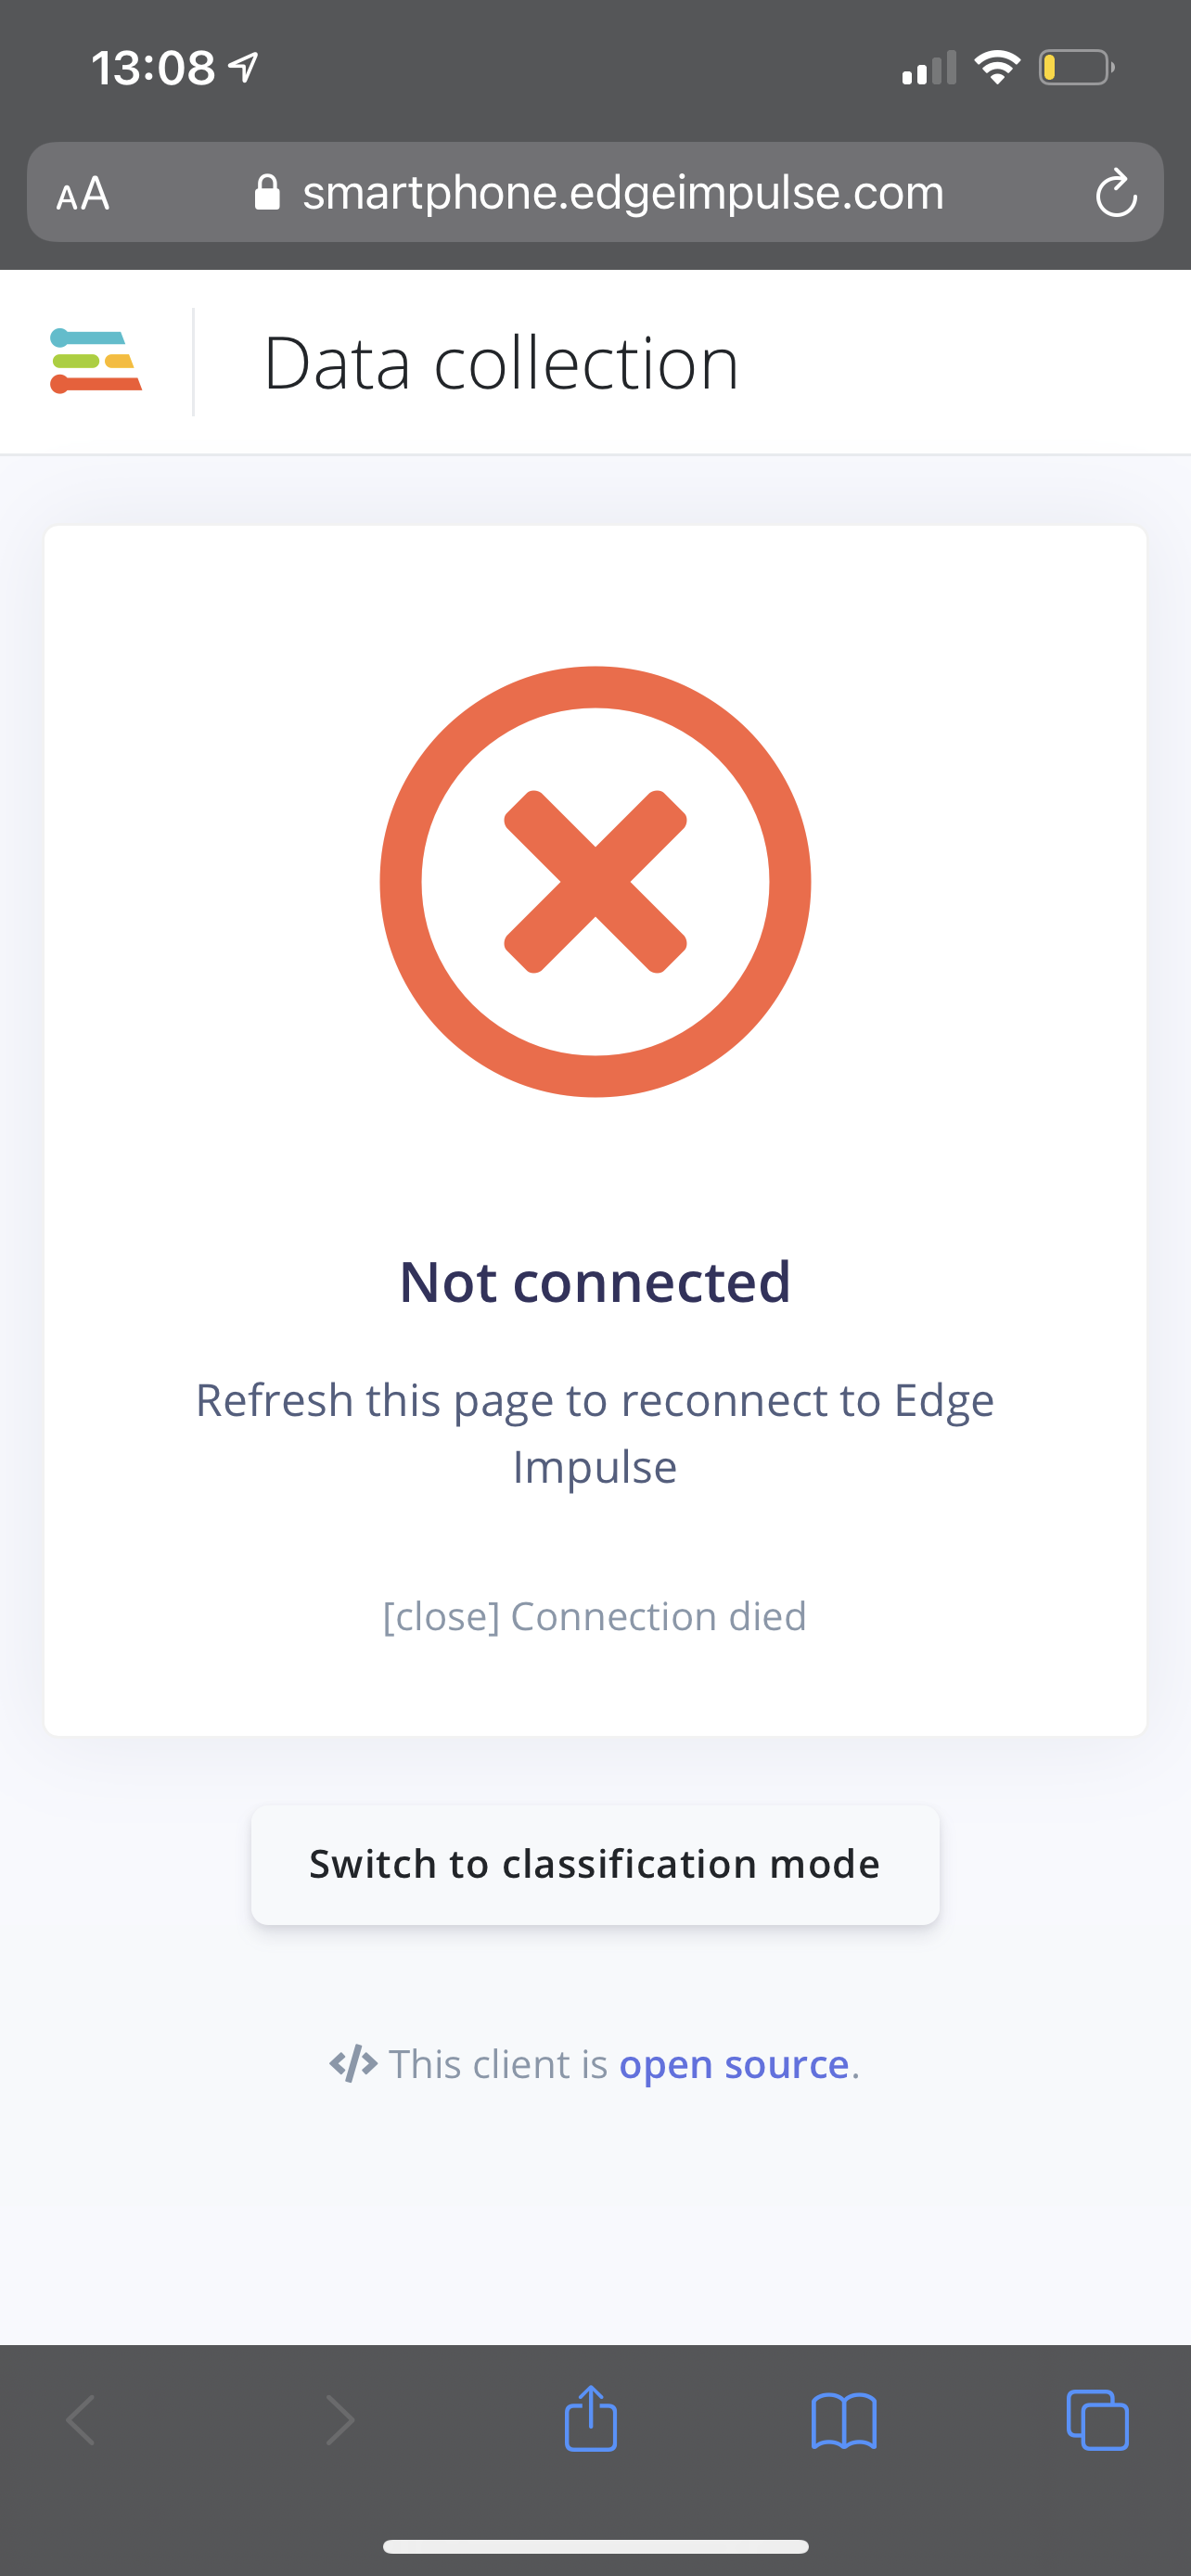
This error sometimes occurs when you leave your web browser app for a different app on your phone. Try refreshing your browser page, if that doesn't reconnect you, follow steps 5 through 8 from the Deploy a Custom Keyword Spotting Model steps above to reconnect your phone to your Edge Impulse project.
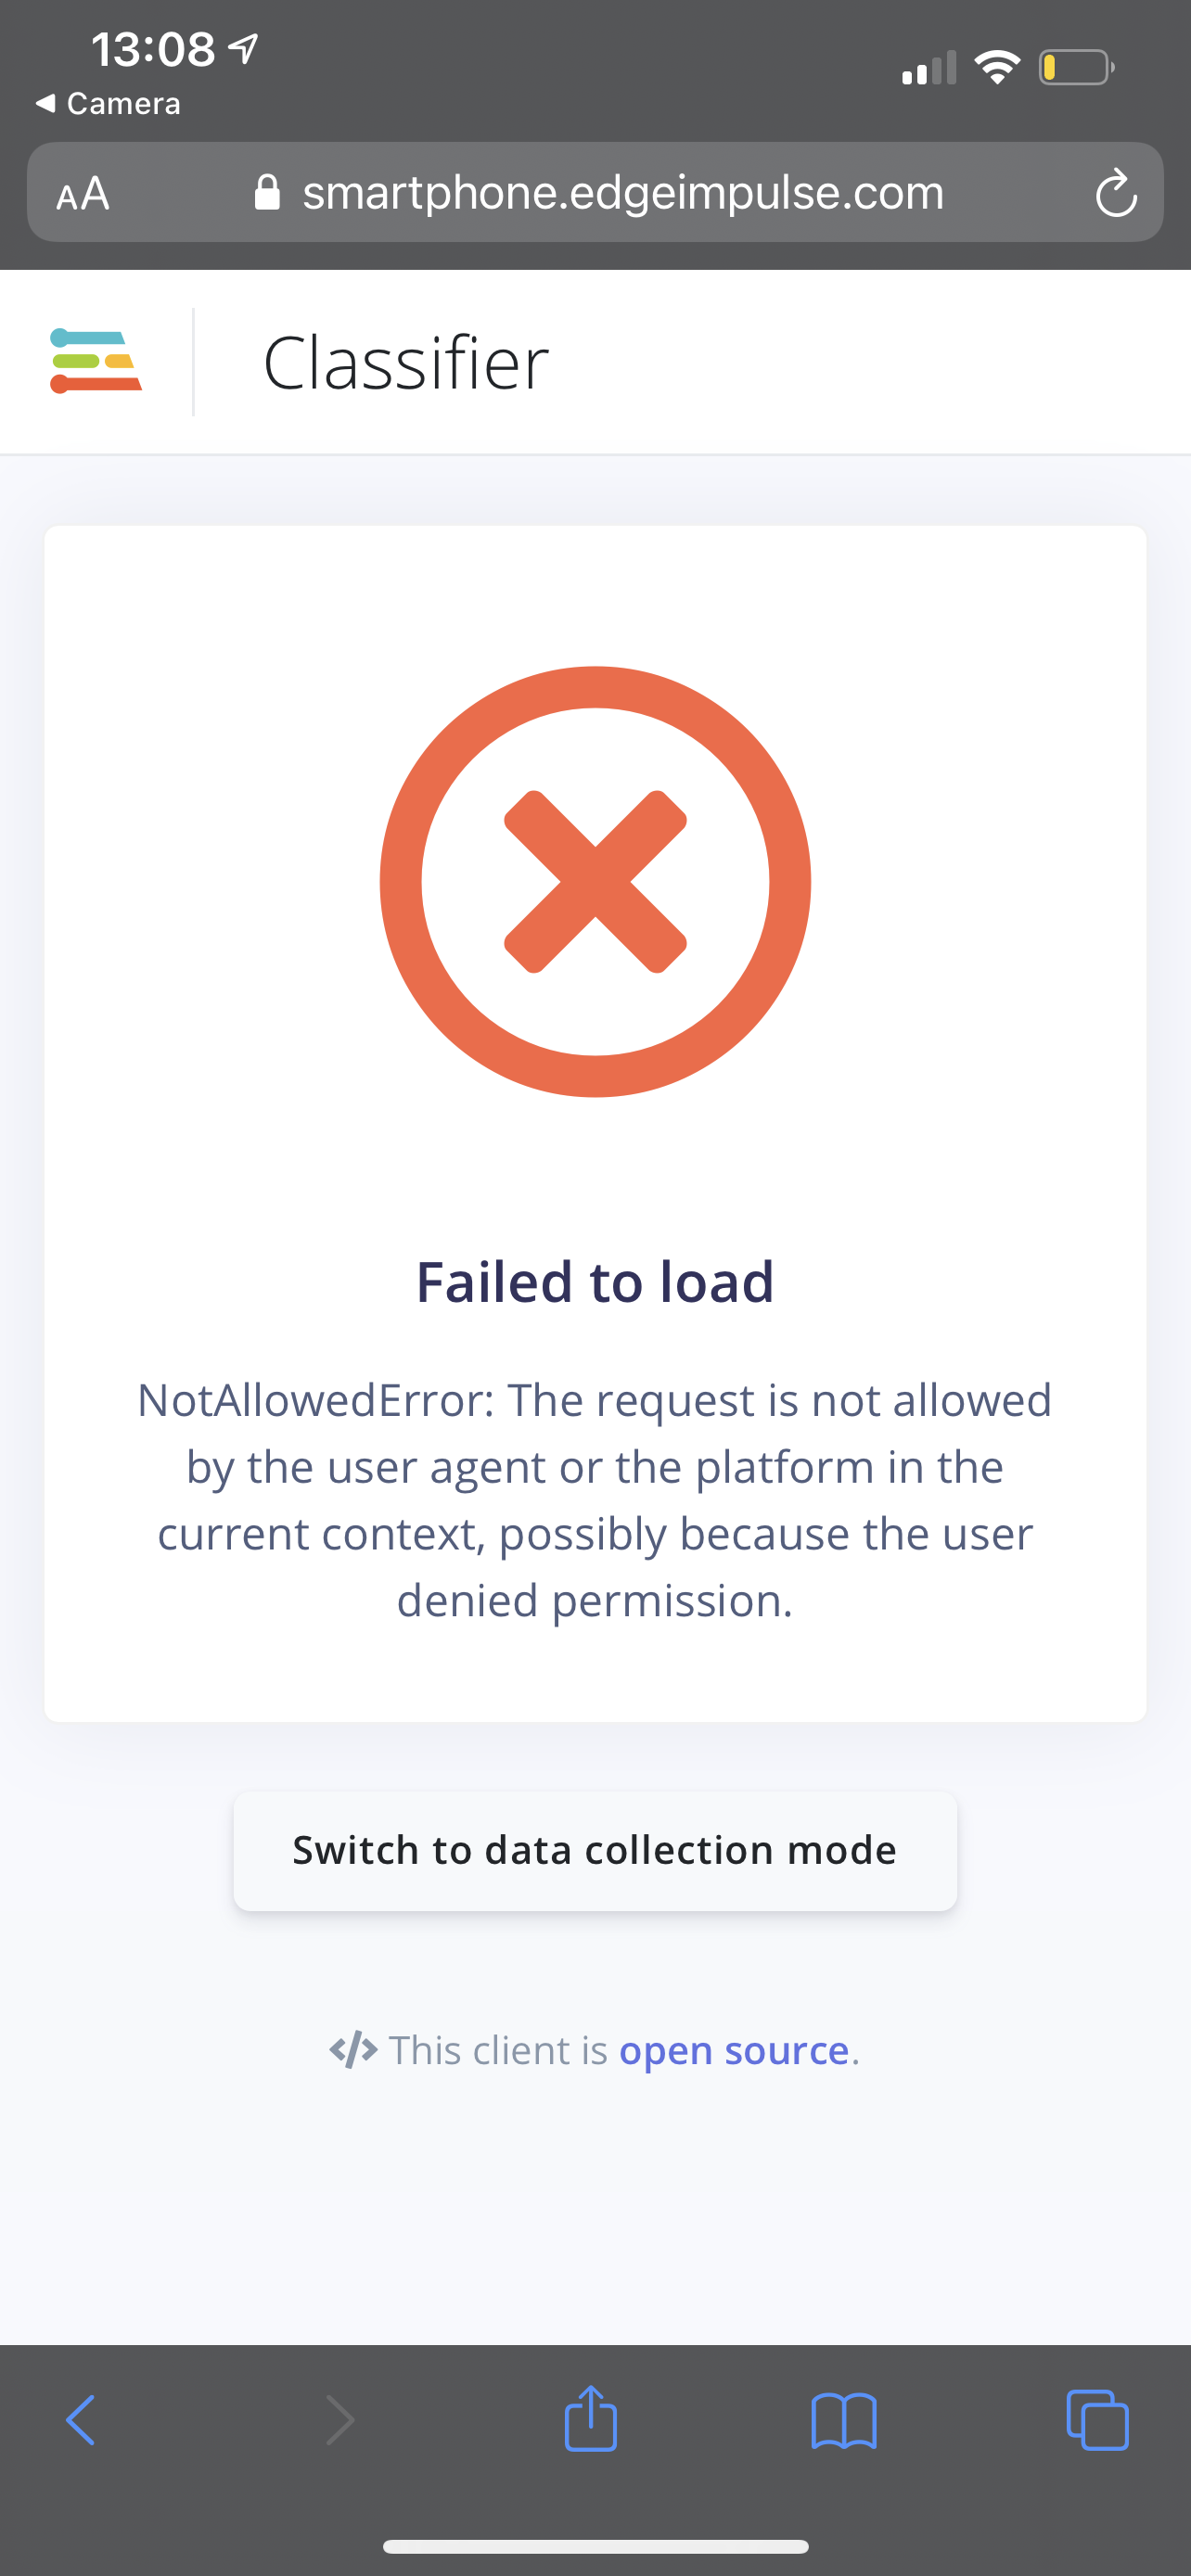
Phone: Failed to load

This error occurs when you don't give the web browser access to your microphone. Refresh your browser page and allow microphone access as seen in step 9 from the Deploy a Custom Keyword Spotting Model steps above.
(Bonus for you to try at home) Deploy a Custom Image Classification Model
Similarly to the custom keyword spotting model, we can also create a personalized version of the person detection image classification model we saw yesterday.
- Clone the person detection project to your own Edge Impulse account. Click the following link and then click the Clone this project button on the top right corner of the page: https://studio.edgeimpulse.com/public/37001/latest
- Change the name of your cloned project if you would like, then click the green Clone this project button:
- When the studio has finished cloning the project, select the “Devices” tab and click the Connect a new device button:
- From the “Collect data” pop-up box, click on the Show QR code button next to “Use your mobile phone”:
- Grab your phone, open up the Camera app and scan the QR code that was generated for you by pointing your camera at your computer screen. An example of the QR code is shown below (this QR code is blurred out and unusable):
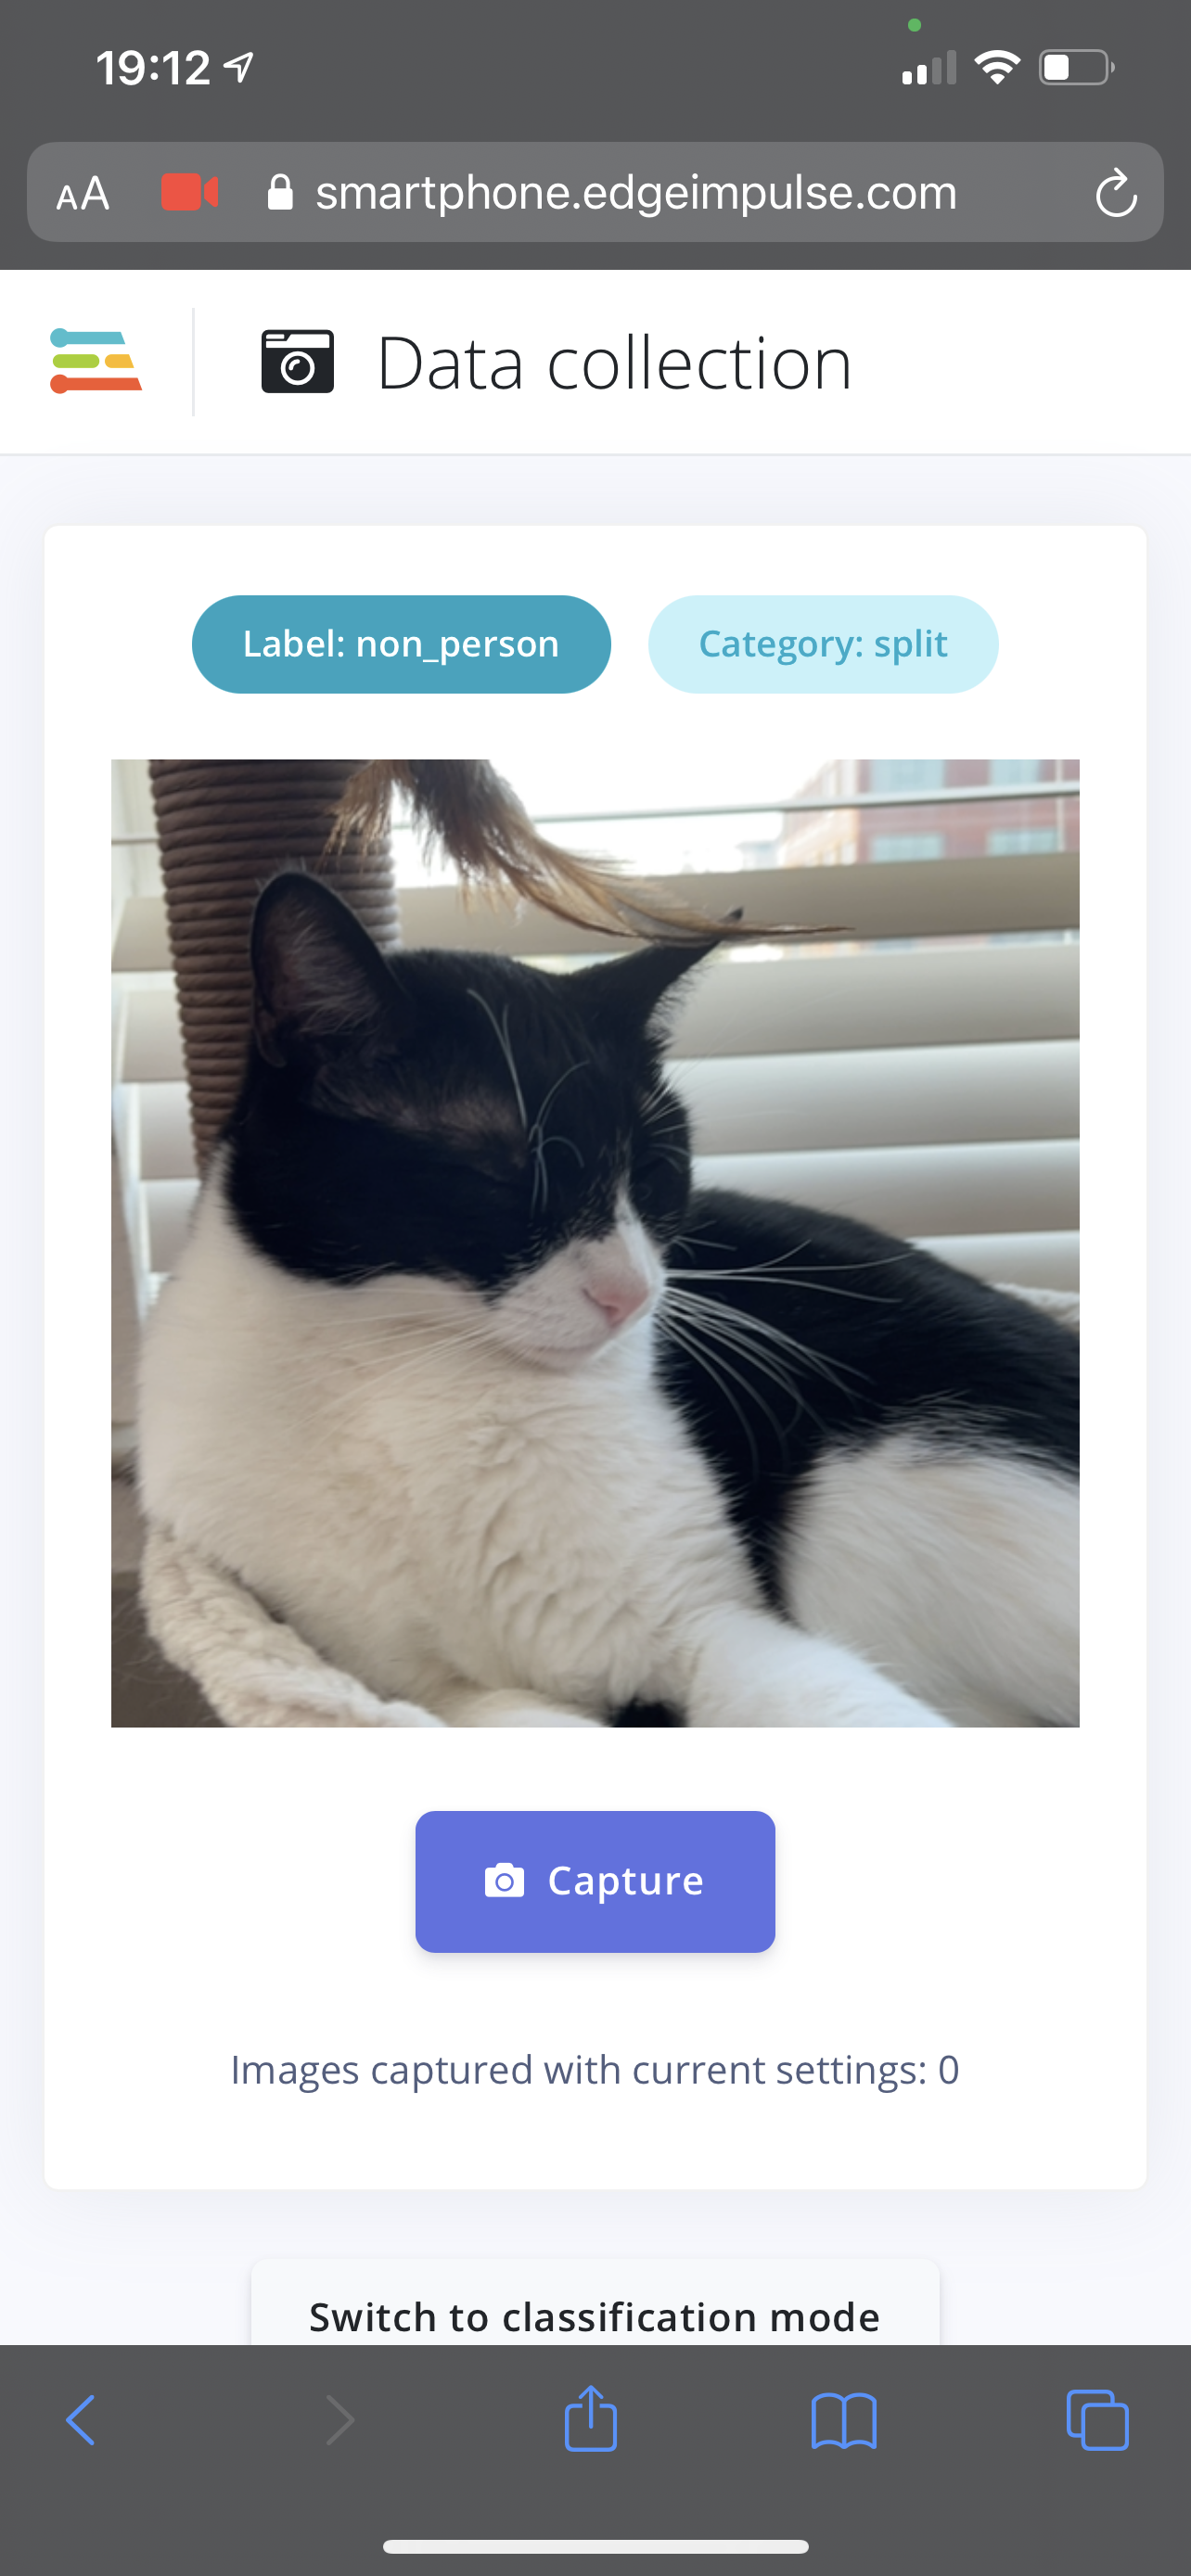
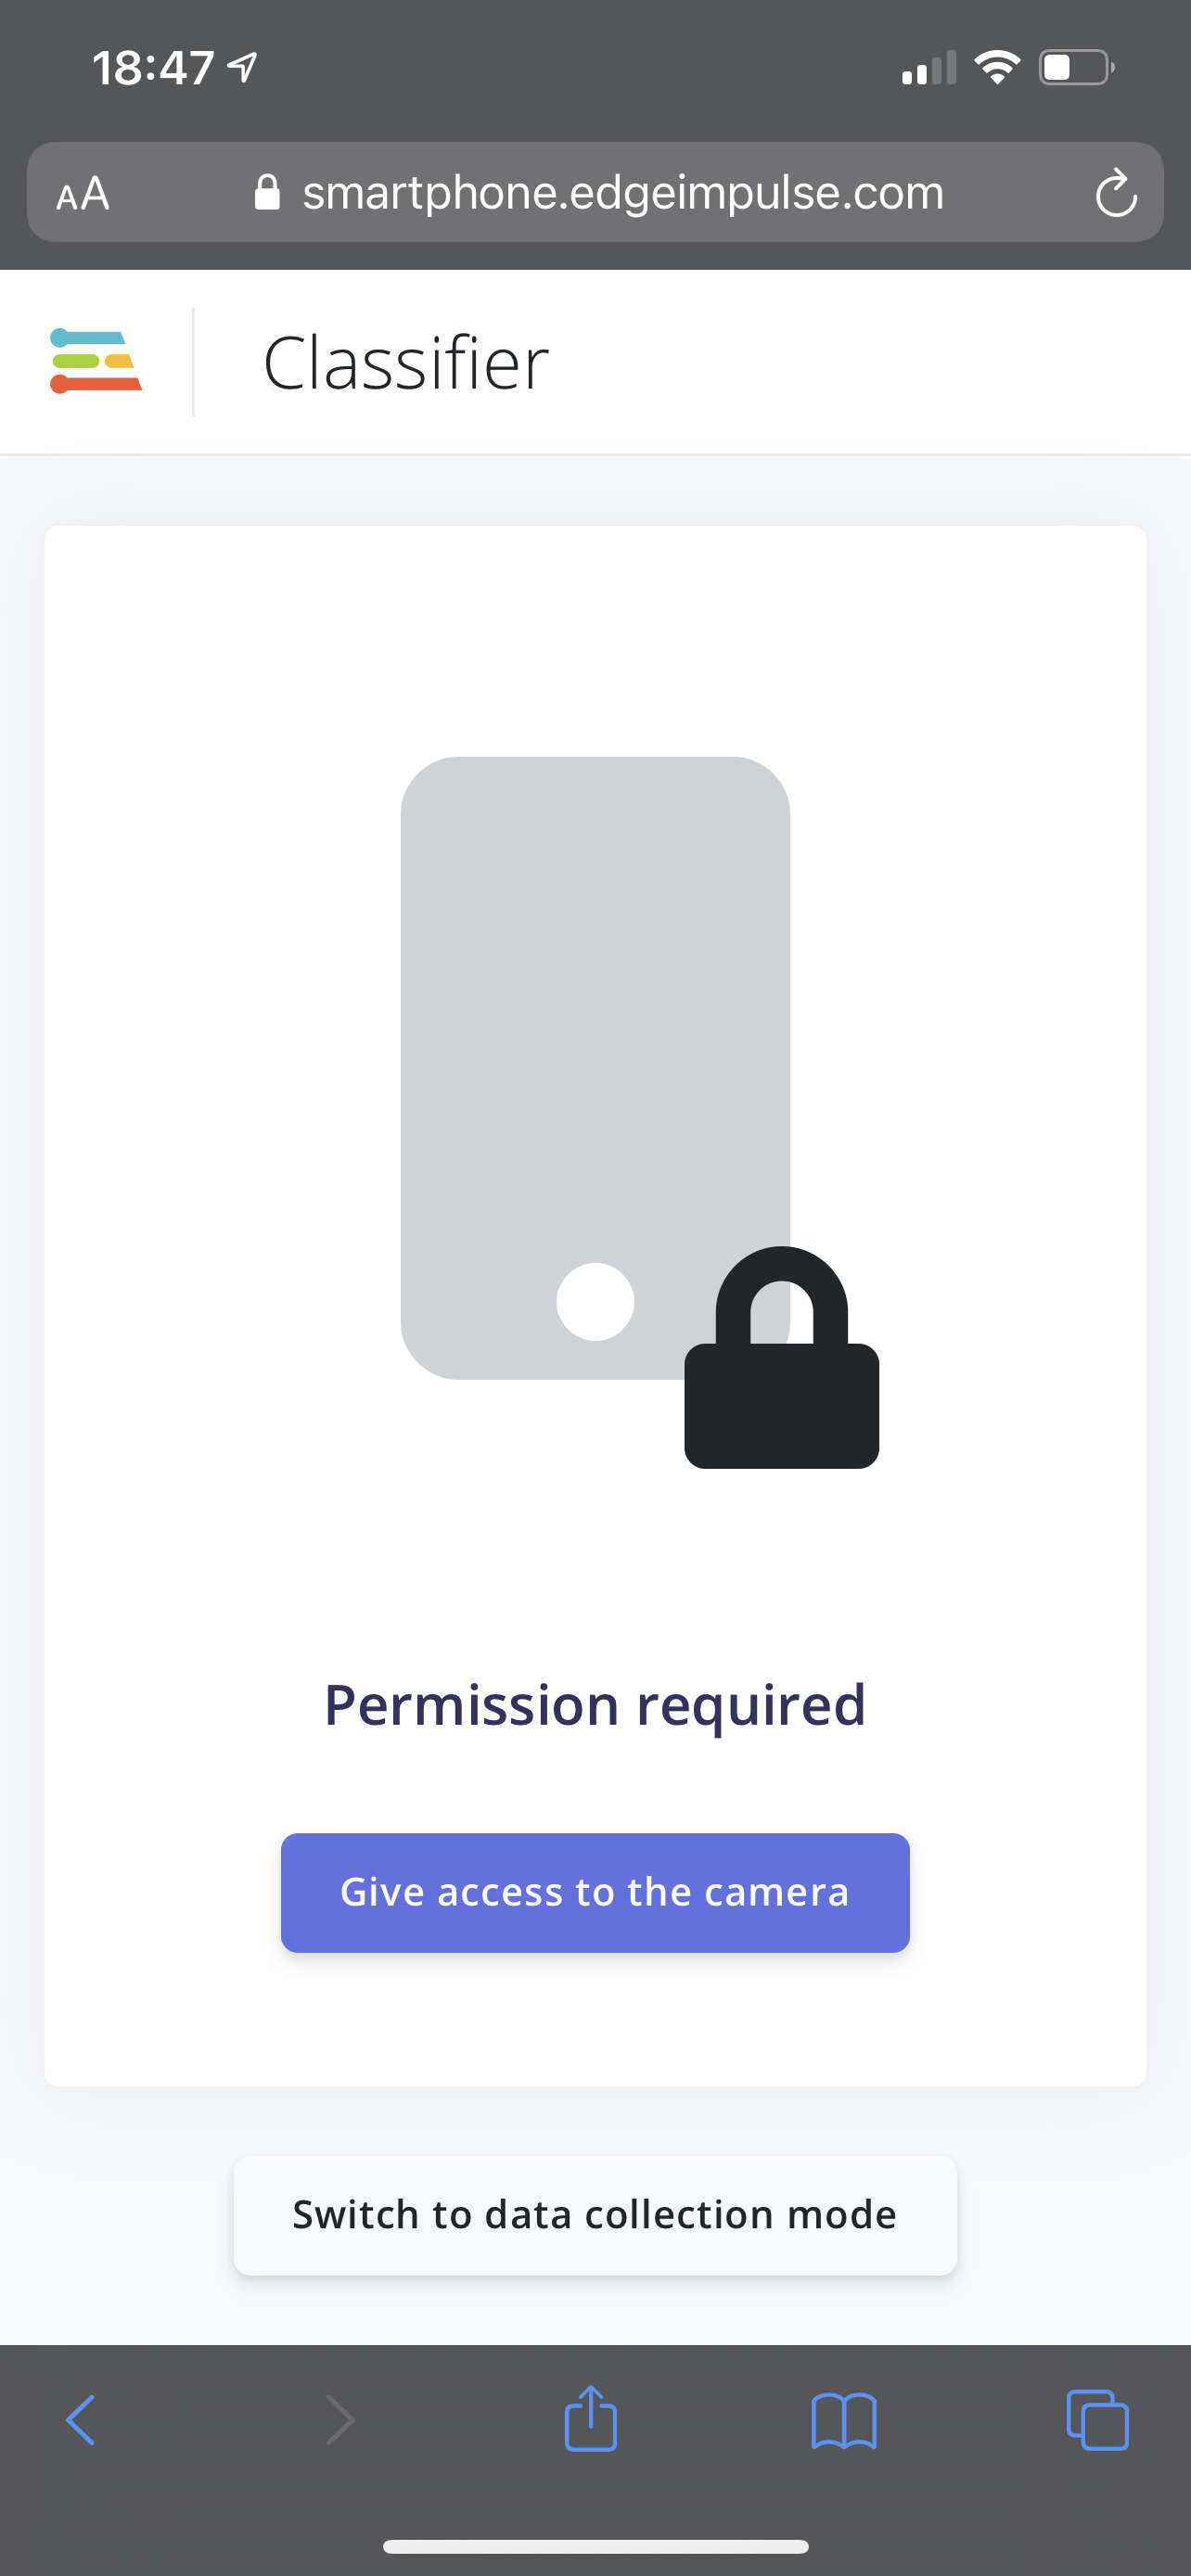
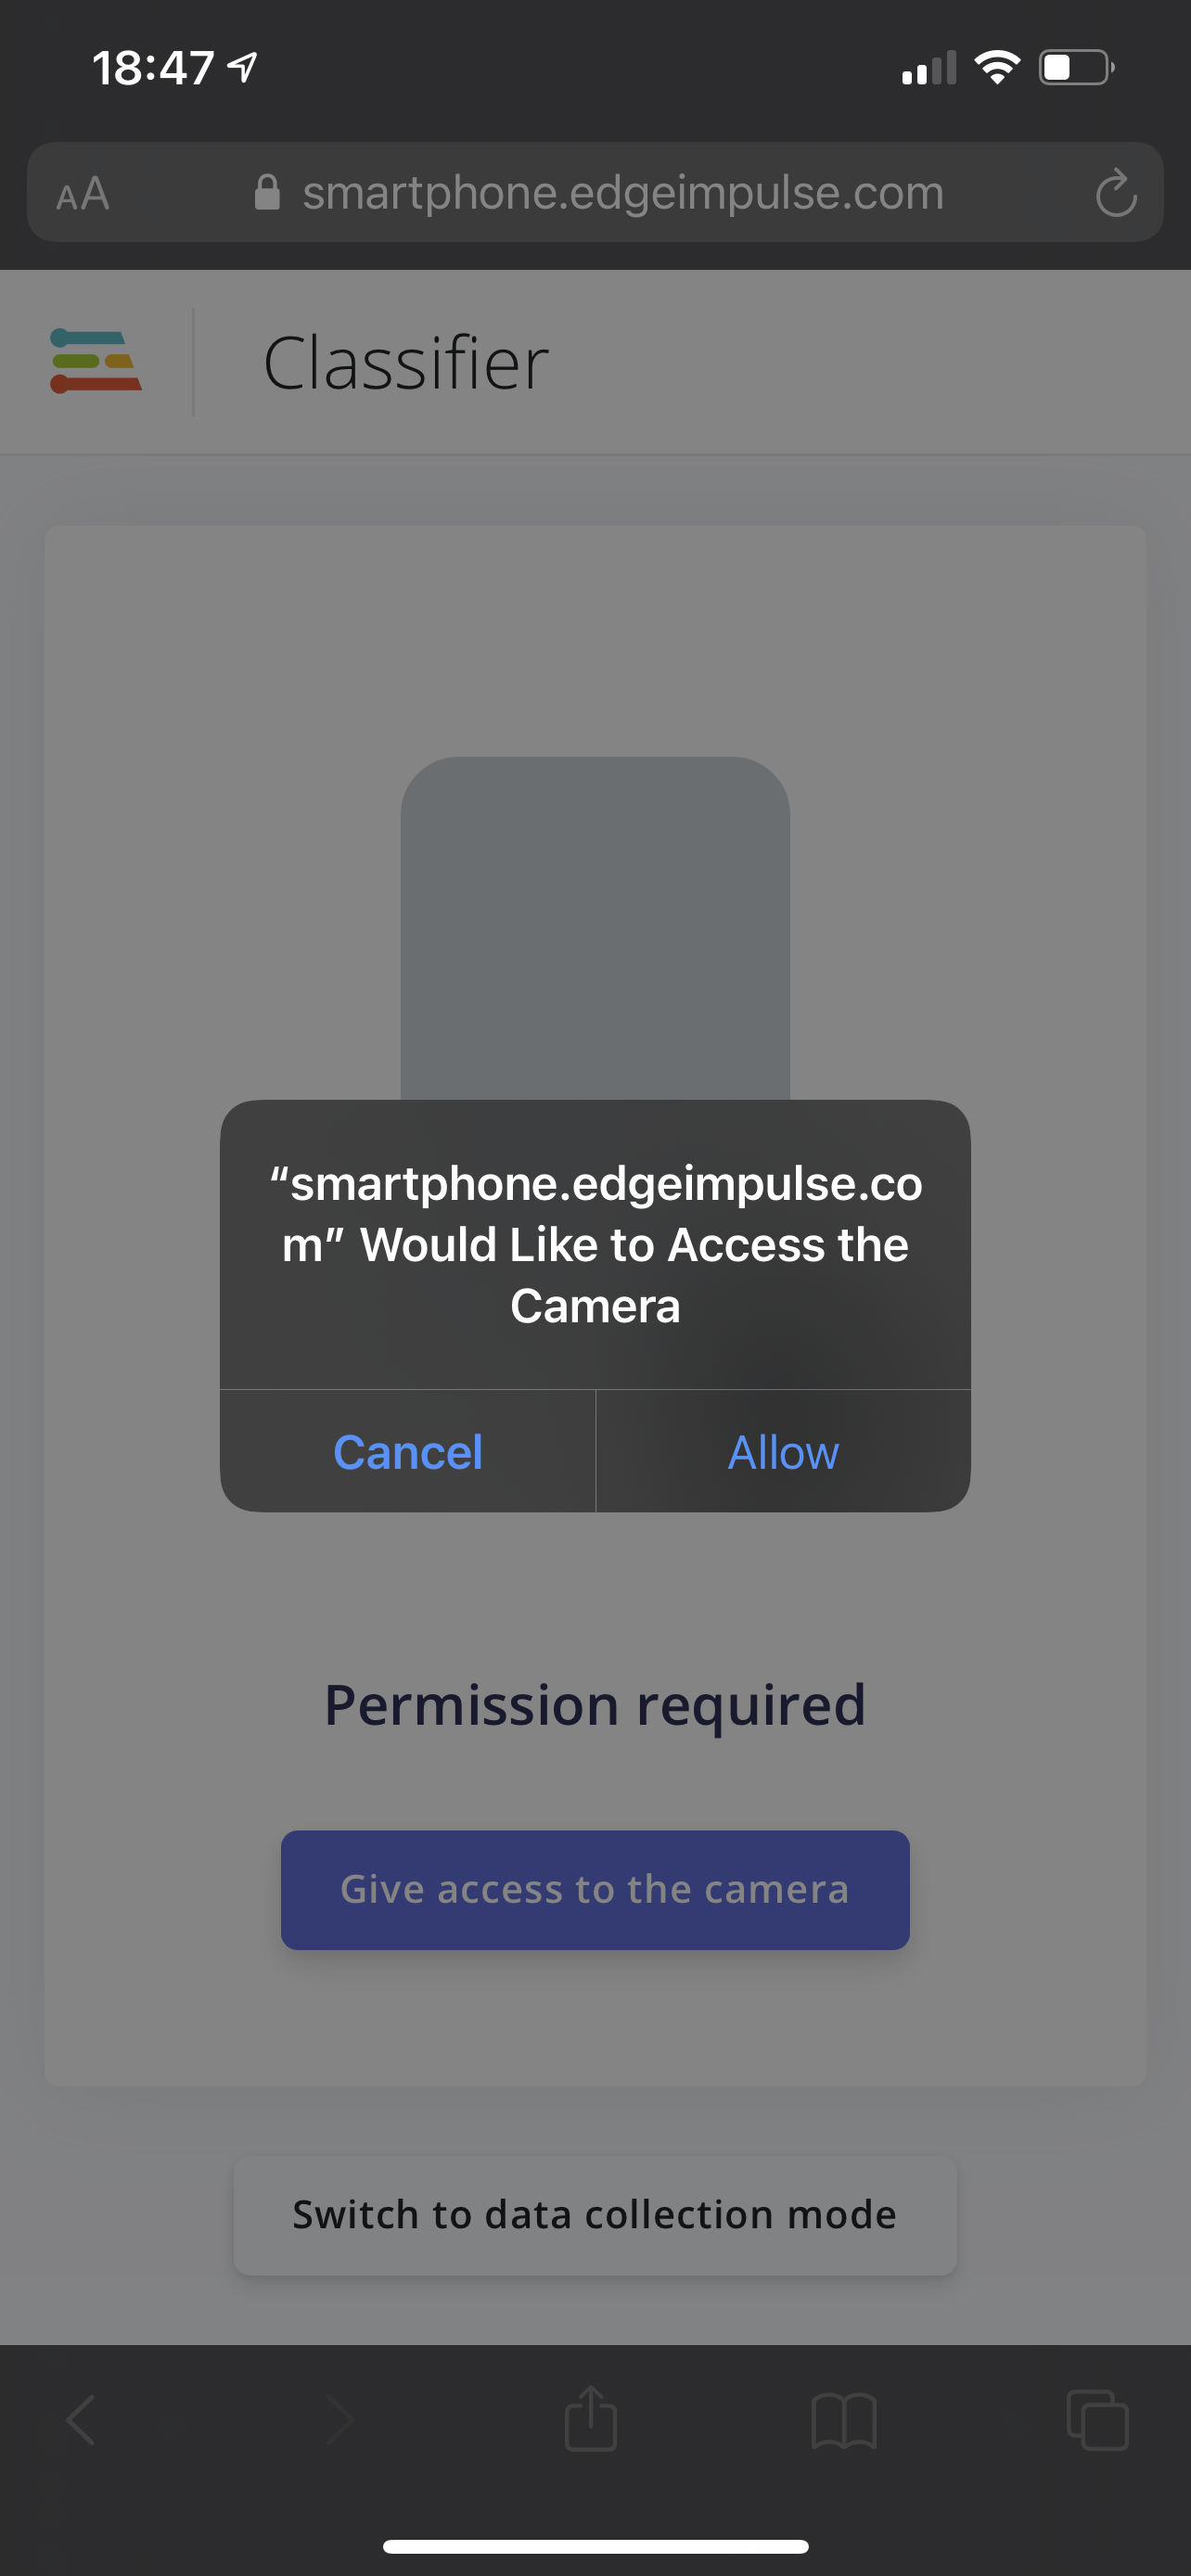
- Once you have scanned the QR code, your phone’s web browser will appear loading the the “Data collection” web application. Now start taking new images with the labels “person” and “non_person”, click the Collecting images? button and wait for the Data collection application to load, and give access to the camera:
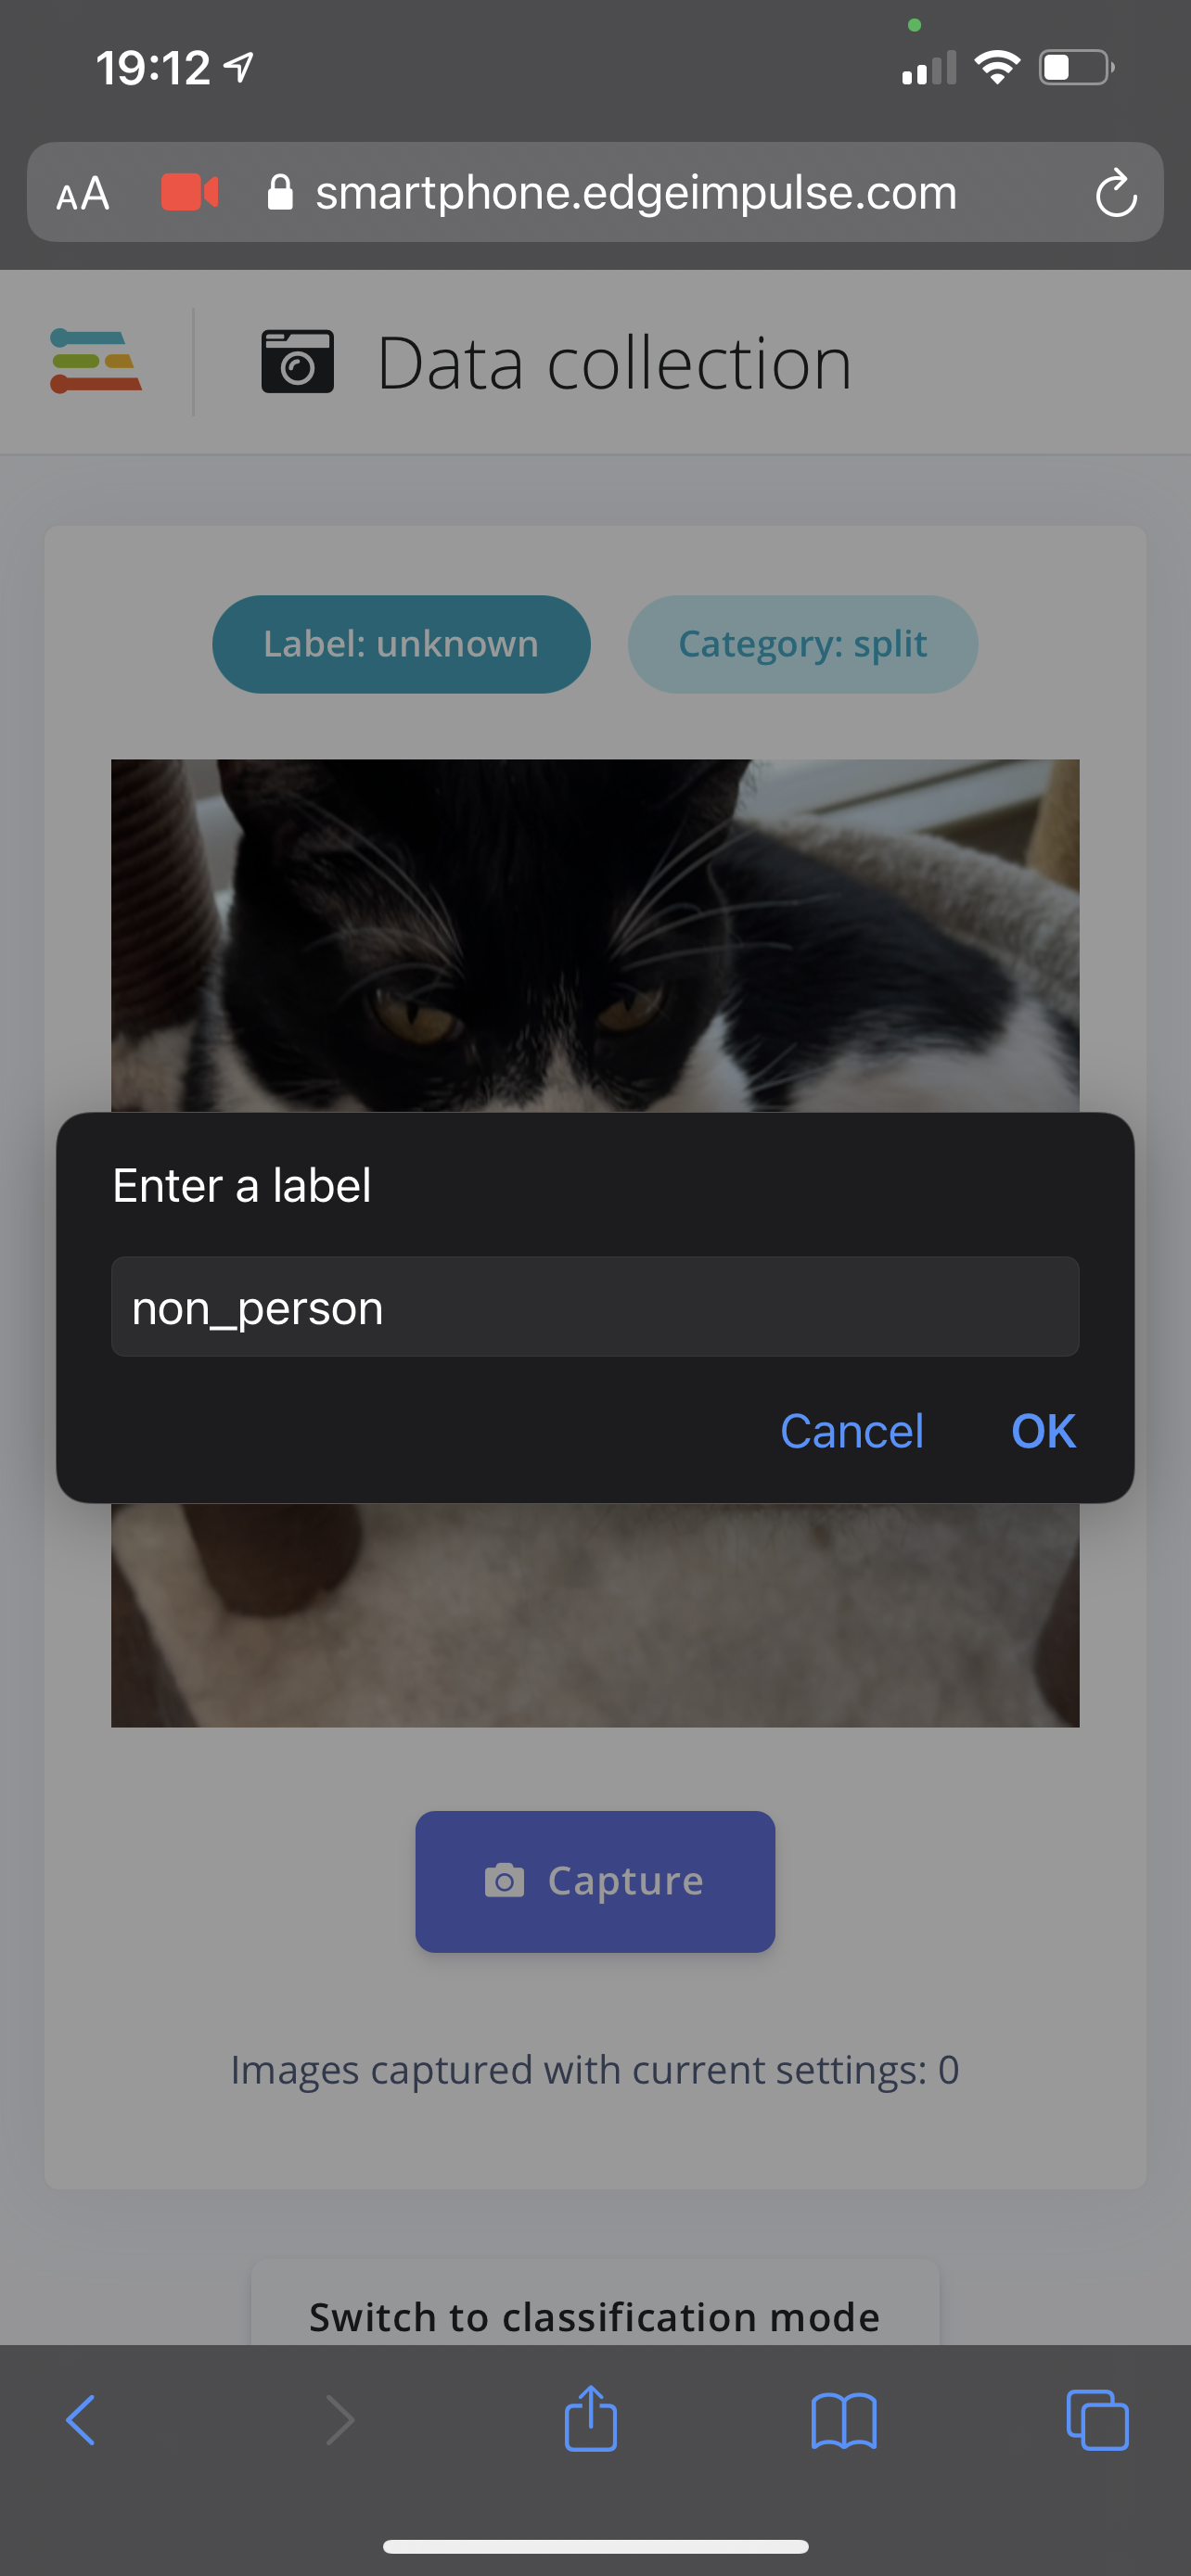
- Click on the Label: unknown button to change the label to “person” or “non_person” depending on the image that are you are taking, this will automatically upload your new images to your Edge Impulse person detection project:
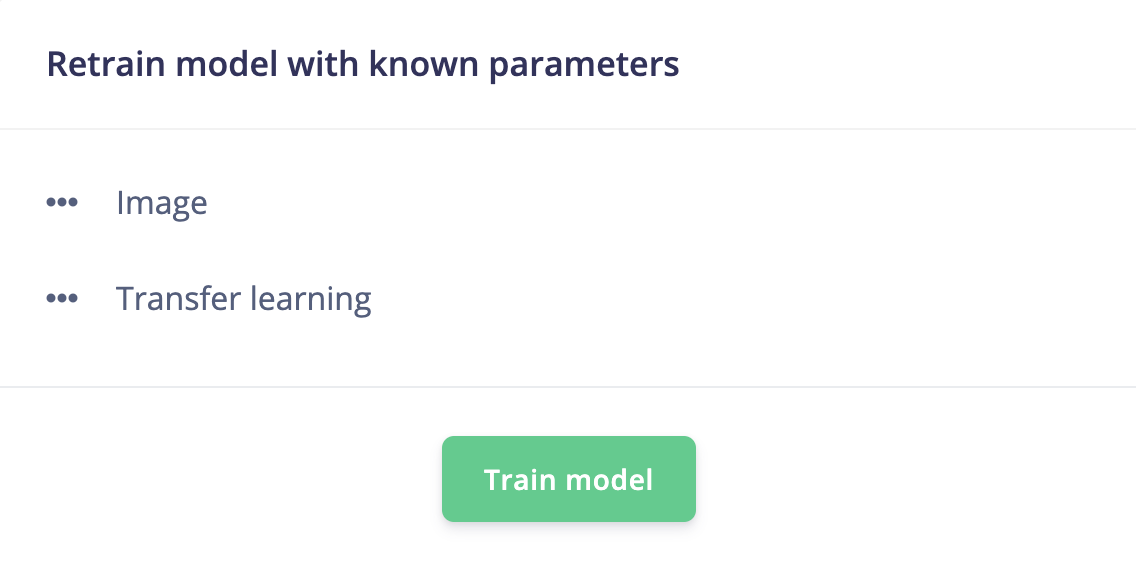
- Open up your Edge Impulse project on your computer, since the model has already been trained before, and all we have done is added new data, click on the “Retrain model” tab, then click on the green Train model button.

- Now wait for your project to finish building and training.
- To deploy your newly trained model onto your phone, select the “Devices” tab again and click the Connect a new device button:
- From the “Collect data” pop-up box, click on the Show QR code button next to “Use your mobile phone”:
- Grab your phone, open up the Camera app and scan the QR code that was generated for you by pointing your camera at your computer screen. An example of the QR code is shown below (this QR code is blurred out and unusable):
- Once you have scanned the QR code, your phone’s web browser will appear loading the the “Data collection” web application. At the bottom of the page, click on the Switch to classification mode button:
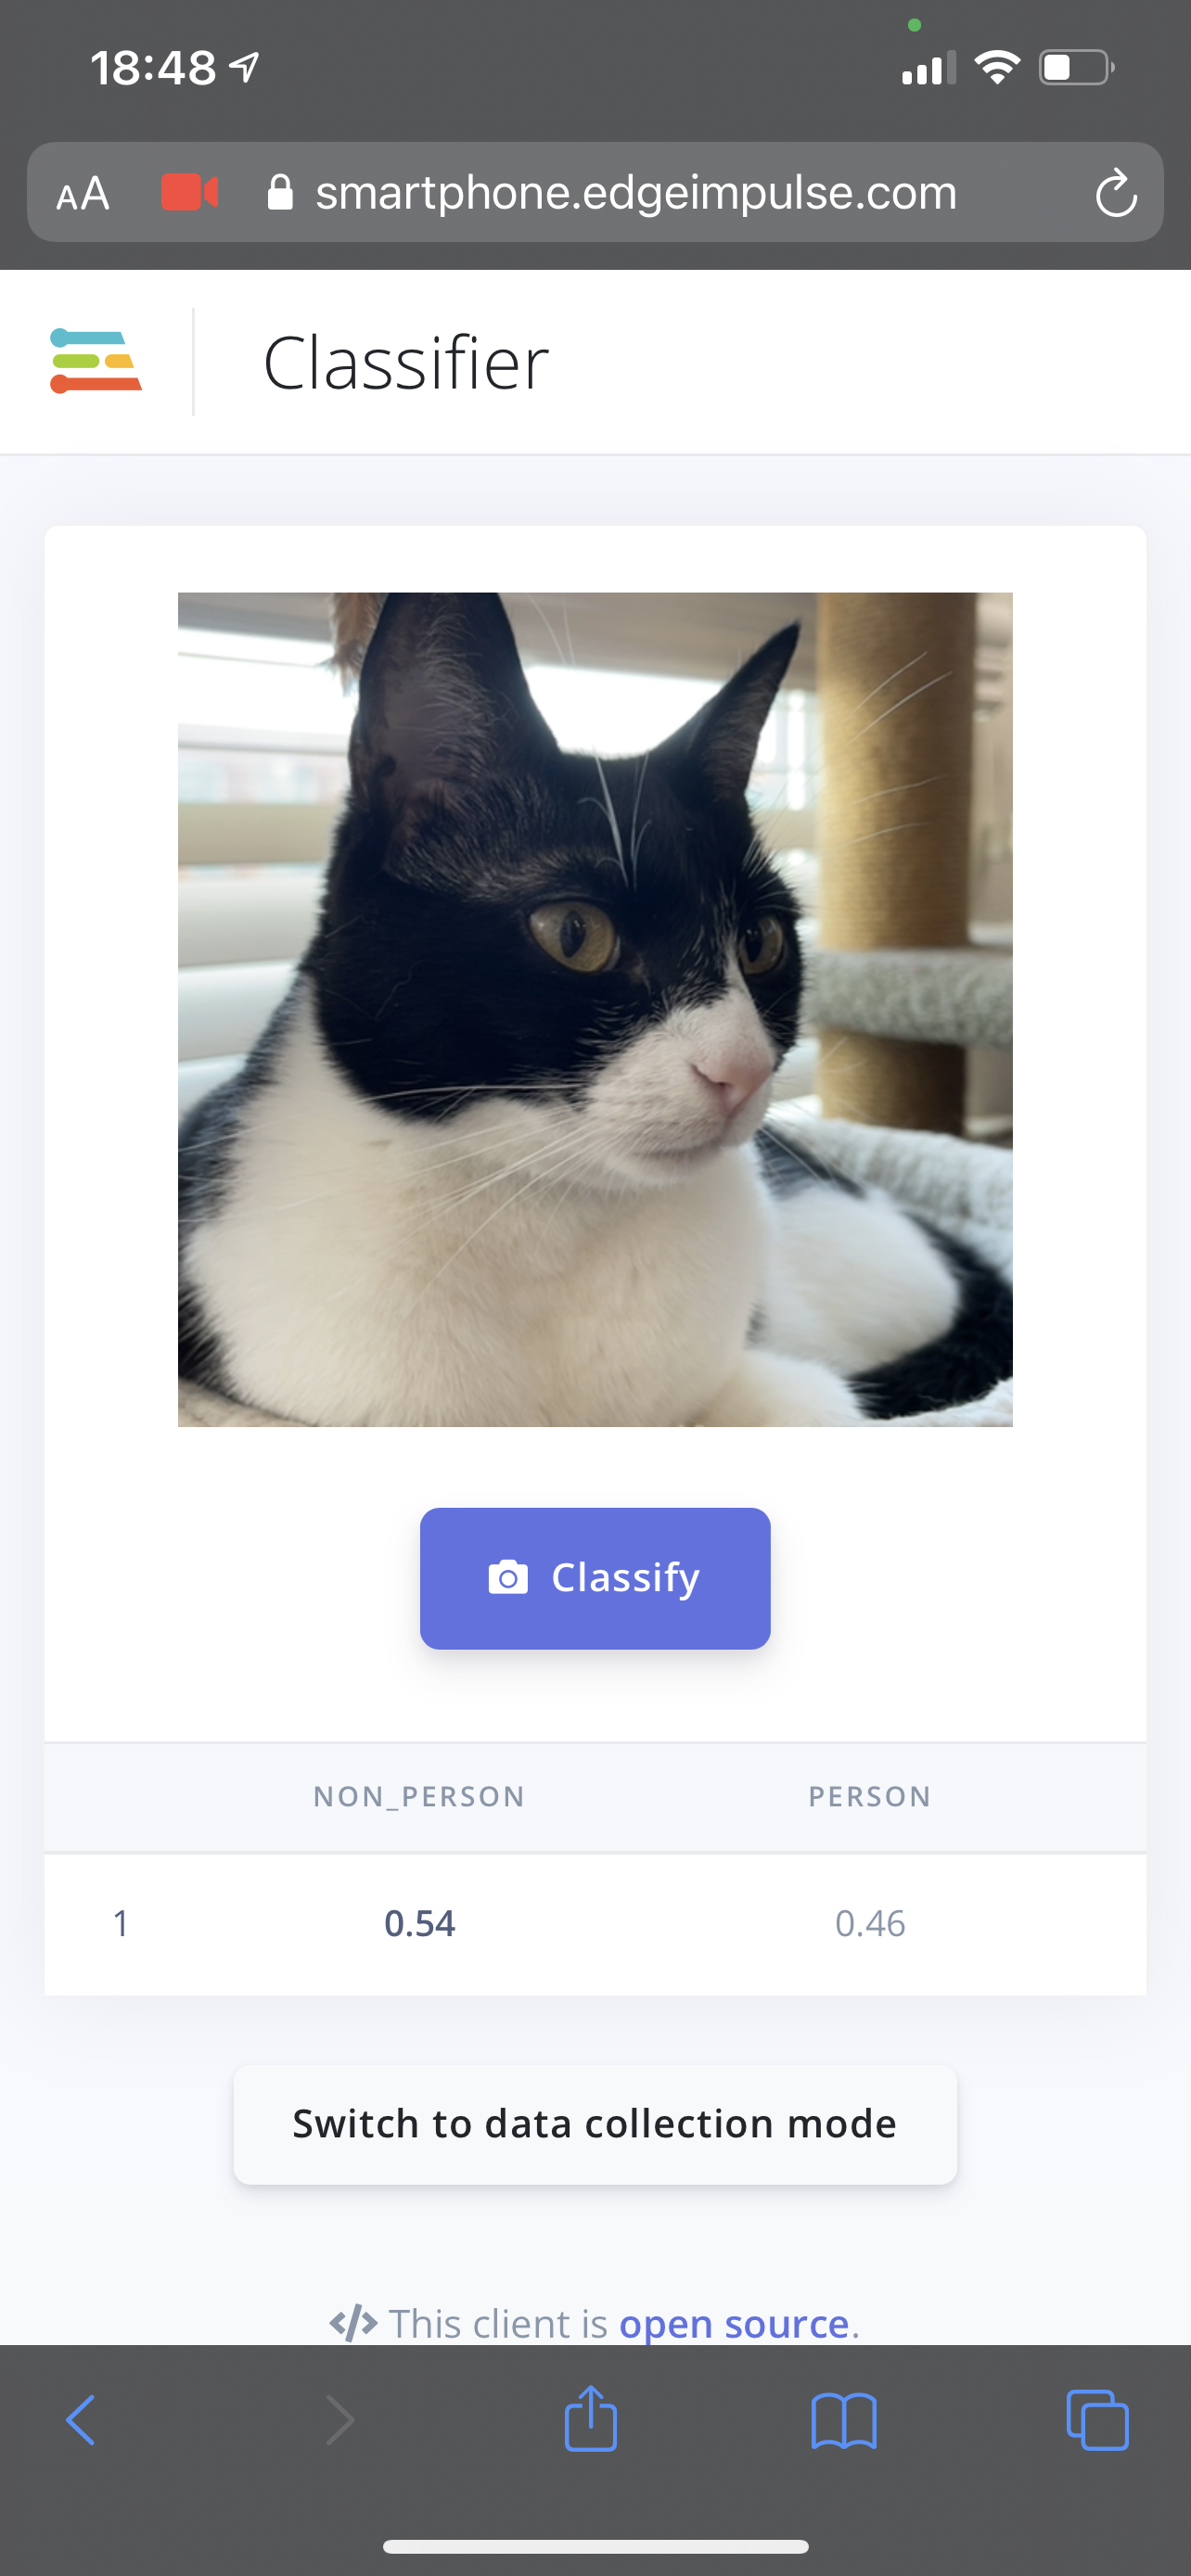
- Once the project has finished building, click the Give access to the camera button, then click Allow:
- Now see your custom person detection image classifier in action!
Troubleshooting (Image Classification)
Phone: Not connected

This error sometimes occurs when you leave your web browser app for a different app on your phone. Try refreshing your browser page, if that doesn't reconnect you, follow the Deploy a Custom Image Classification Model steps above to reconnect your phone to the Keyword Spotting classifer application.
Phone: Failed to load
This error occurs when you don't give the web browser access to your camera. Refresh your browser page and allow camera access (steps above: Deploy a Custom Image Classification Model).
(Bonus for you to try at home) Creating Your Own Crowdsourced Dataset
The below instructions have been superseeded by this wonderful new post from Jenny!
The following instructions are based on this document where you can find content.
If you would like to use the power of the crowd to create you own dataset you’ll need to do the following three steps:
-
First get your own API key. You’ll find under Edge Impulse Project Dashboard > Keys > Add new API key.
-
Then construct the following URL: https://smartphone.edgeimpulse.com/keyword.html?apiKey=[ei_XXX]&sampleLength=[30000]&keyword=[microbit]&frequency=[11000]
Where you replace:
- [ei_XXX] with your API key.
- [30000] with the desired length that people need to record for in milliseconds (here 30000 = 30 seconds).
- [microbit] with the keyword people should say.
- [frequency] the audio frequency. (If you don’t know the frequency of your hardware leave it as 11KHz aka 11000).
- Share the link through a QR code which you can generate at this link! NOTE: People will have access to your full project through this API key. Revoke the API key after your presentation!!